Create and Deploy an AI Agent
Connect your AI agent to a channel by selecting a unit group and choosing the messaging platform.
Open AI Configuration
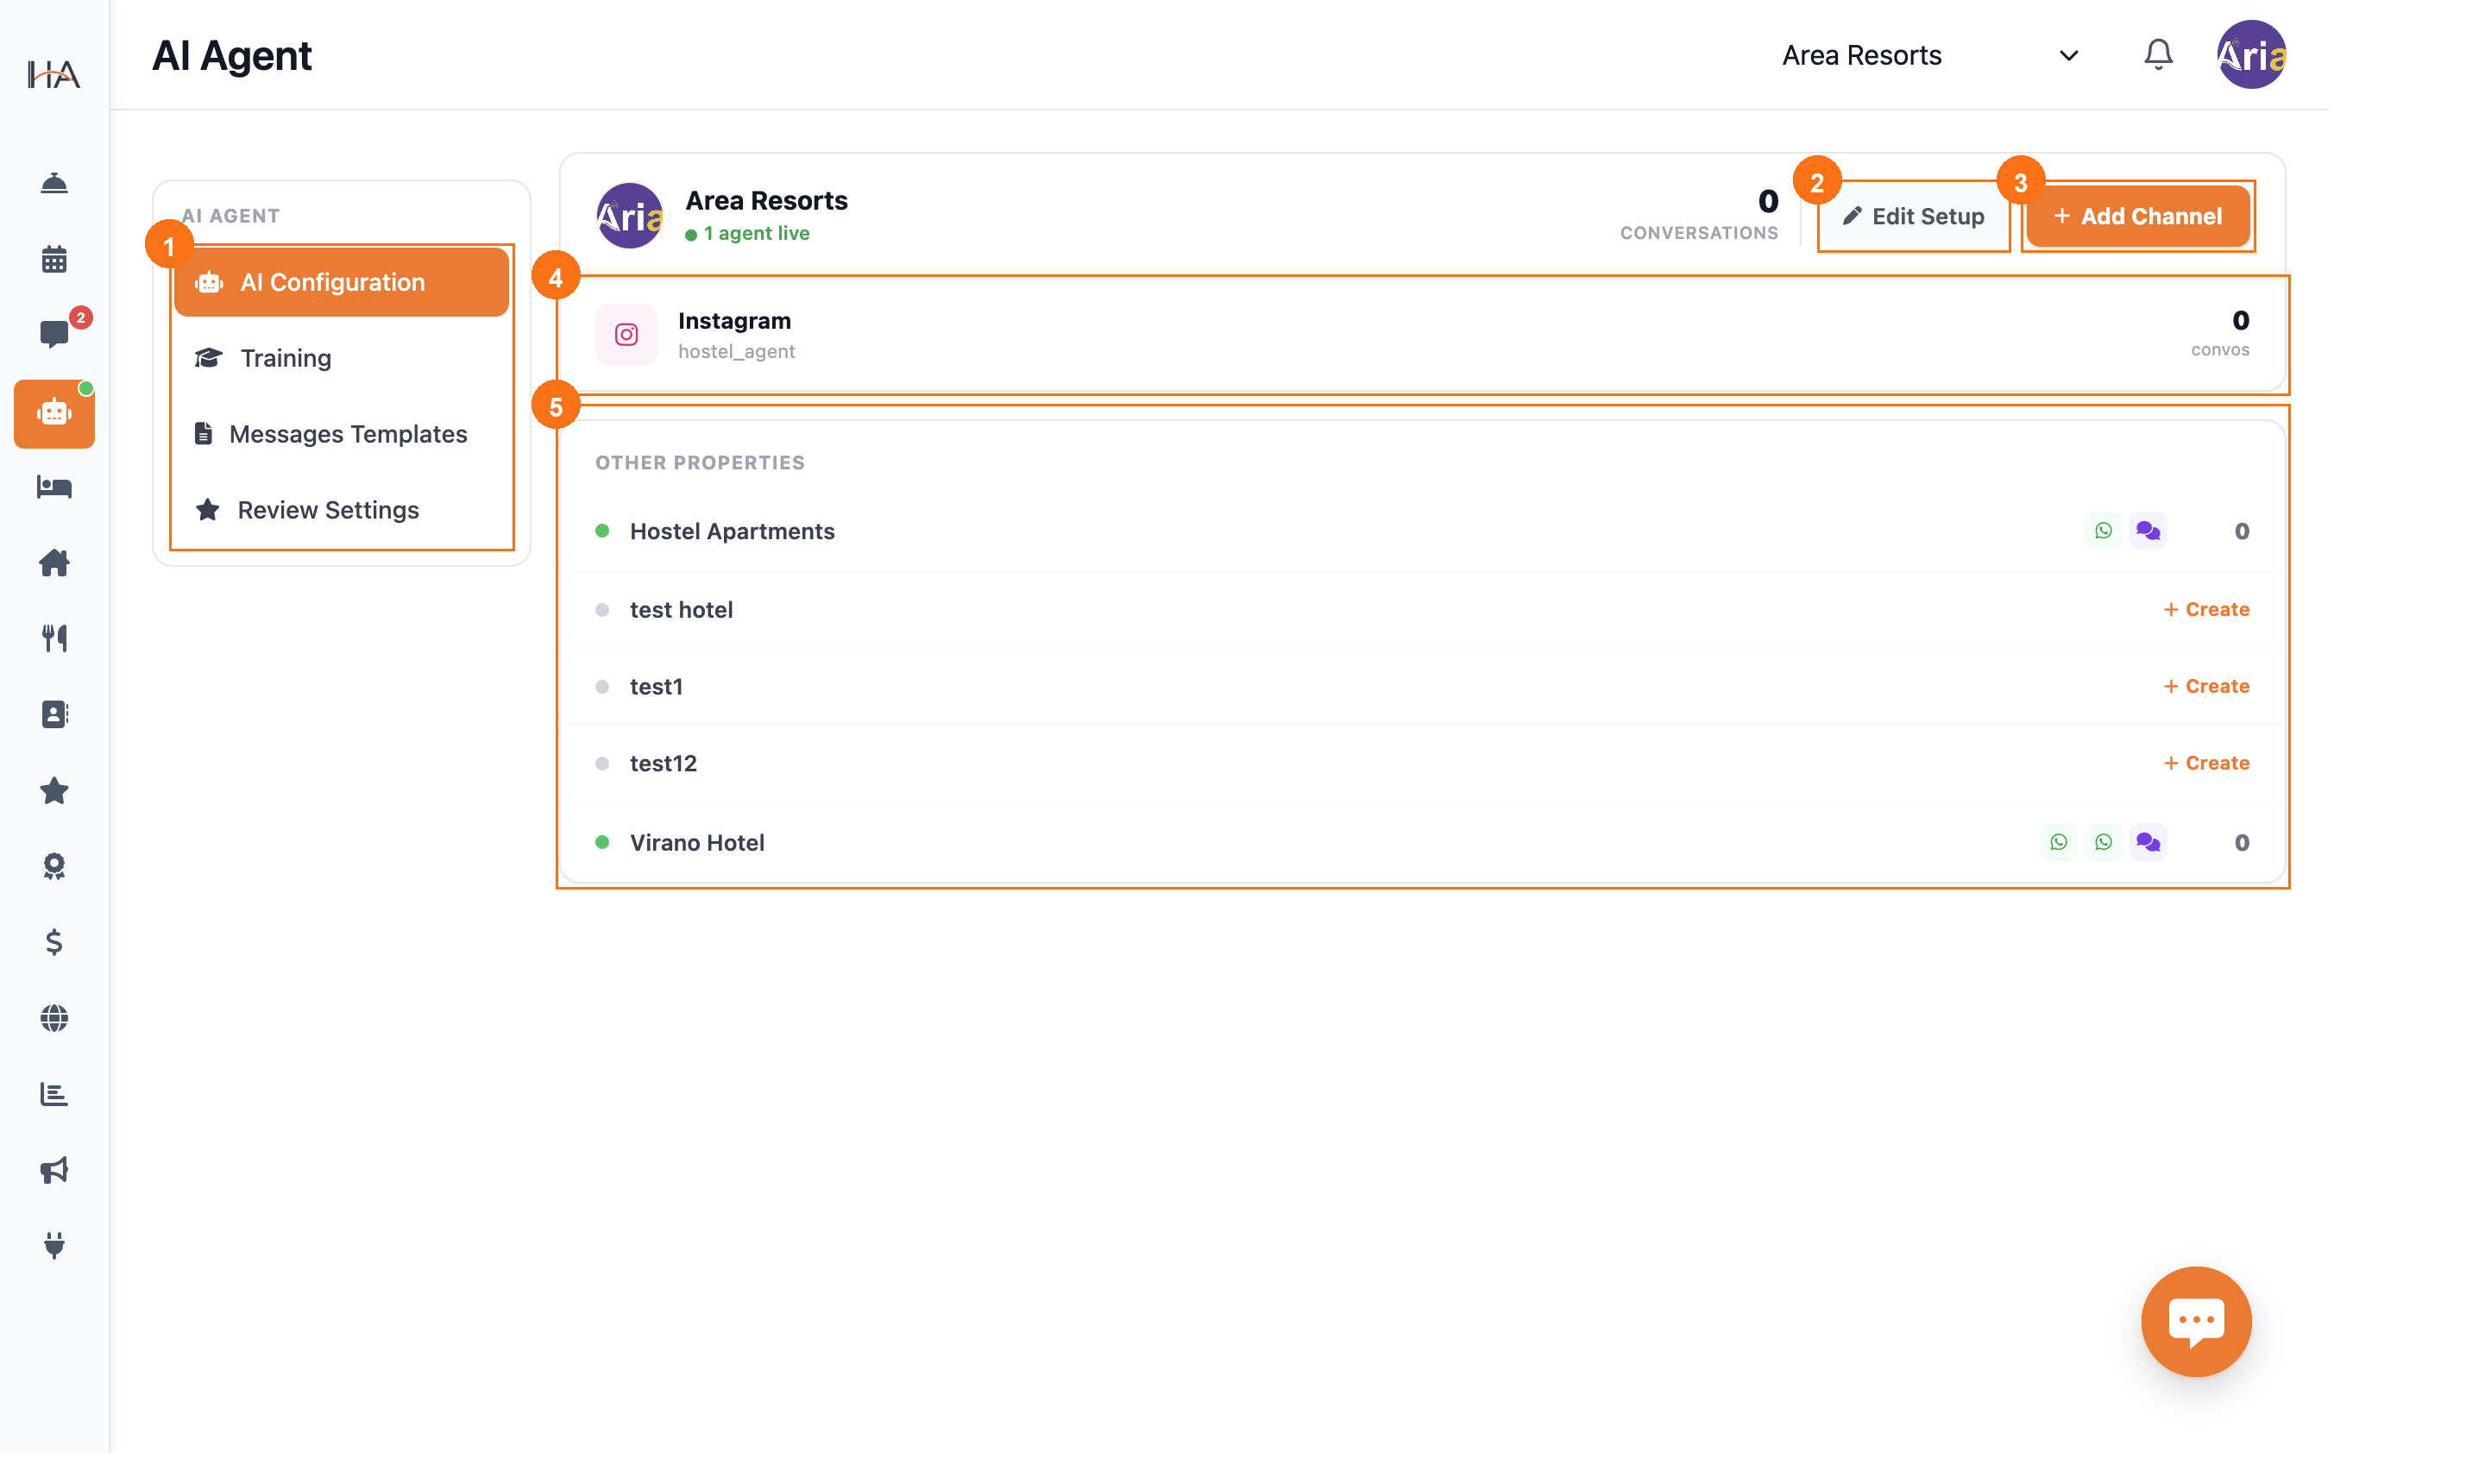
Navigate to AI Agent in the left sidebar. The default view is the AI Configuration tab: ① The four tabs in the left panel — AI Configuration is selected by default ② Property card — shows the property name, active agents count, and total conversations ③ Edit Setup — opens Training tab to configure the agent's responses and personality ④ + Add Channel — click this to deploy an agent on a new channel ⑤ Other Properties — lists other unit groups; click + Add Channel there to deploy an agent for a different property
Create a New AI Agent
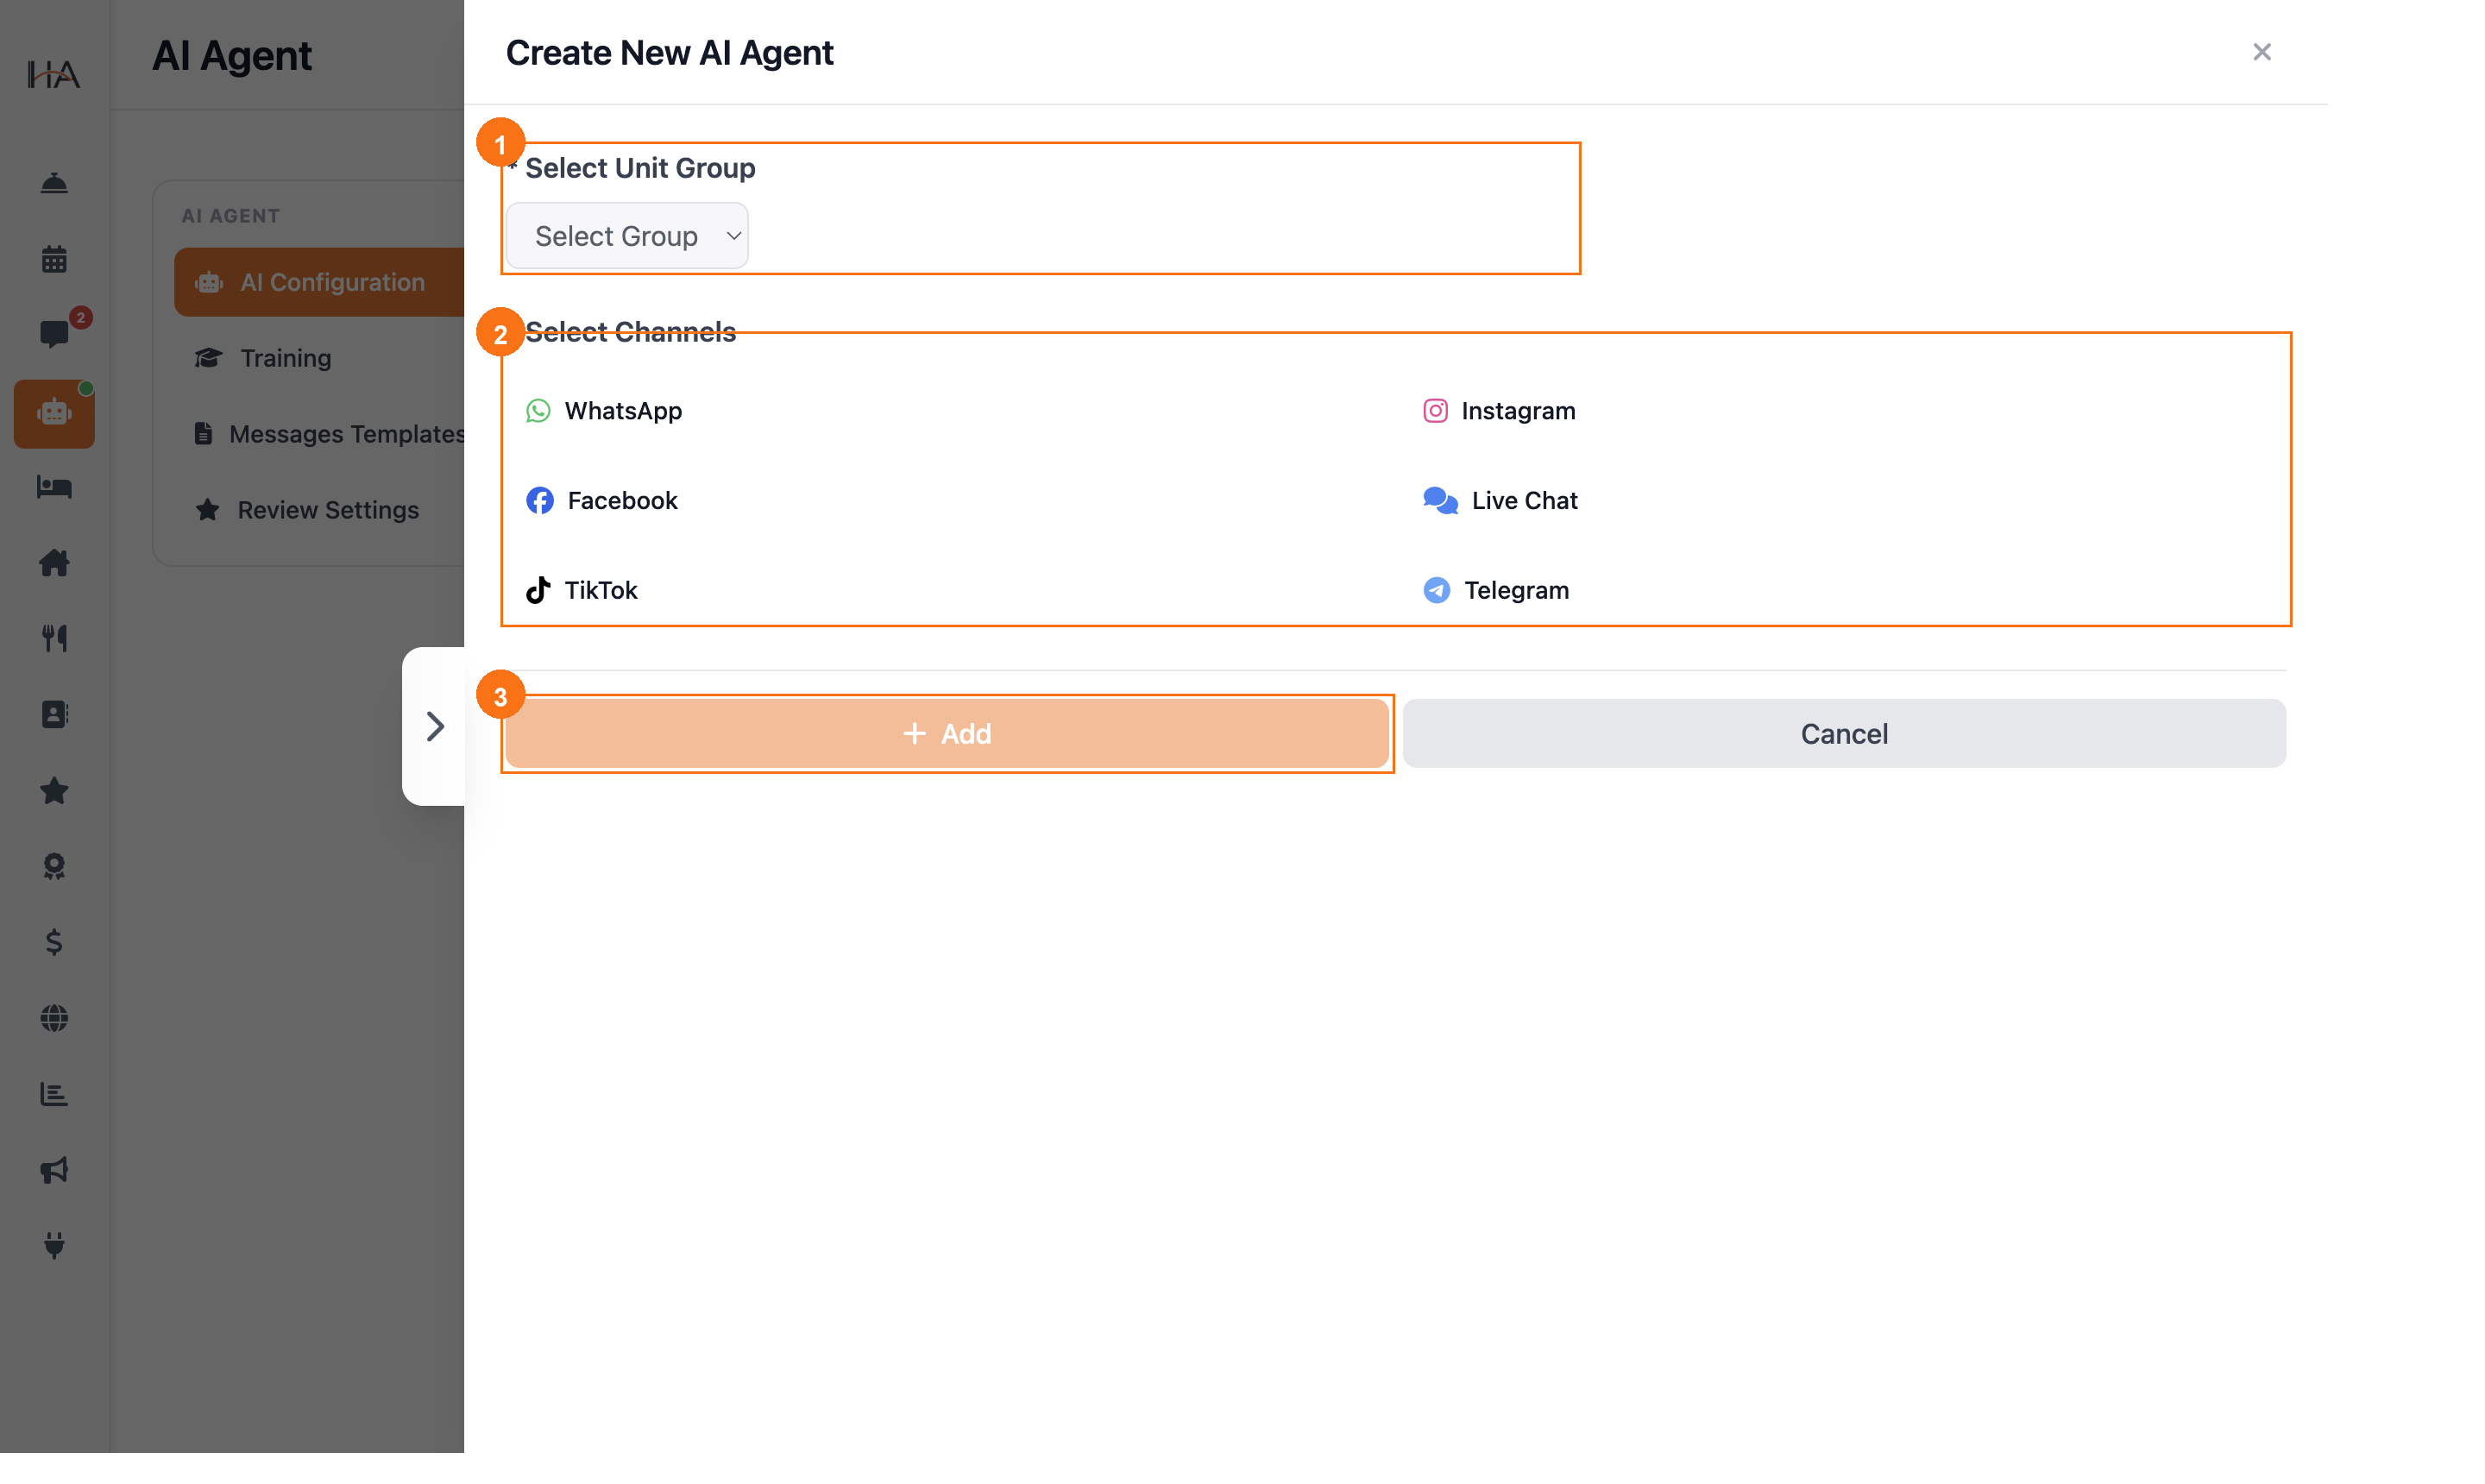
Clicking + Add Channel opens the "Create New AI Agent" panel with two required fields: ① Select Unit Group — choose which property this agent will manage bookings for (e.g., Area Resorts, Hostel Apartments) ② Select Channels — toggle one or more platforms: WhatsApp, Instagram, Facebook, Live Chat, TikTok, or Telegram ③ + Add button — submits the form and activates the agent on the selected channels Once created, your agent is immediately live and ready to receive messages on the selected platform.
More in AI Agent
Understanding the AI Agent
Learn how the AI booking and reservation agent works — the AI hotel assistant that answers guests and takes bookings — and explore the four main tabs in the AI Agent section.
Configure AI Agent Settings
Customize the agent's welcome message, speaking tone, AI instructions, and follow-up reminders from the Training tab.
Message Templates & Review Settings
Customize the WhatsApp notification templates sent to guests and configure automated review collection after checkout.