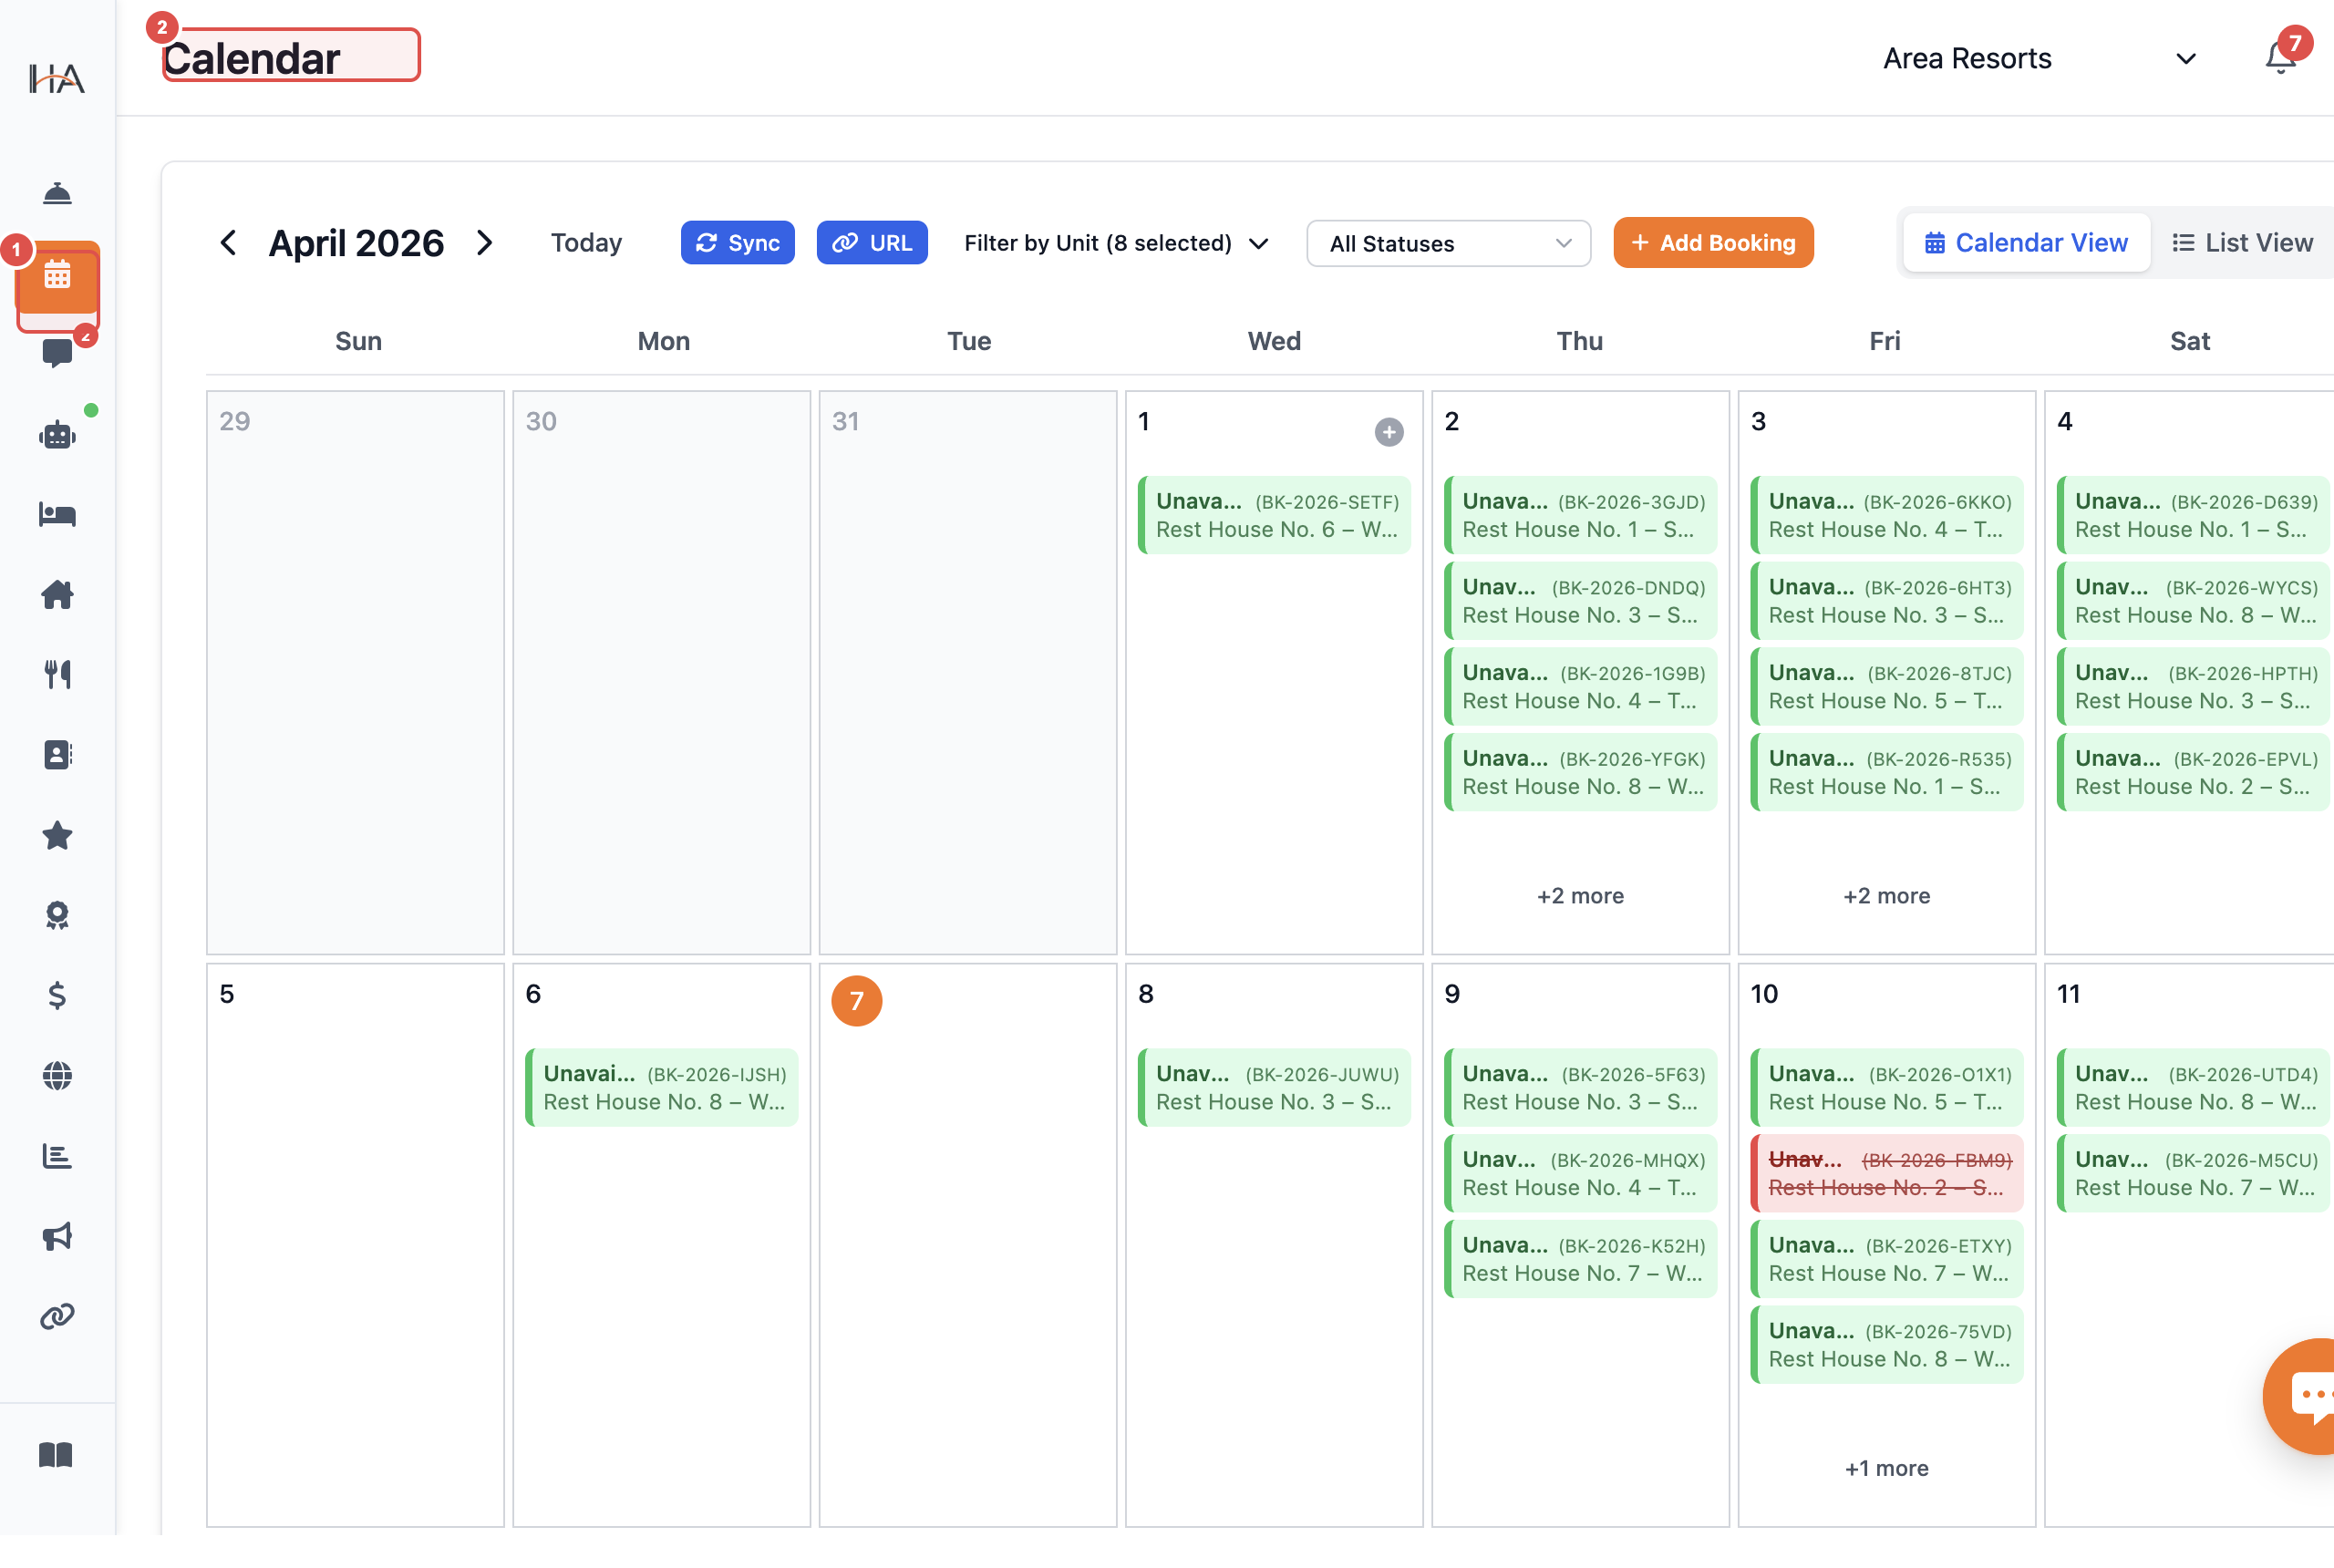
Understanding the Calendar View
Learn how to navigate the calendar, understand booking statuses, filter by units, and interpret the visual indicators.
Access the Calendar
1. Log in to your Hostel Agent dashboard 2. Click on 'Calendar & Bookings' in the left sidebar (calendar icon) 3. The calendar view loads by default showing the current month 4. You can see all your bookings displayed across the calendar dates
Understand Booking Status Colors
Bookings are color-coded by their status: - GREEN: Confirmed (paid, active booking) - YELLOW: In Progress (being processed, check-in happening) - BLUE: Pending (awaiting payment or approval) - RED: Cancelled (booking withdrawn by guest or host) - ORANGE: Temp Booked (hold placed, not yet confirmed) - AMBER: No Show (guest didn't arrive on check-in date) - PURPLE: Completed (stay finished, booking completed) - GRAY: Blocked (unit unavailable on these dates) Hover over any booking to see a tooltip with guest name, unit, and quick actions.

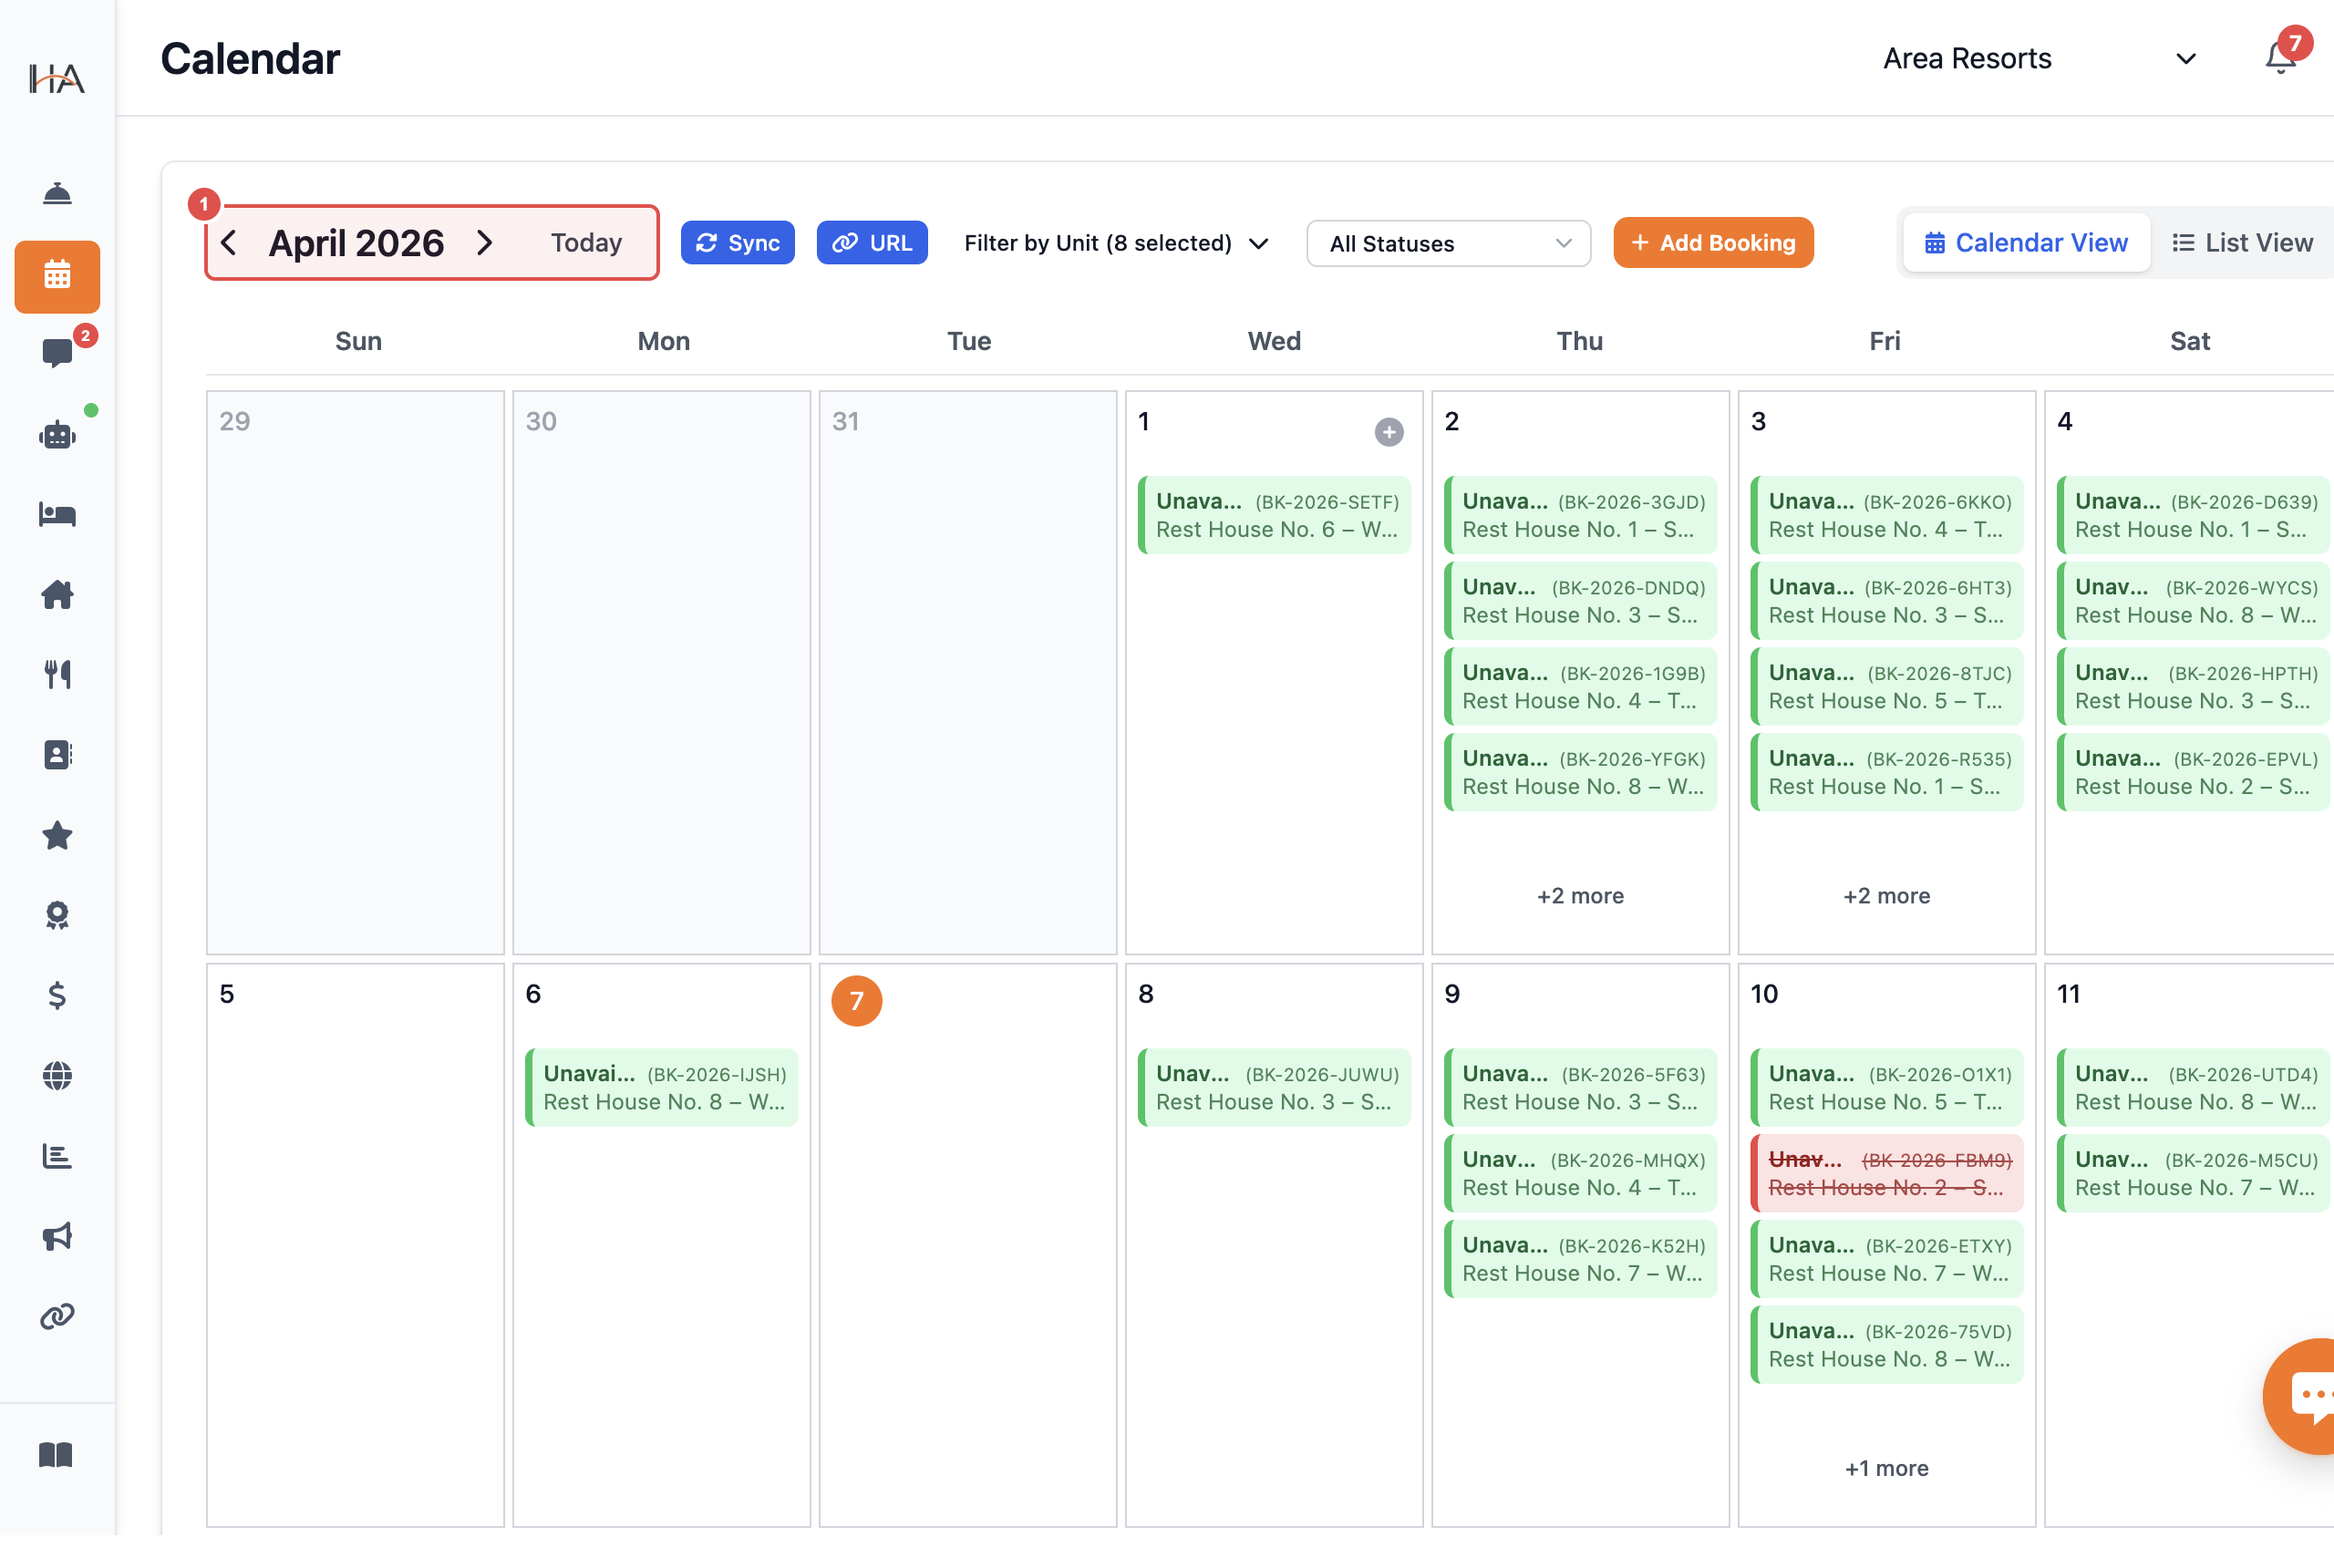
Navigate Between Months
1. Use the arrow buttons at the top of the calendar to move forward or backward 2. Click the month/year title to jump to a specific month quickly 3. The 'Today' button brings you back to the current date 4. Calendar view automatically loads bookings for the visible month 5. Previous/next month previews help you plan ahead
Filter by Units/Rooms
1. At the top of the calendar, you'll see unit selector buttons 2. Click unit names/numbers to toggle their visibility on or off 3. Selected units are highlighted; unselected are grayed out 4. Filter multiple units at once to compare occupancy 5. Your unit selection preference is saved for your next session 6. Use unit filtering to focus on specific rooms during high-occupancy periods

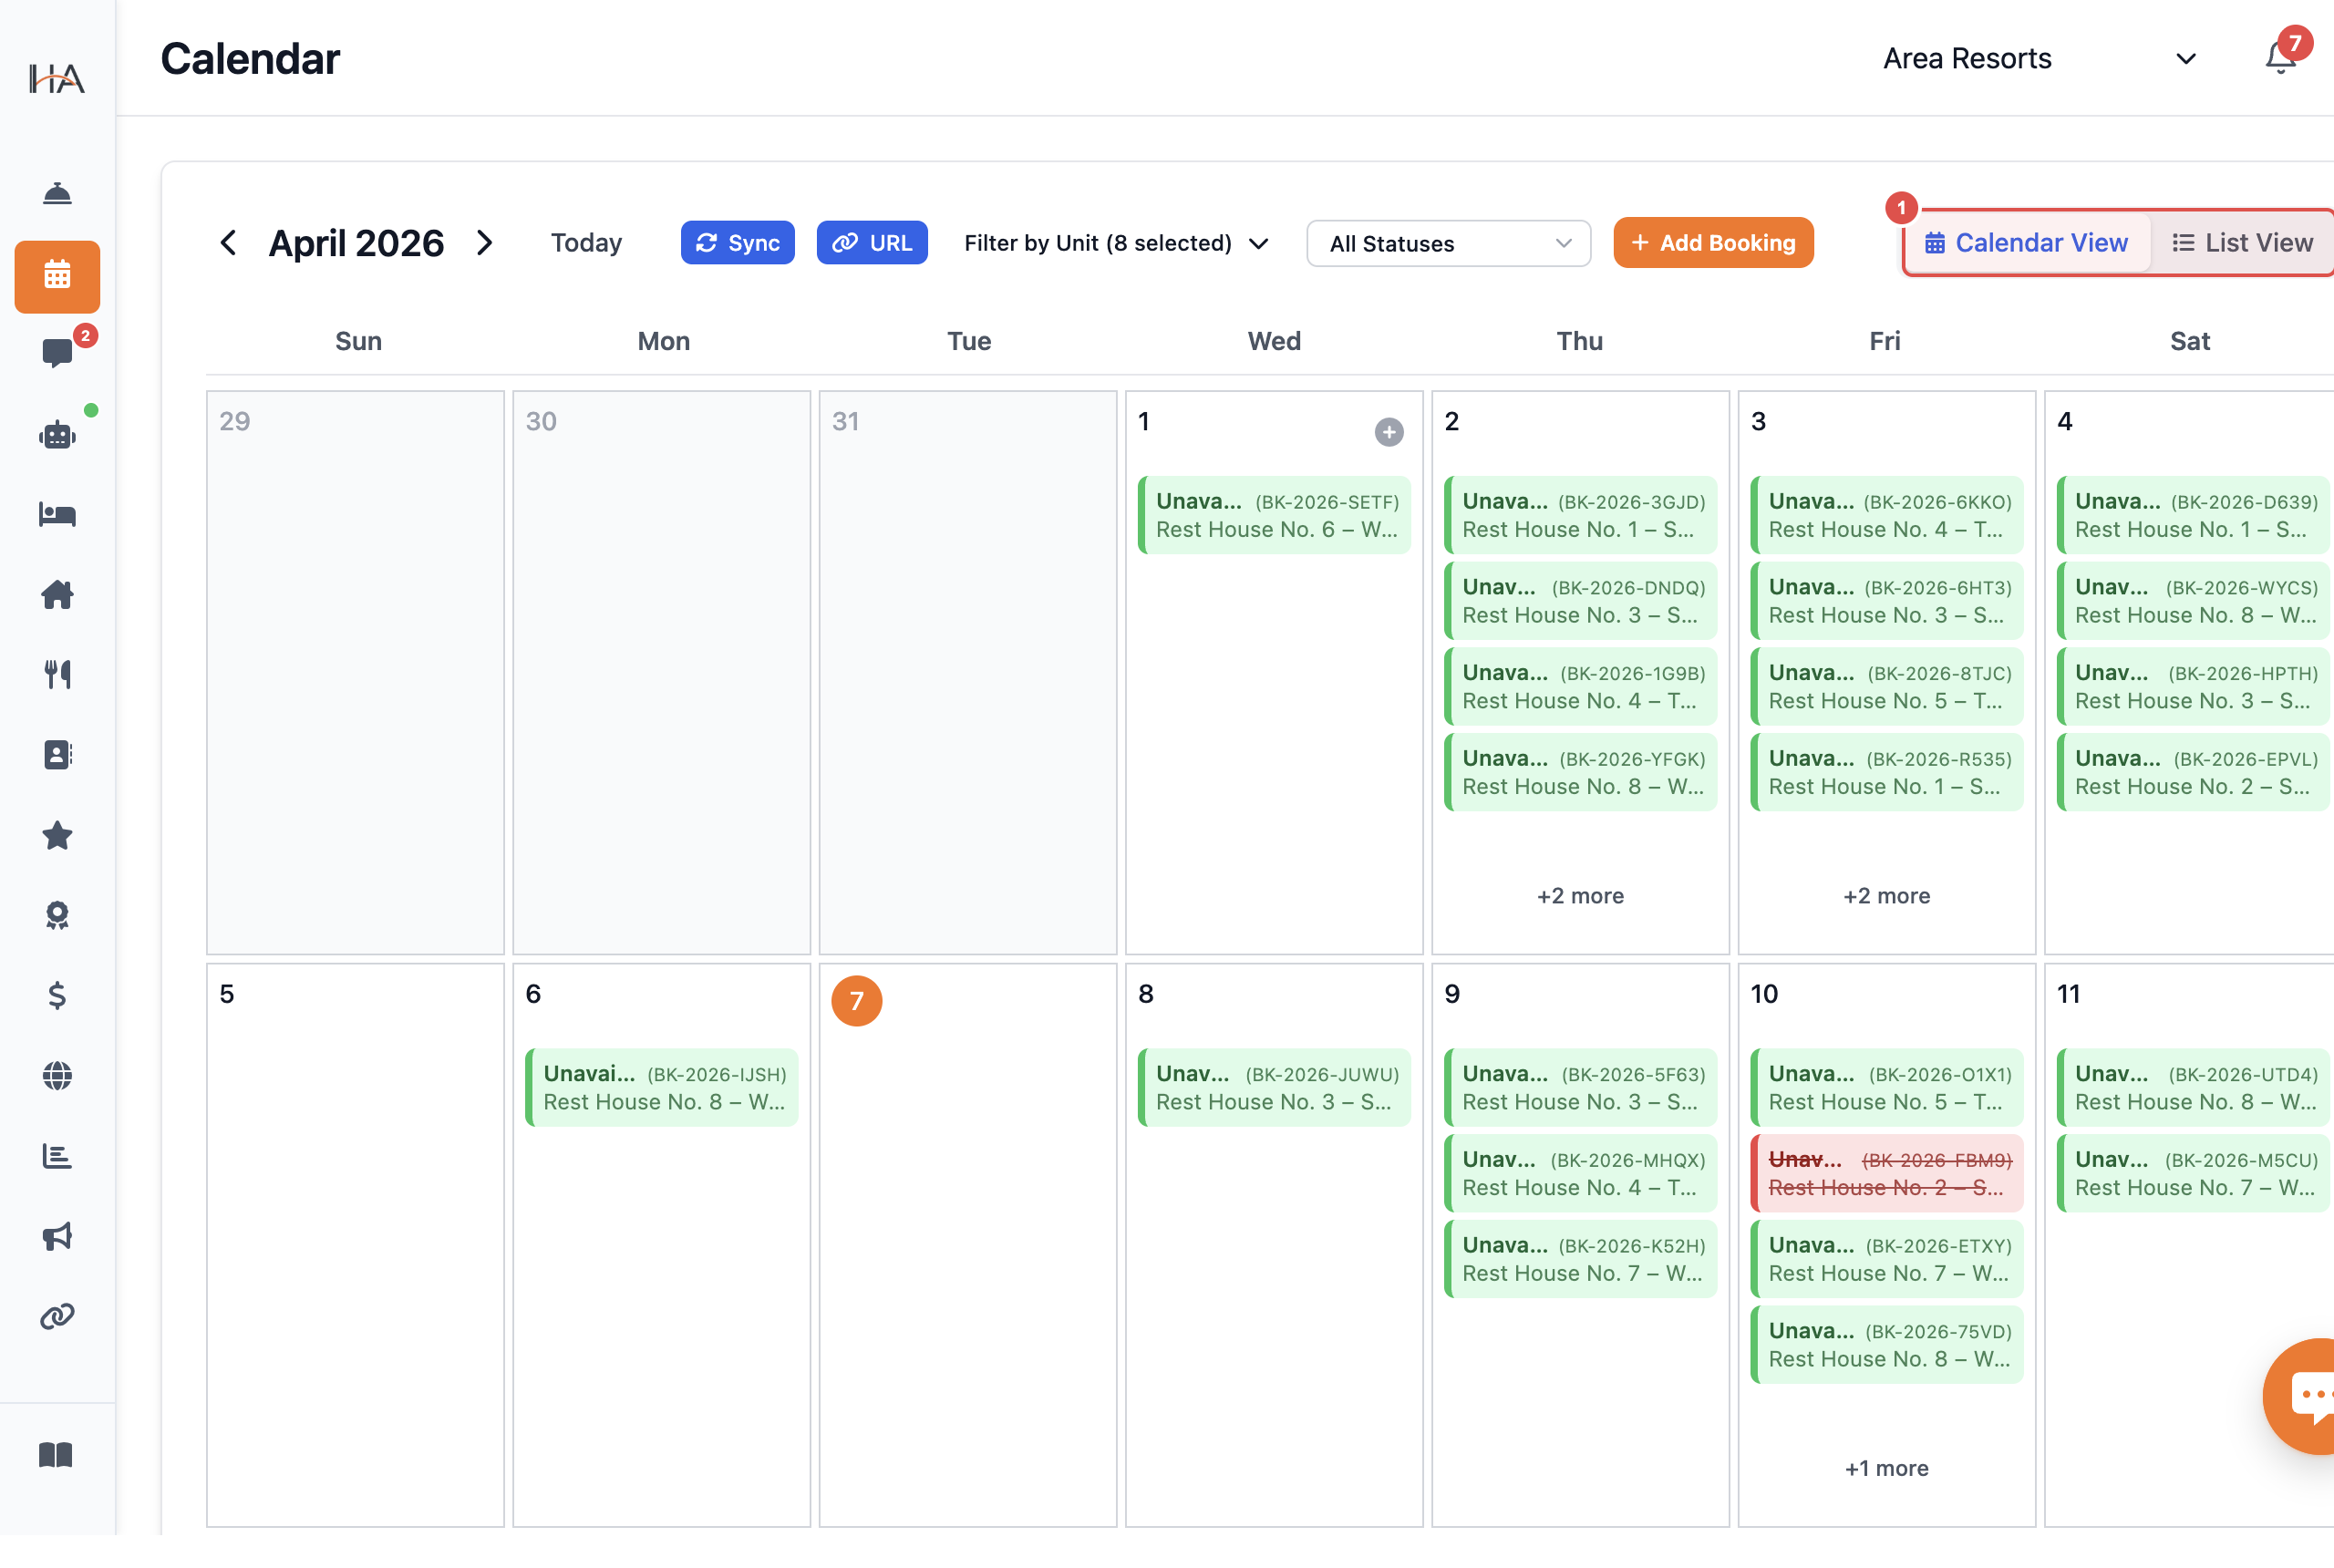
Switch to List View
1. At the top right, toggle between 'Calendar' and 'List' view modes 2. List view shows bookings in a table format with columns: - Booking ID - Guest Name - Unit/Room - Check-in & Check-out Dates - Number of Nights - Status - Payment Status - Amount 3. Click column headers to sort (ascending/descending) 4. Use column visibility toggle to show/hide specific columns 5. Search for bookings by guest name or booking ID 6. Filter by status and booking source in list view
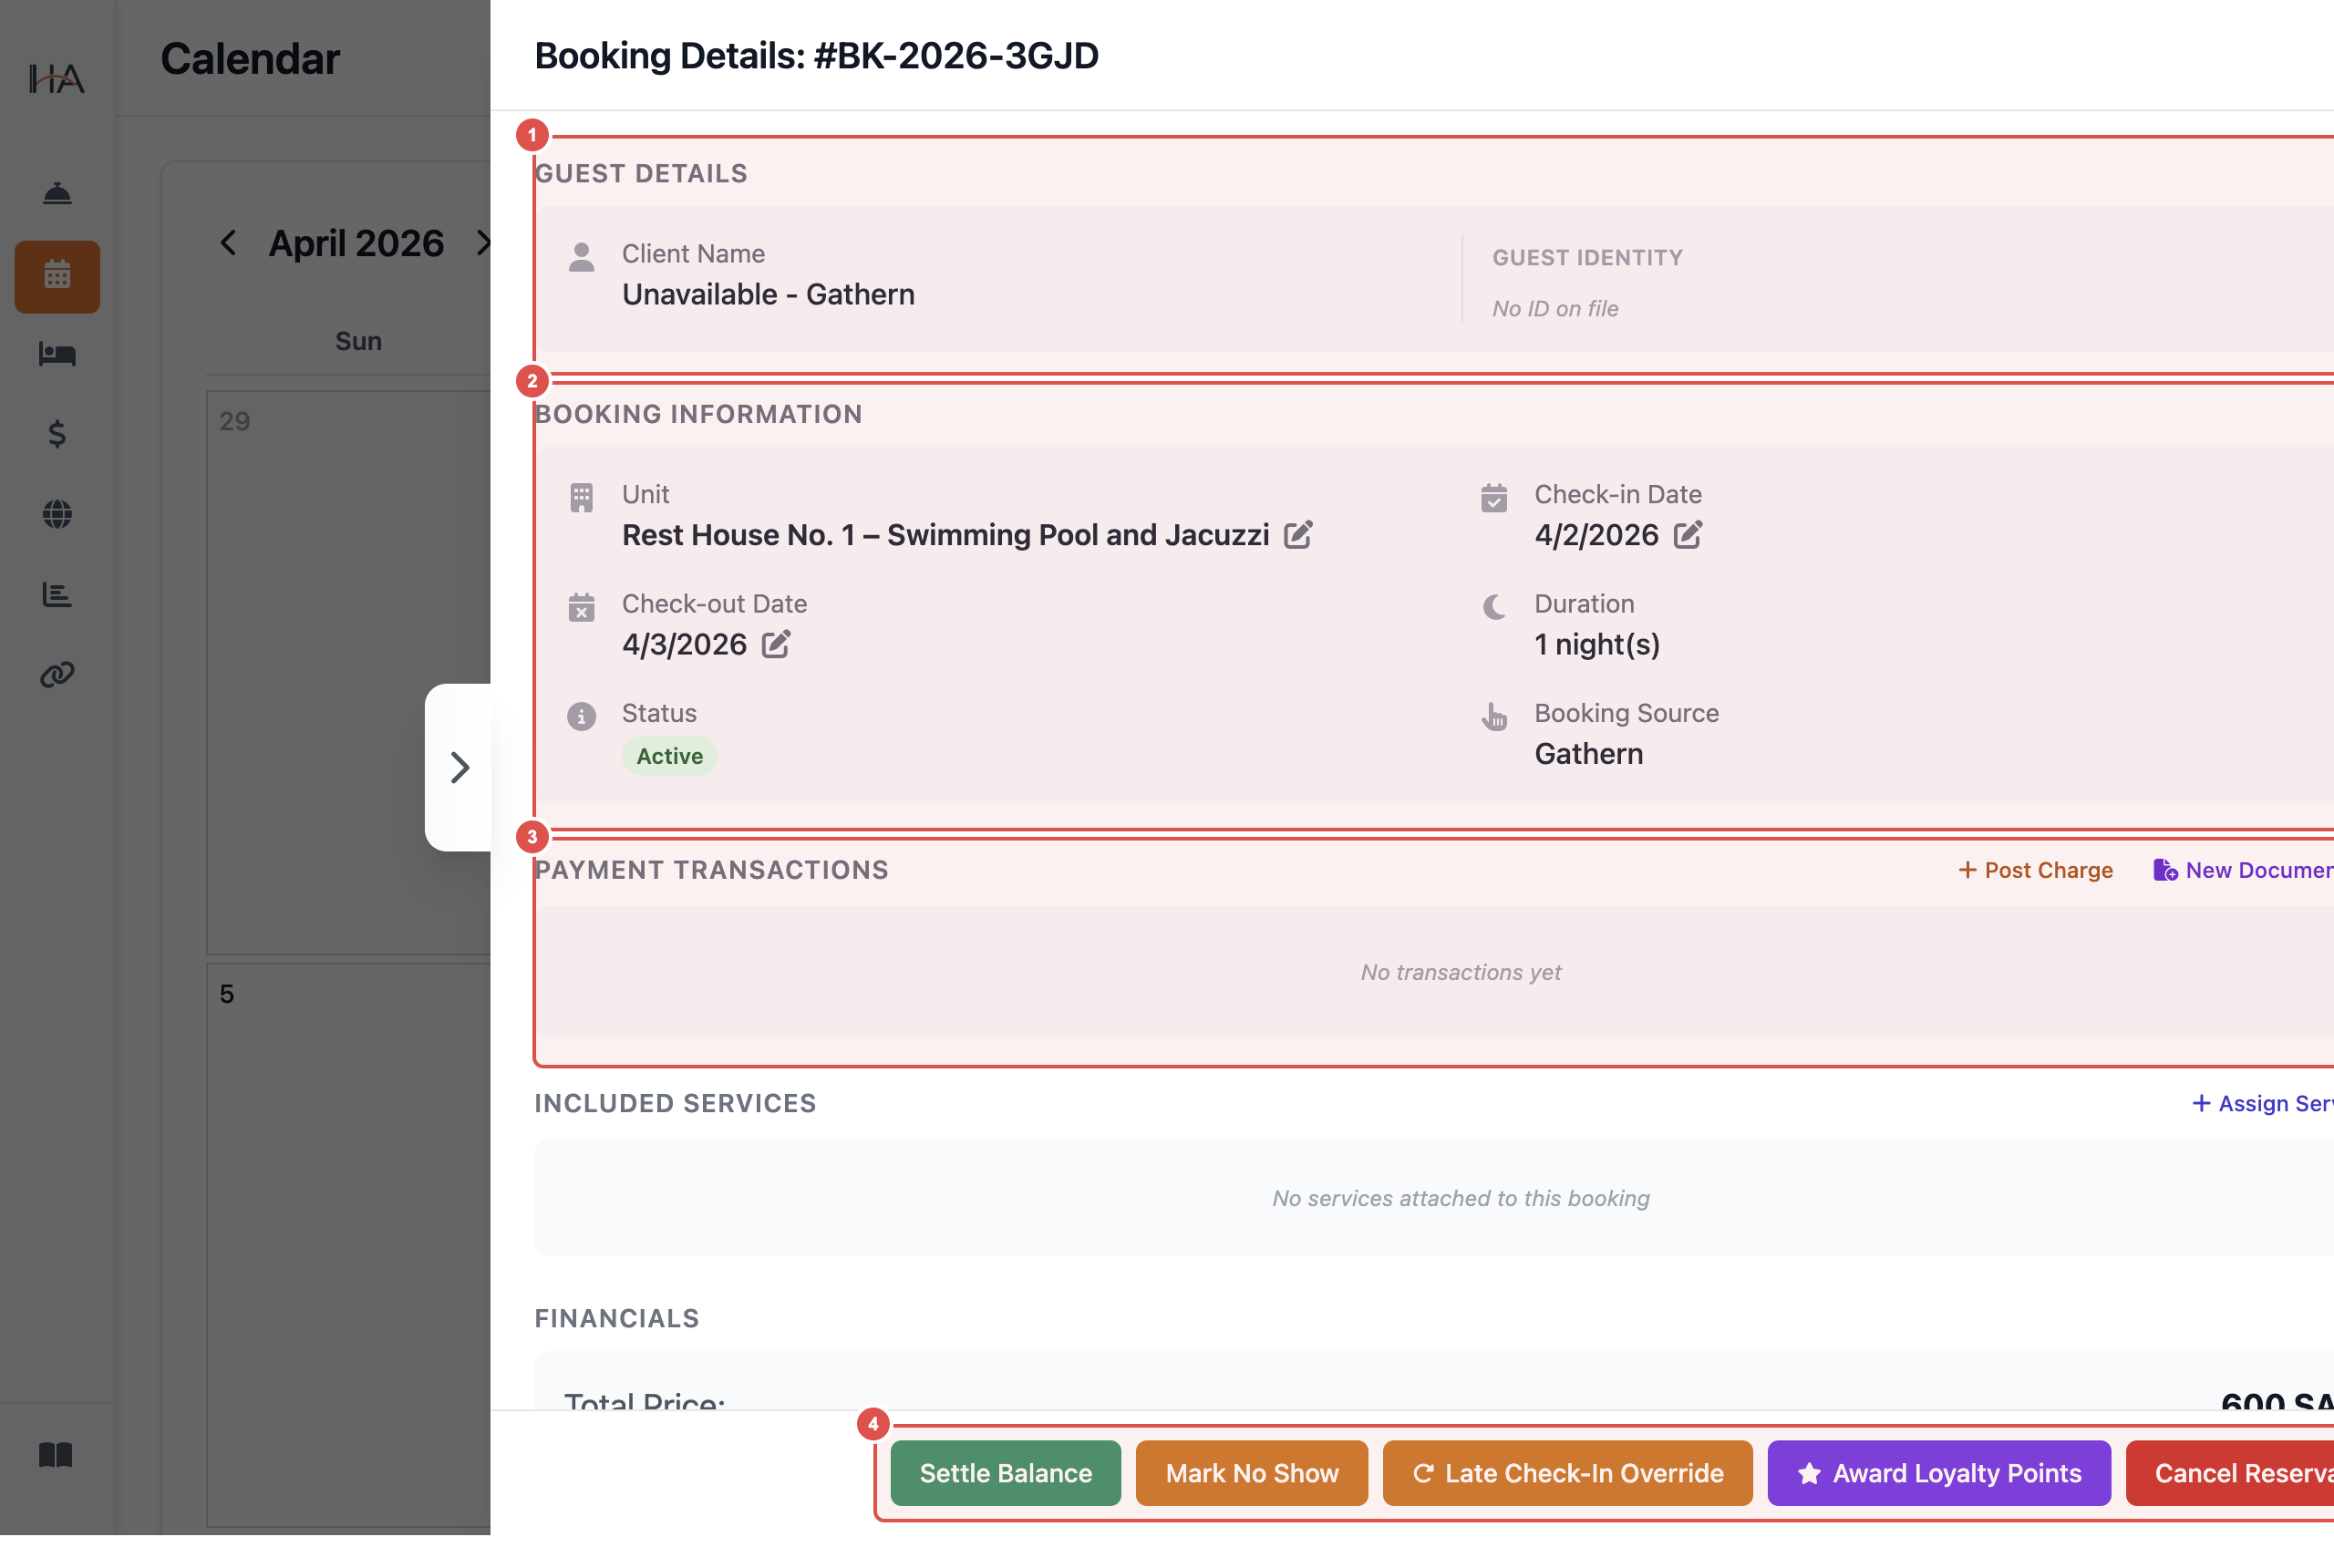
Read Booking Details on Click
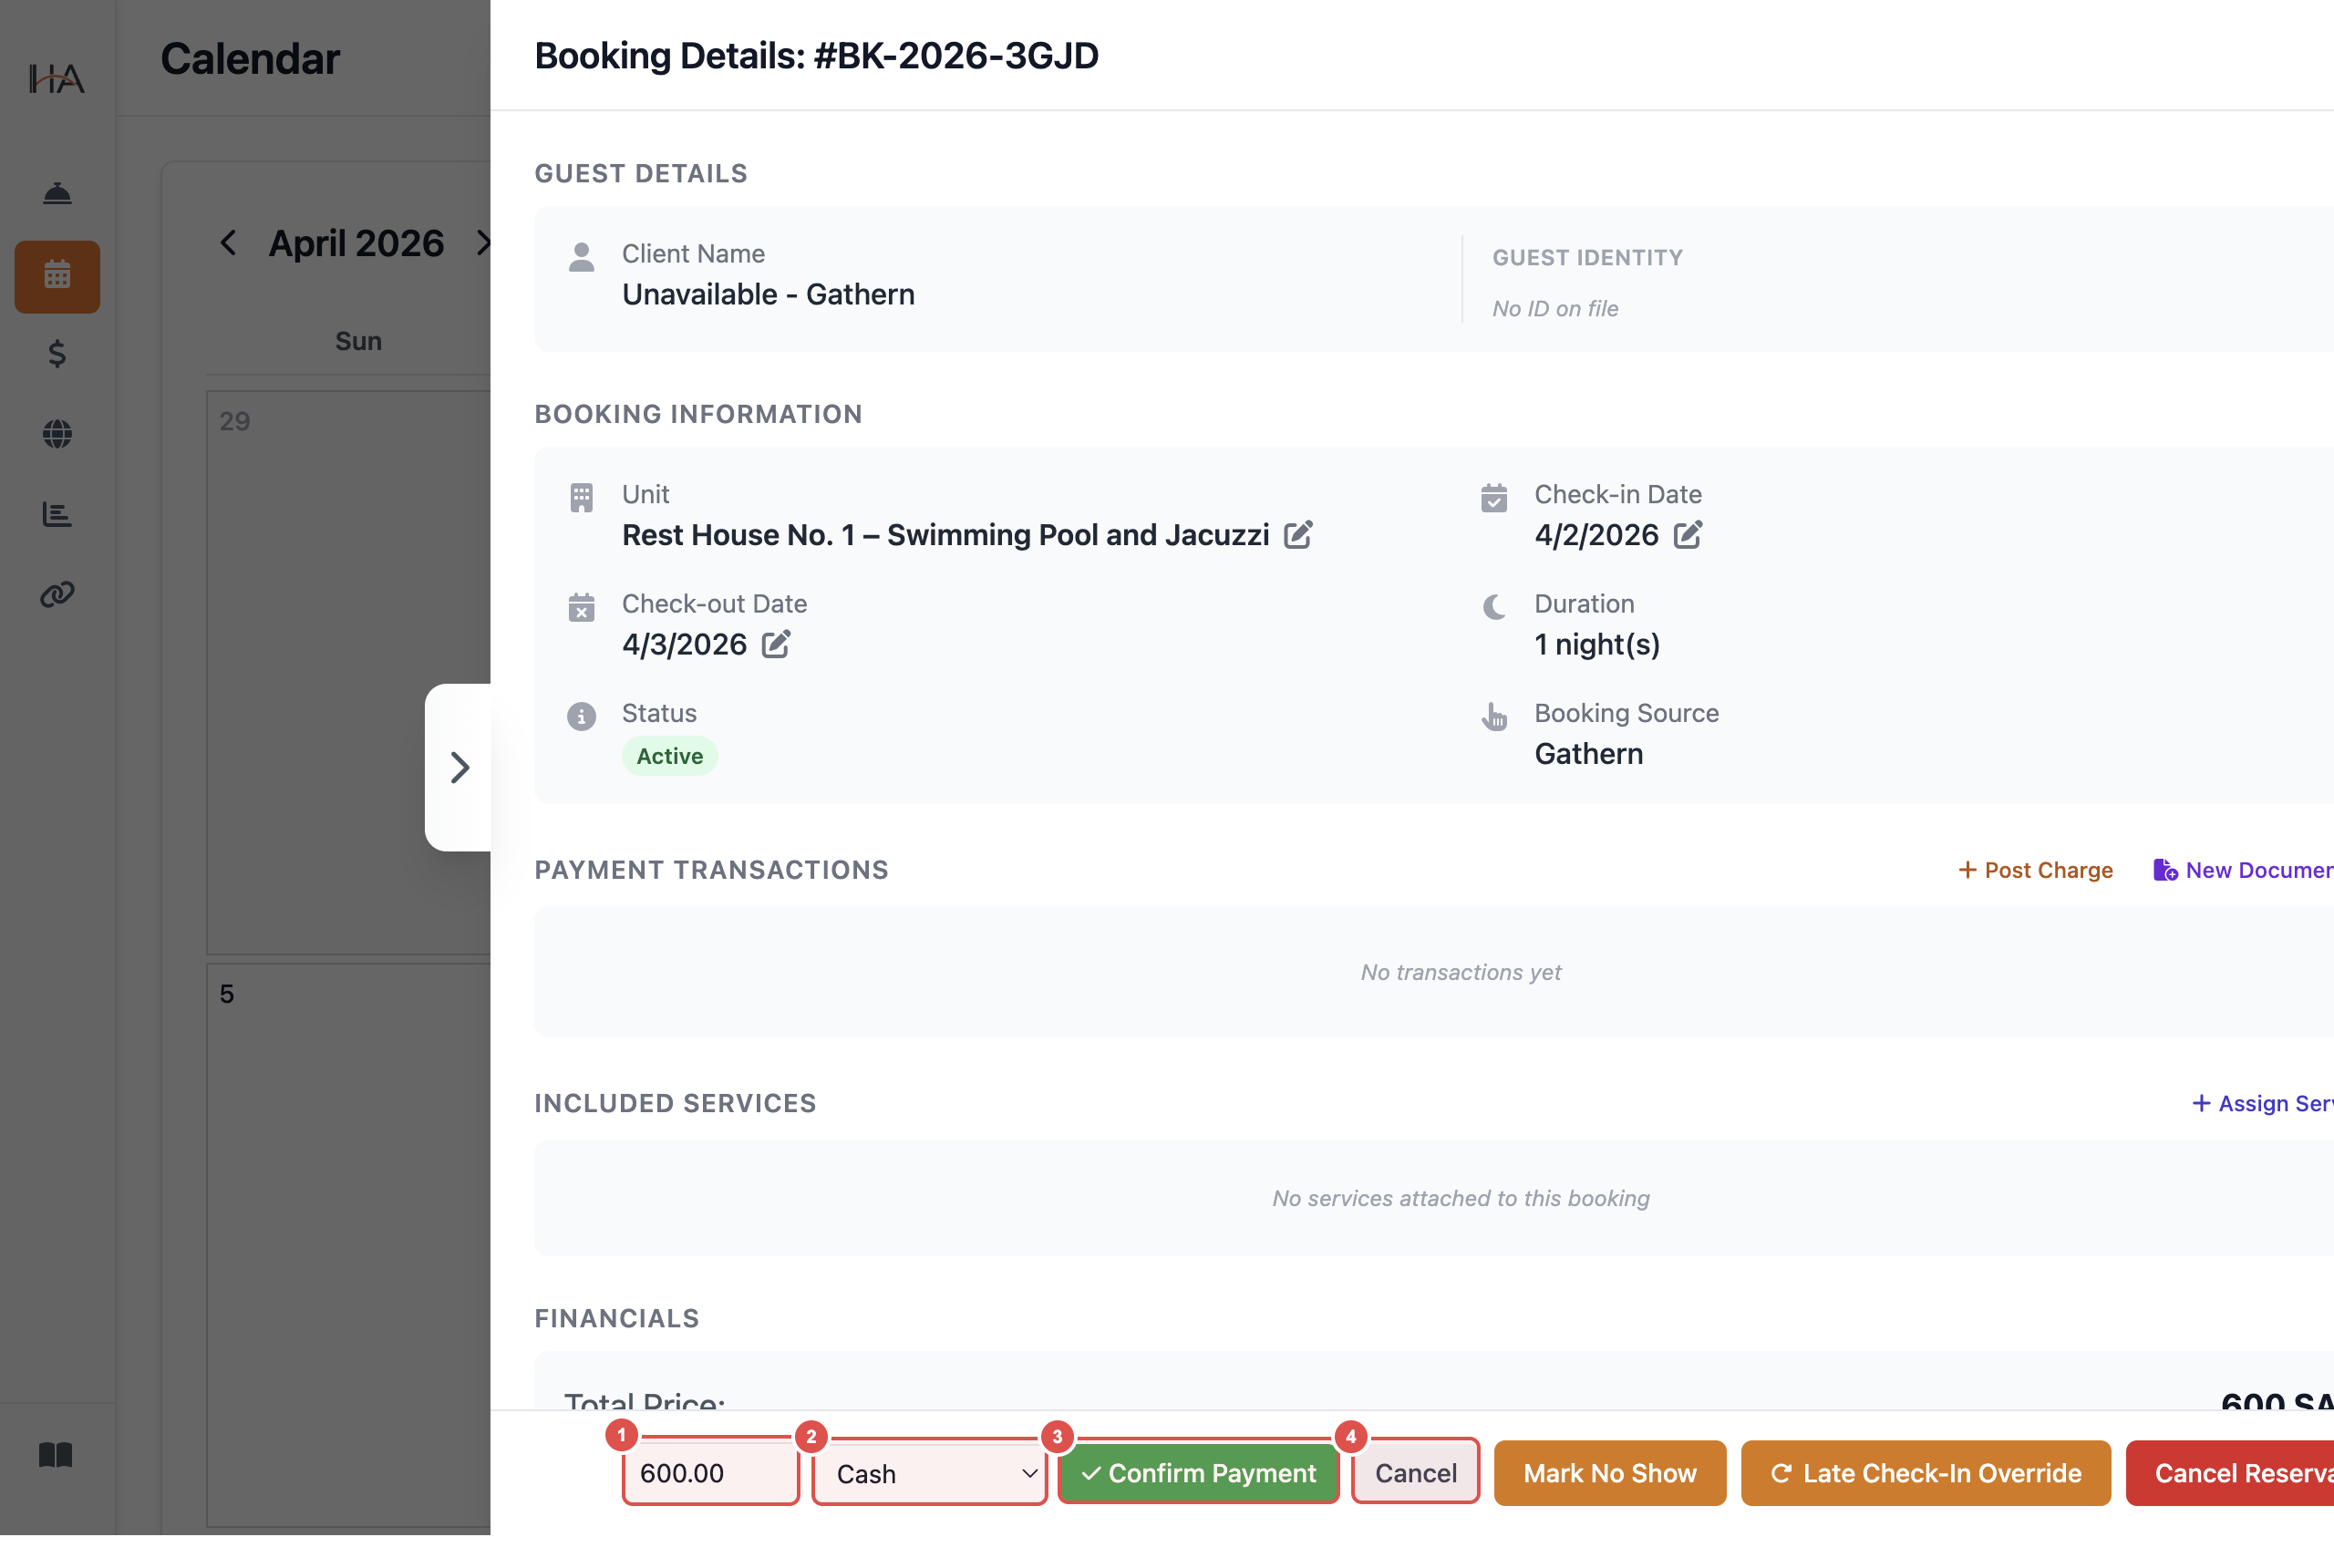
Click any booking block on the calendar to open its full details panel. The panel shows: - Guest Details — client name and identity - Booking Information — unit, check-in/out dates, duration, status, and source - Payment Transactions — charges posted against the booking - Included Services — any services assigned to the stay - Financials — total price, paid amount, balance due, and payment status At the bottom of the panel you will find quick action buttons to manage the booking directly.
Settle Balance
Clicking 'Settle Balance' opens an inline payment form directly below the booking details panel: ① **Amount** — Enter the payment amount (pre-filled with the outstanding balance) ② **Payment Method** — Select from Cash, Credit Card, or Bank Transfer ③ **Confirm Payment** — Submit the payment; the balance due updates immediately ④ **Cancel** — Dismiss the form without recording any payment
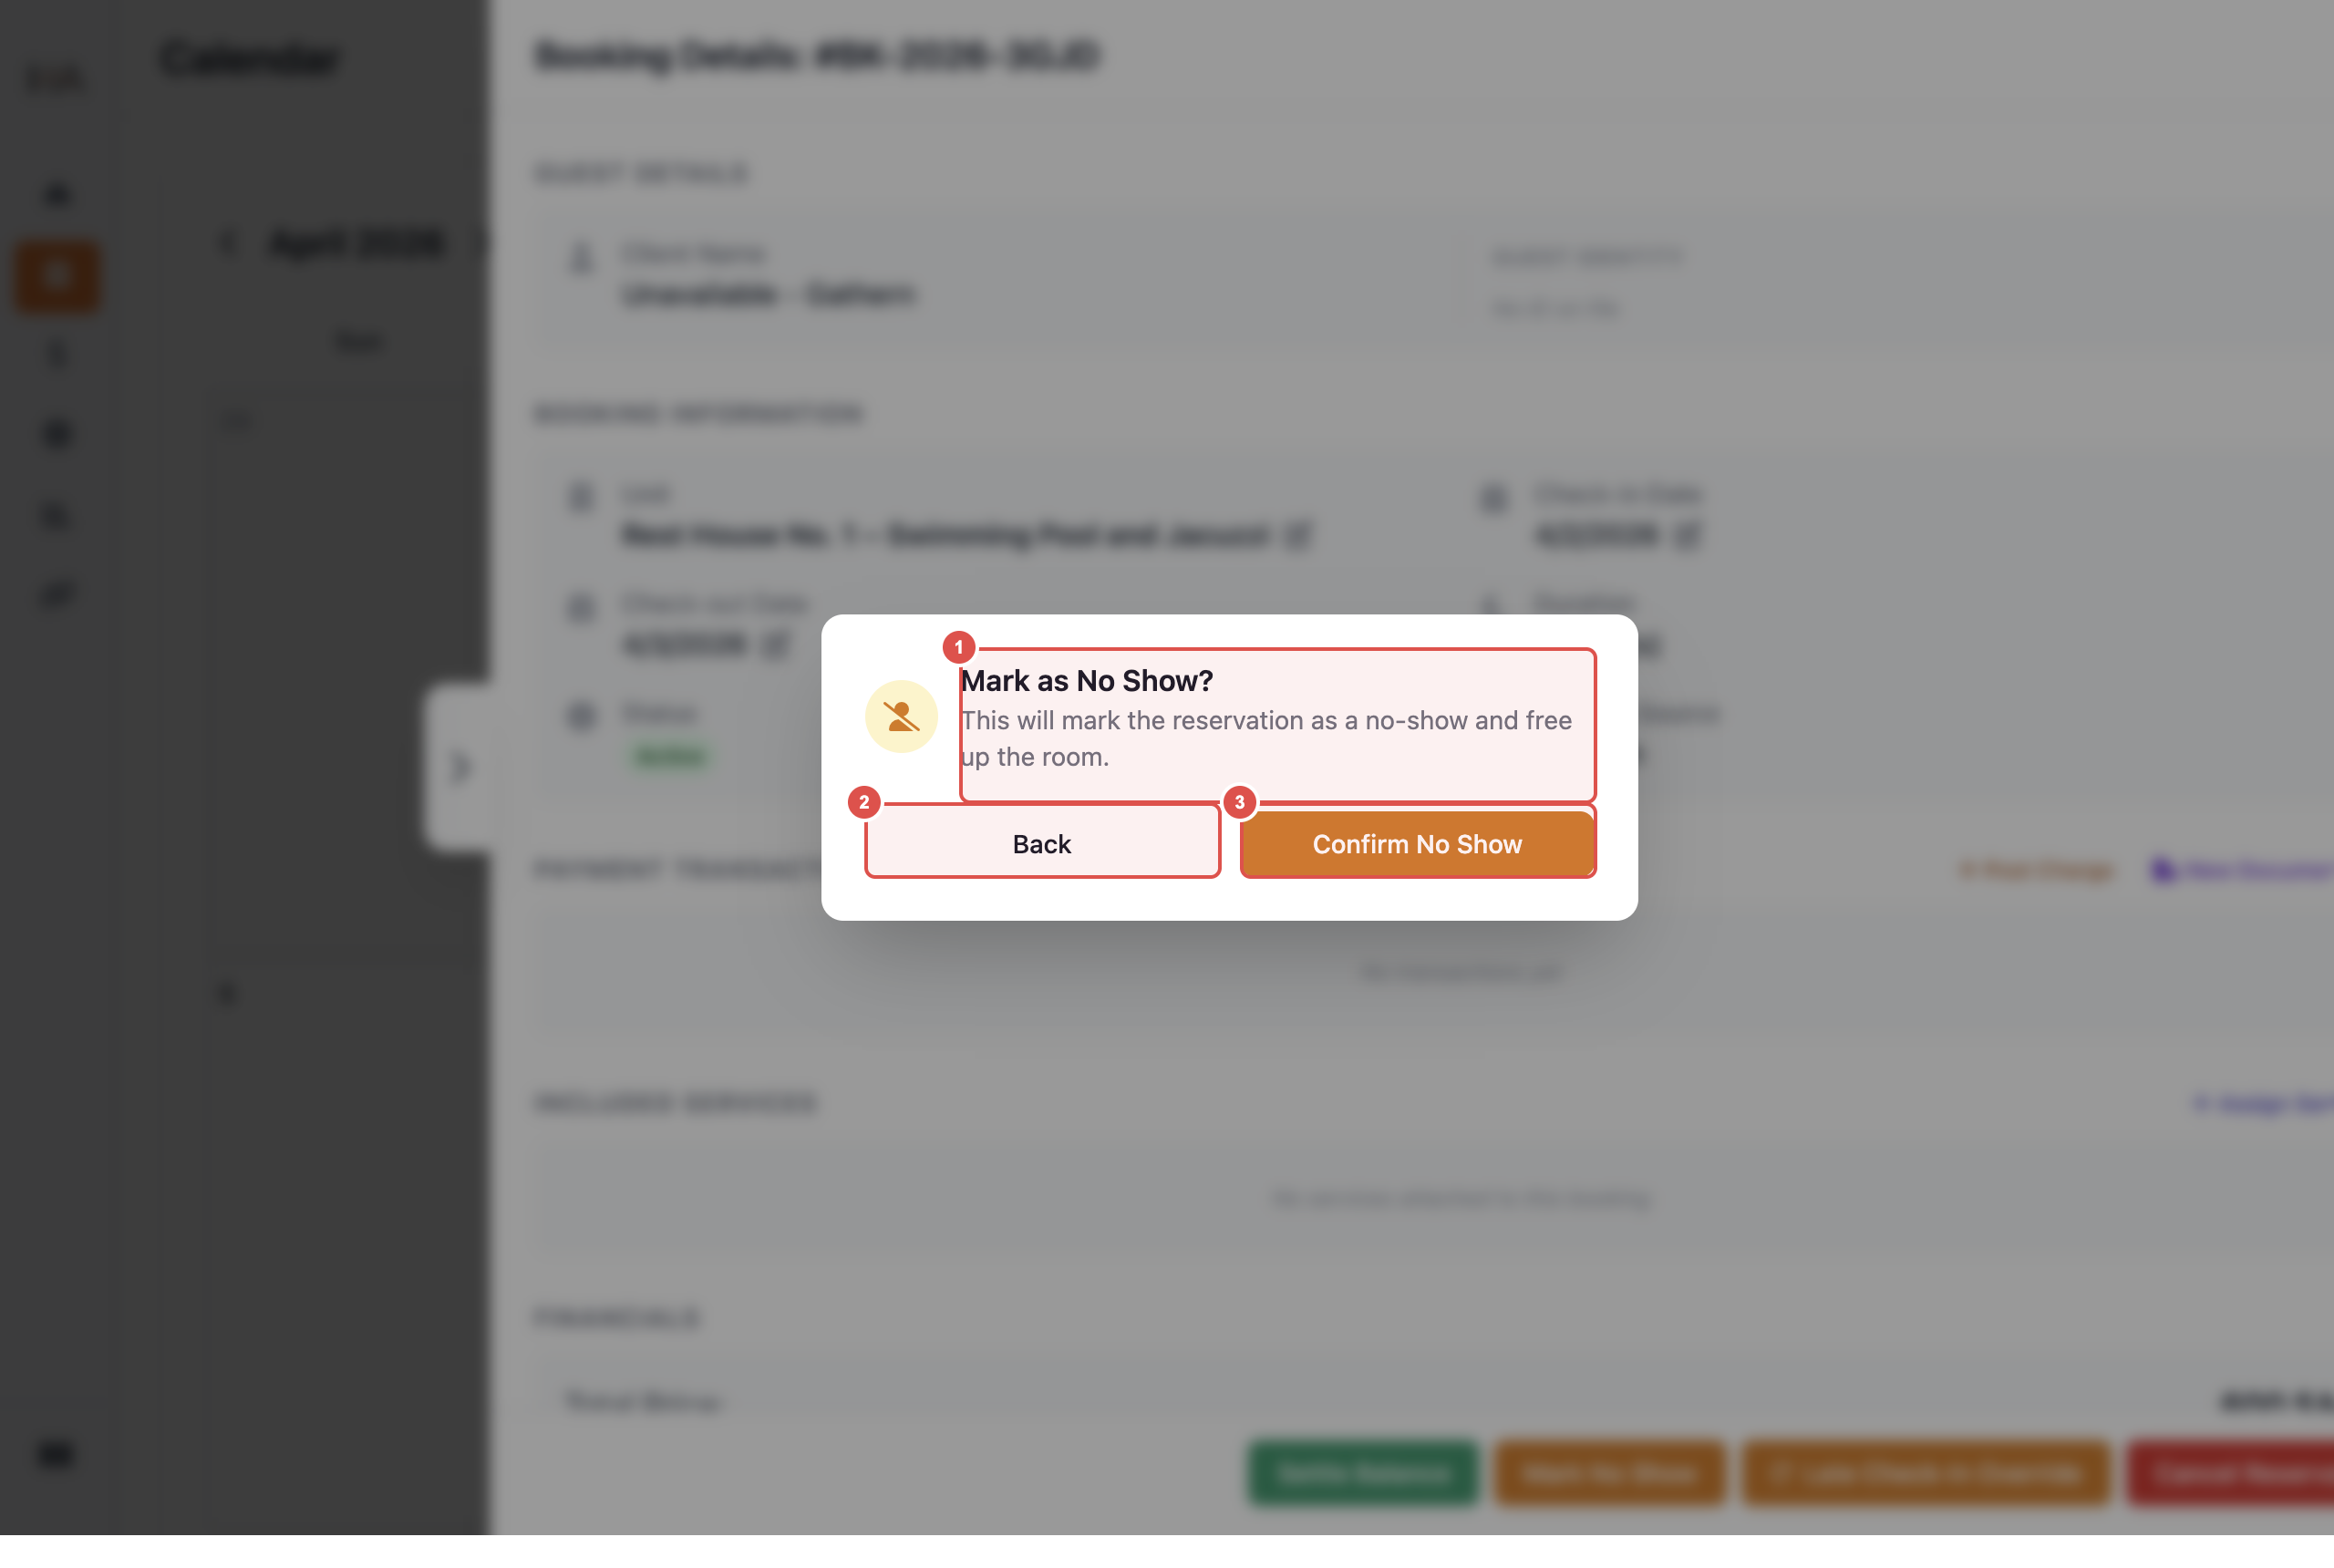
Mark No Show
Clicking 'Mark No Show' opens a confirmation modal: ① **Message** — "This will mark the reservation as a no-show and free up the room." ② **Back** — Return to the booking panel without any changes ③ **Confirm No Show** — Confirm the action; the booking status changes to 'No Show' and the unit is freed for new bookings
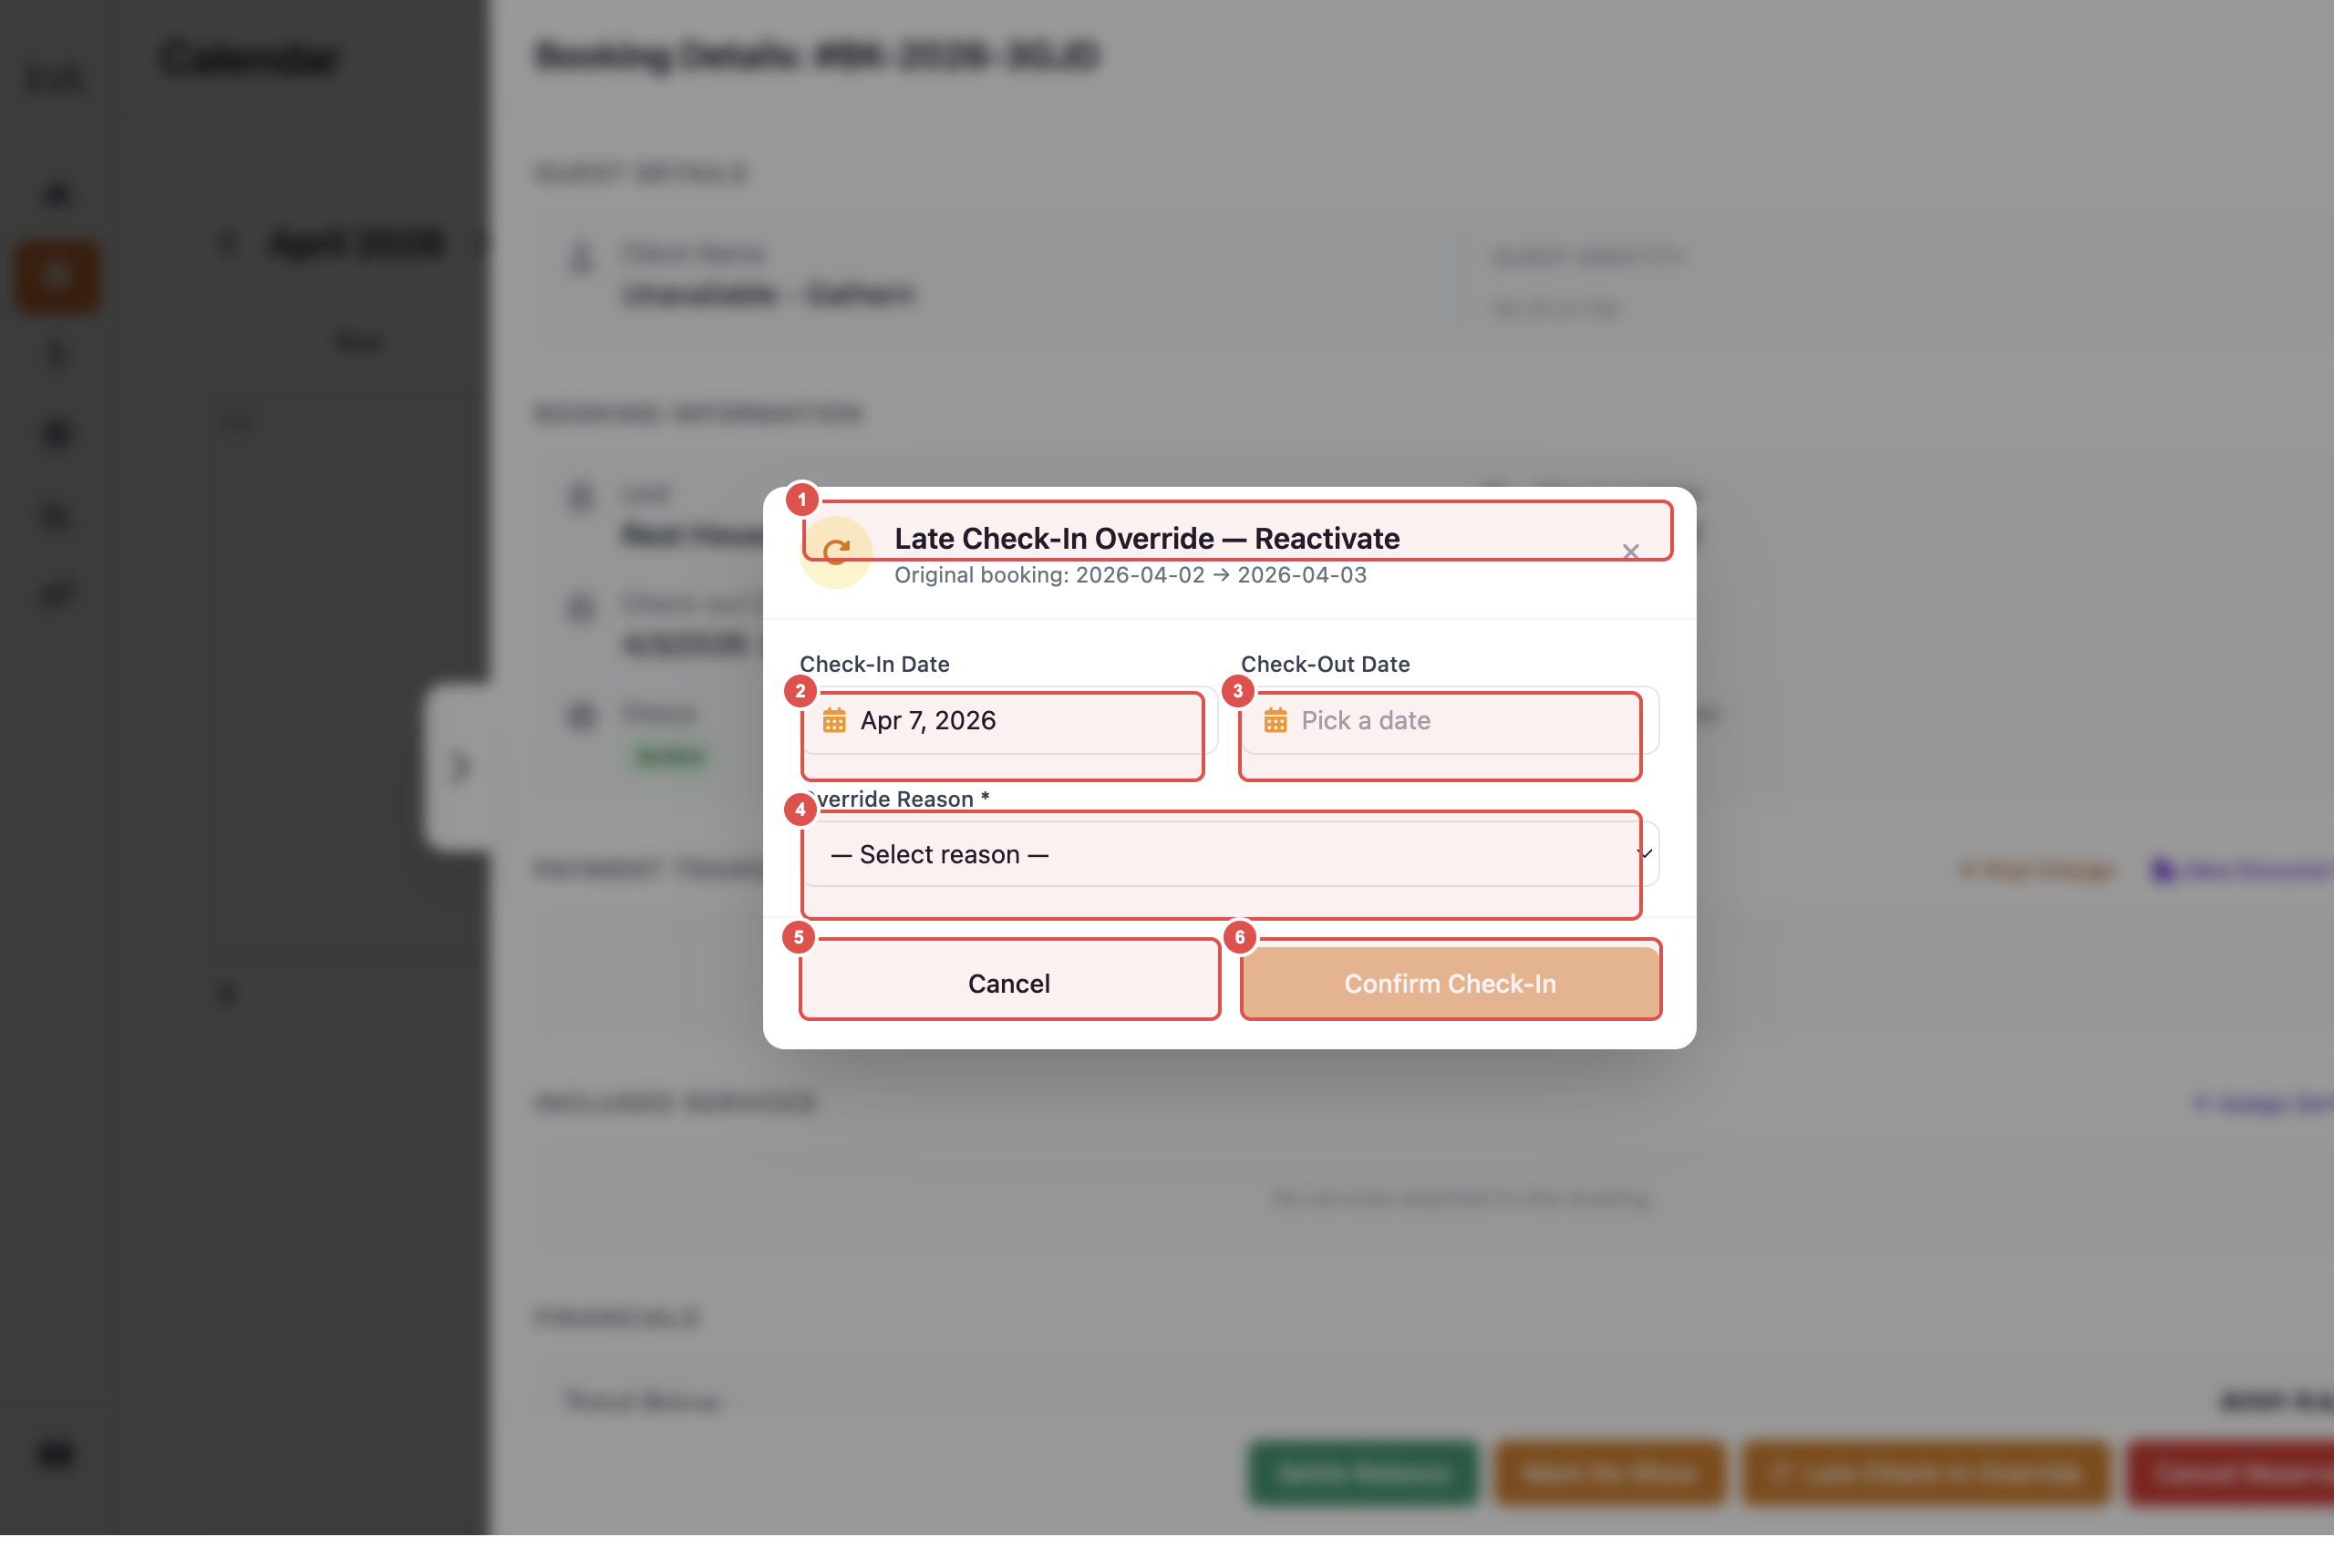
Late Check-In Override
Clicking 'Late Check-In Override' opens a reactivation form modal: ① **Booking Info** — Shows the original booking dates for reference ② **Check-In Date** — Date picker to set the new actual check-in date ③ **Check-Out Date** — Date picker, defaults to the original check-out date ④ **Override Reason** — Required dropdown: Delayed Flight, Traffic, Work, Personal Emergency, Guest Request, or Other ⑤ **Cancel** — Close the modal without making changes ⑥ **Confirm Check-In** — Activates once a reason is selected; reactivates the booking with the override recorded
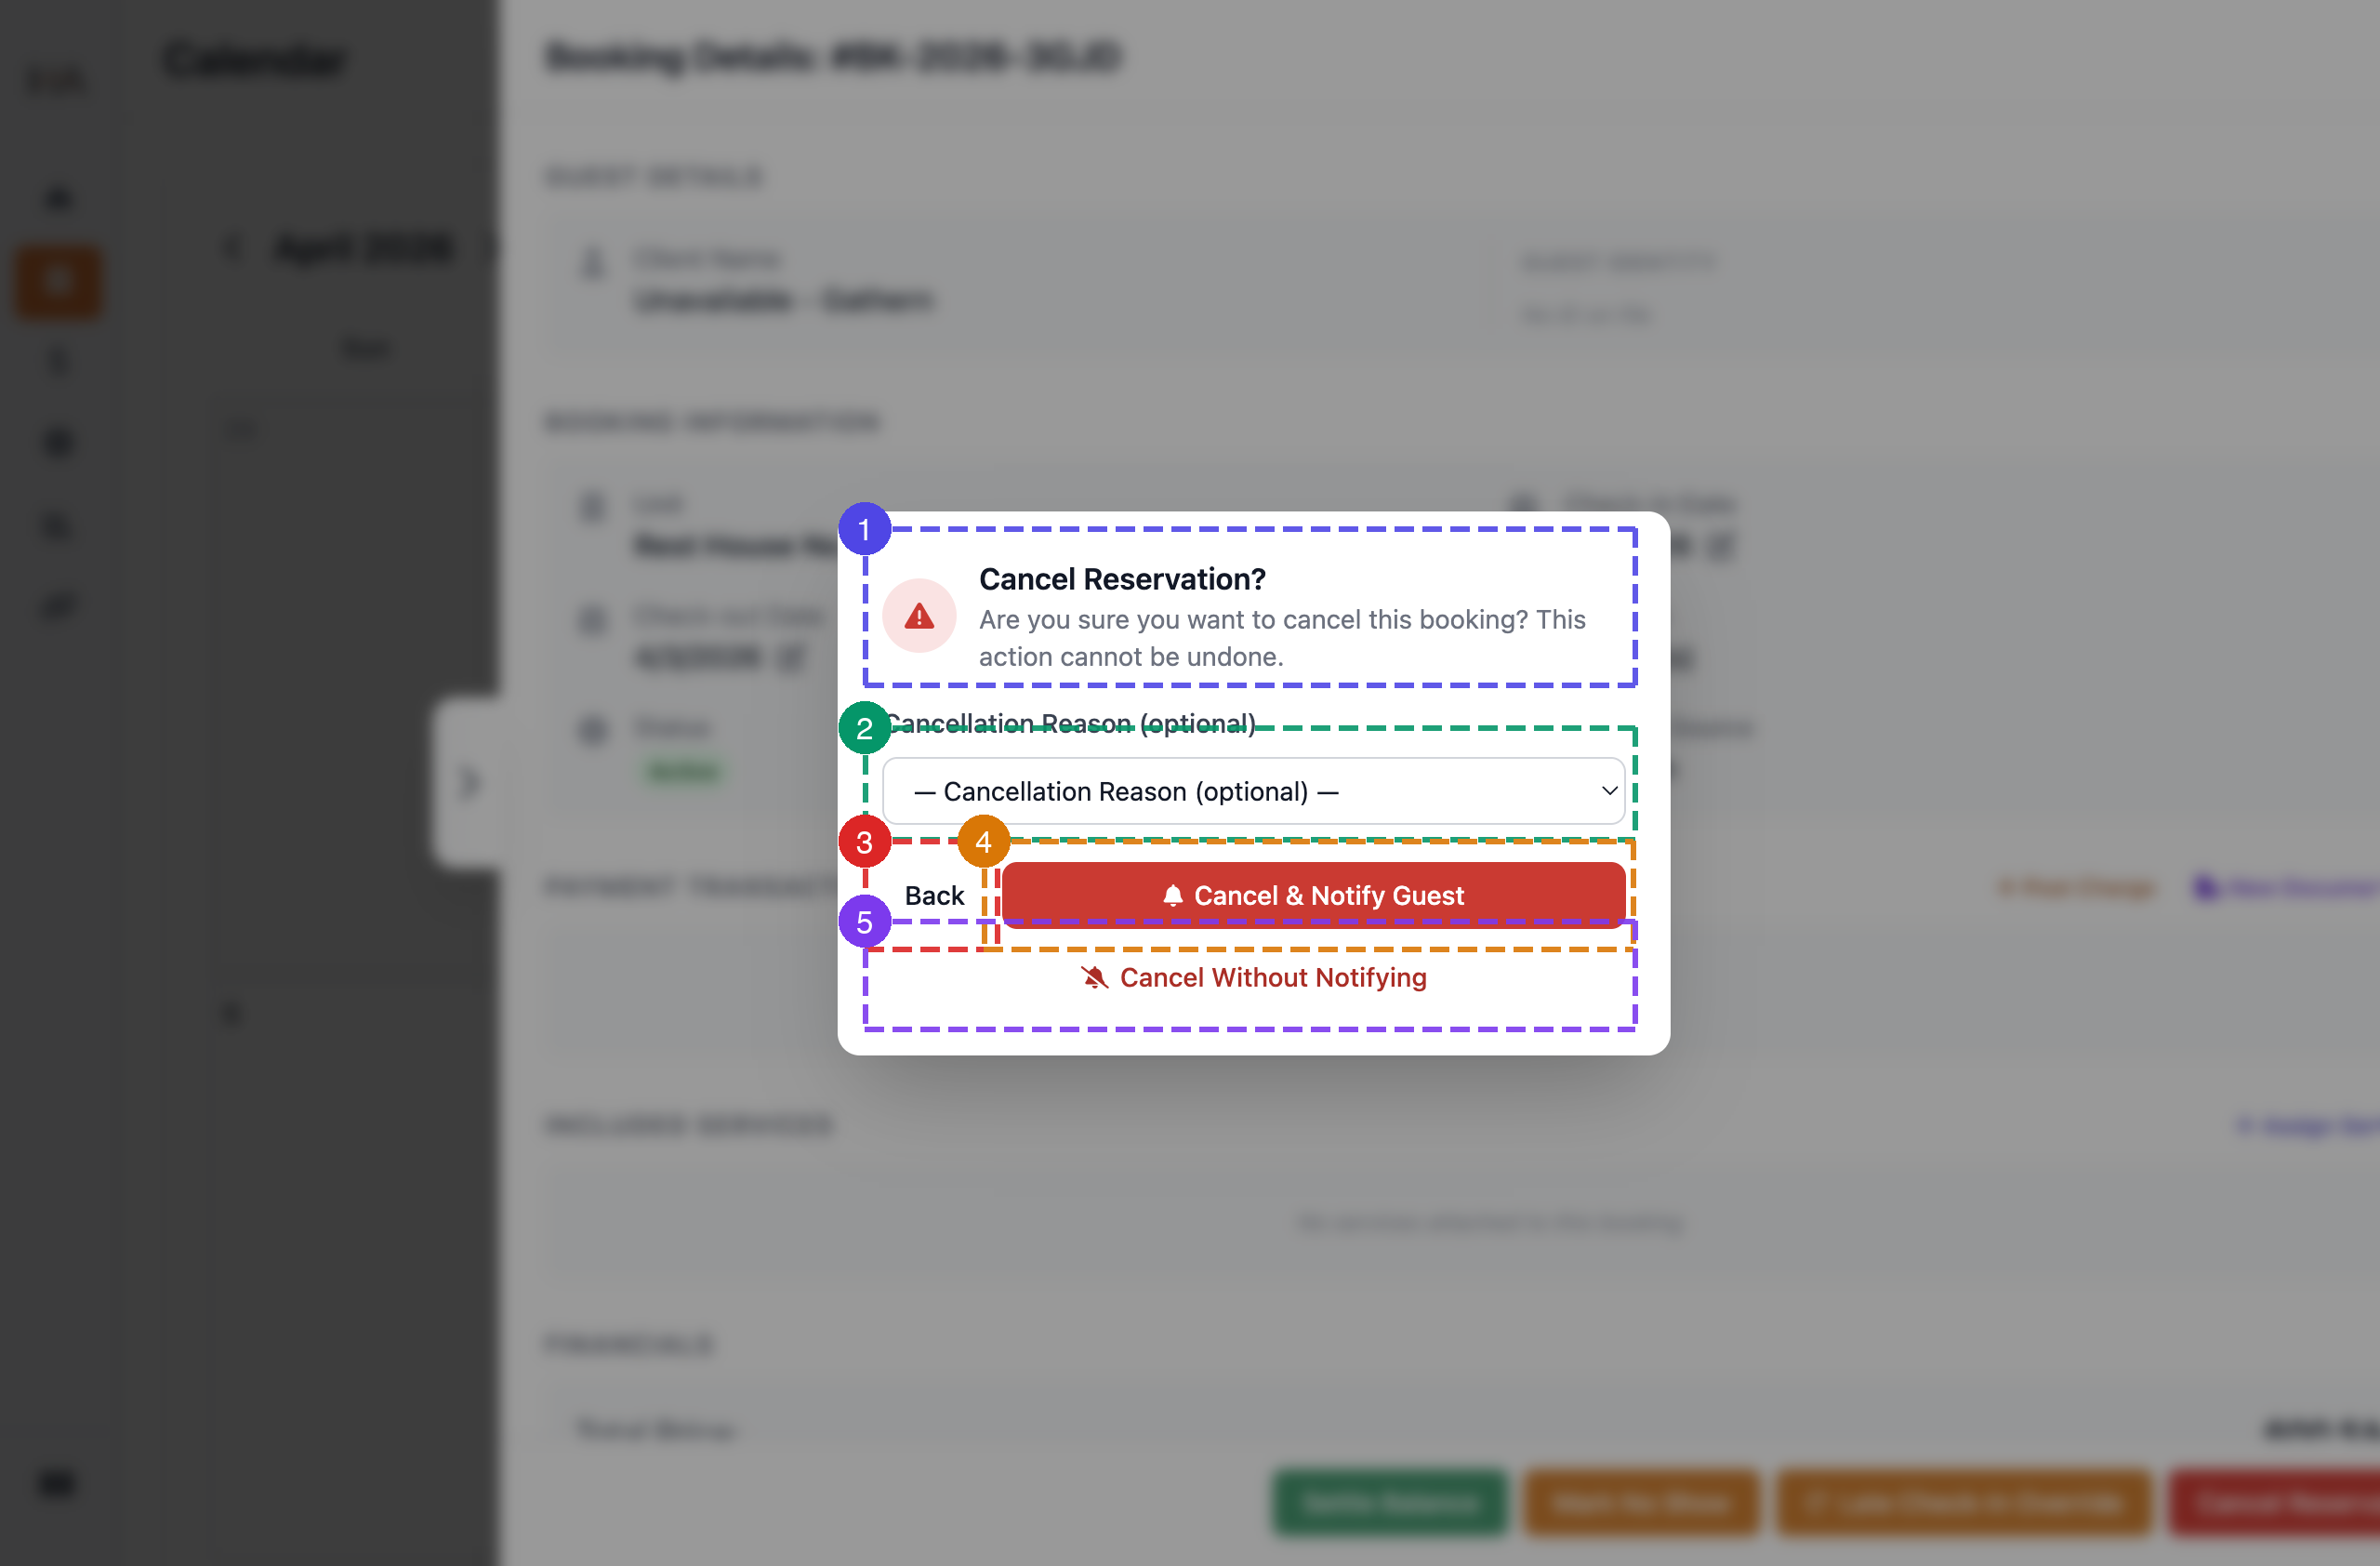
Cancel Reservation
Clicking 'Cancel Reservation' opens a confirmation dialog: ① **Warning** — "Are you sure you want to cancel this booking? This action cannot be undone." ② **Cancellation Reason** — Optional dropdown to record why the booking was cancelled (Guest Request, No Show, Duplicate Booking, Property Issue, Payment Failure, OTA Channel Cancellation, Other) ③ **Back** — Return to the booking panel without cancelling ④ **Cancel & Notify Guest** — Cancels the booking and sends an automated notification email/SMS to the guest ⑤ **Cancel Without Notifying** — Cancels silently with no message sent to the guest
More in Calendar & Bookings
Create a Manual Booking
Learn how to create a booking from the calendar using the Add Booking panel, including guest info, stay details, pricing edits, payment details, and final submission.
View & Edit Booking Details
Learn how to read the booking panel, transfer units, adjust dates, post incidental charges, generate invoices and documents, assign services, and apply coupon codes.
Modify Booking Dates
Learn how to move a booking's check-in or check-out date directly from the Booking Details panel using the inline pencil edit icons.
Cancel or Delete Bookings
Learn how to cancel bookings, process refunds, manage cancellation policies, and handle guest communication.
Set Custom Pricing on Specific Dates
Learn how to create price overrides for specific date ranges — replacing the base price or adding a fixed amount — and apply them to selected units.