View & Edit Booking Details
Learn how to read the booking panel, transfer units, adjust dates, post incidental charges, generate invoices and documents, assign services, and apply coupon codes.
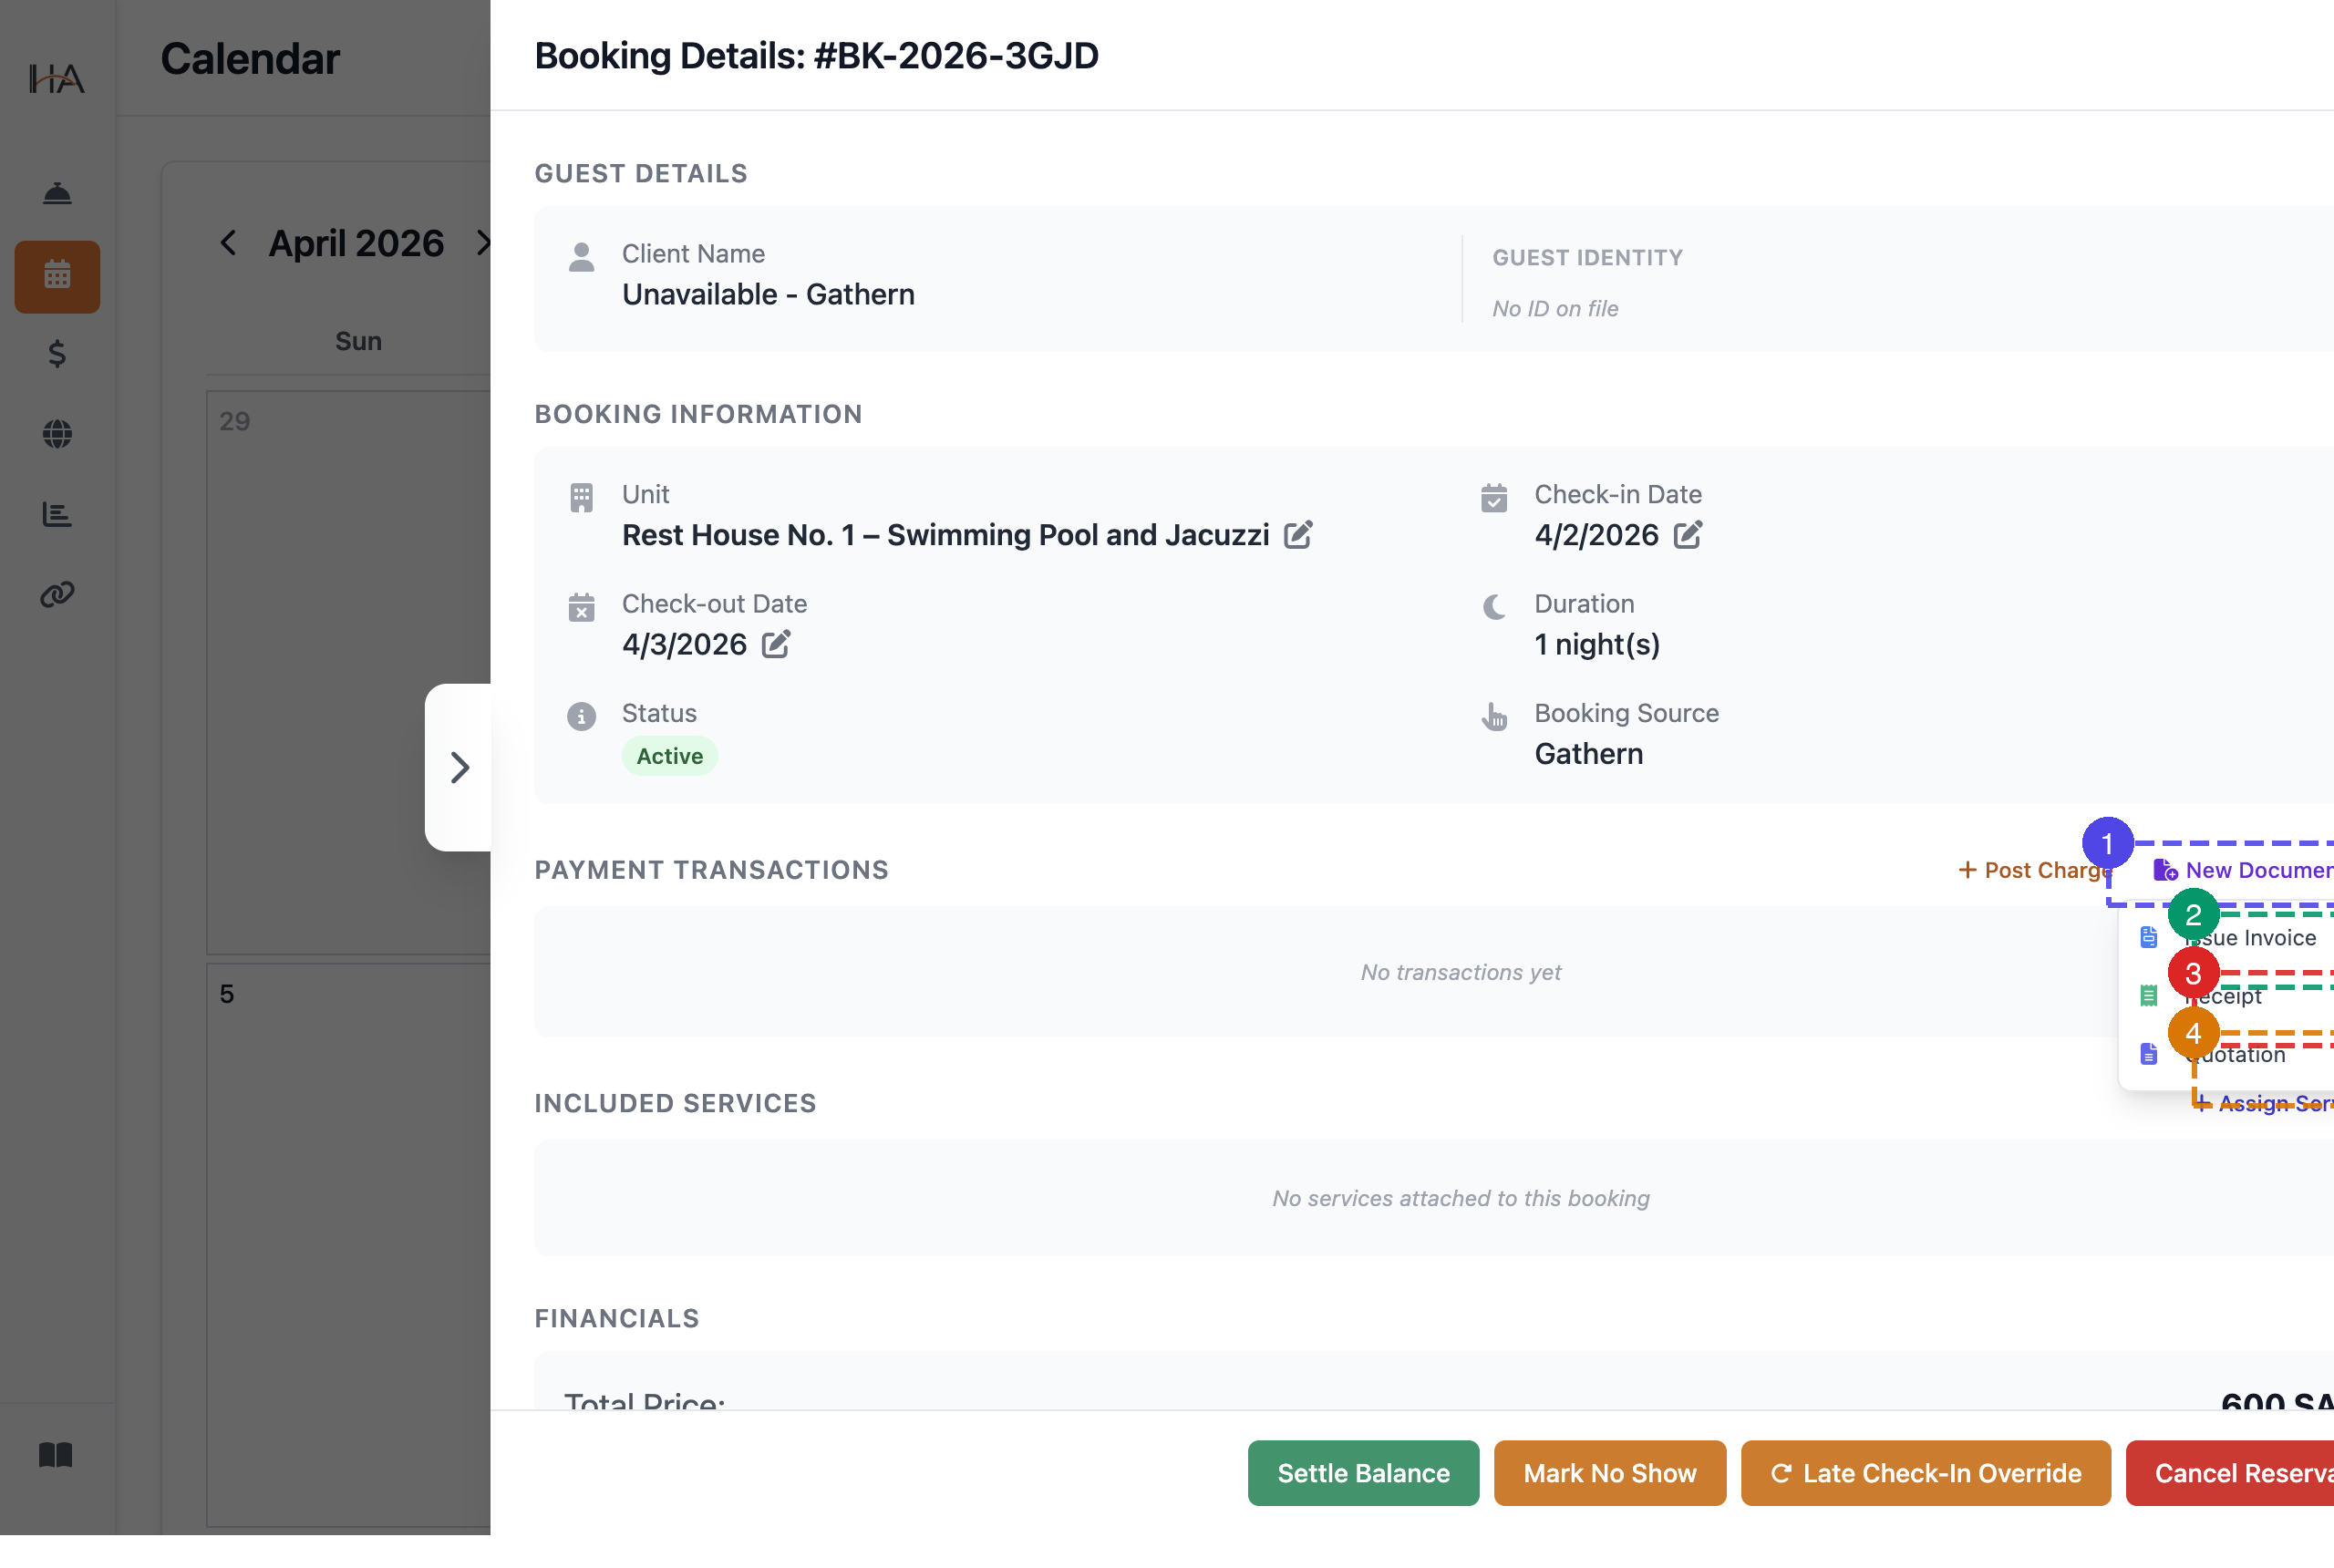
Open Booking Details Panel
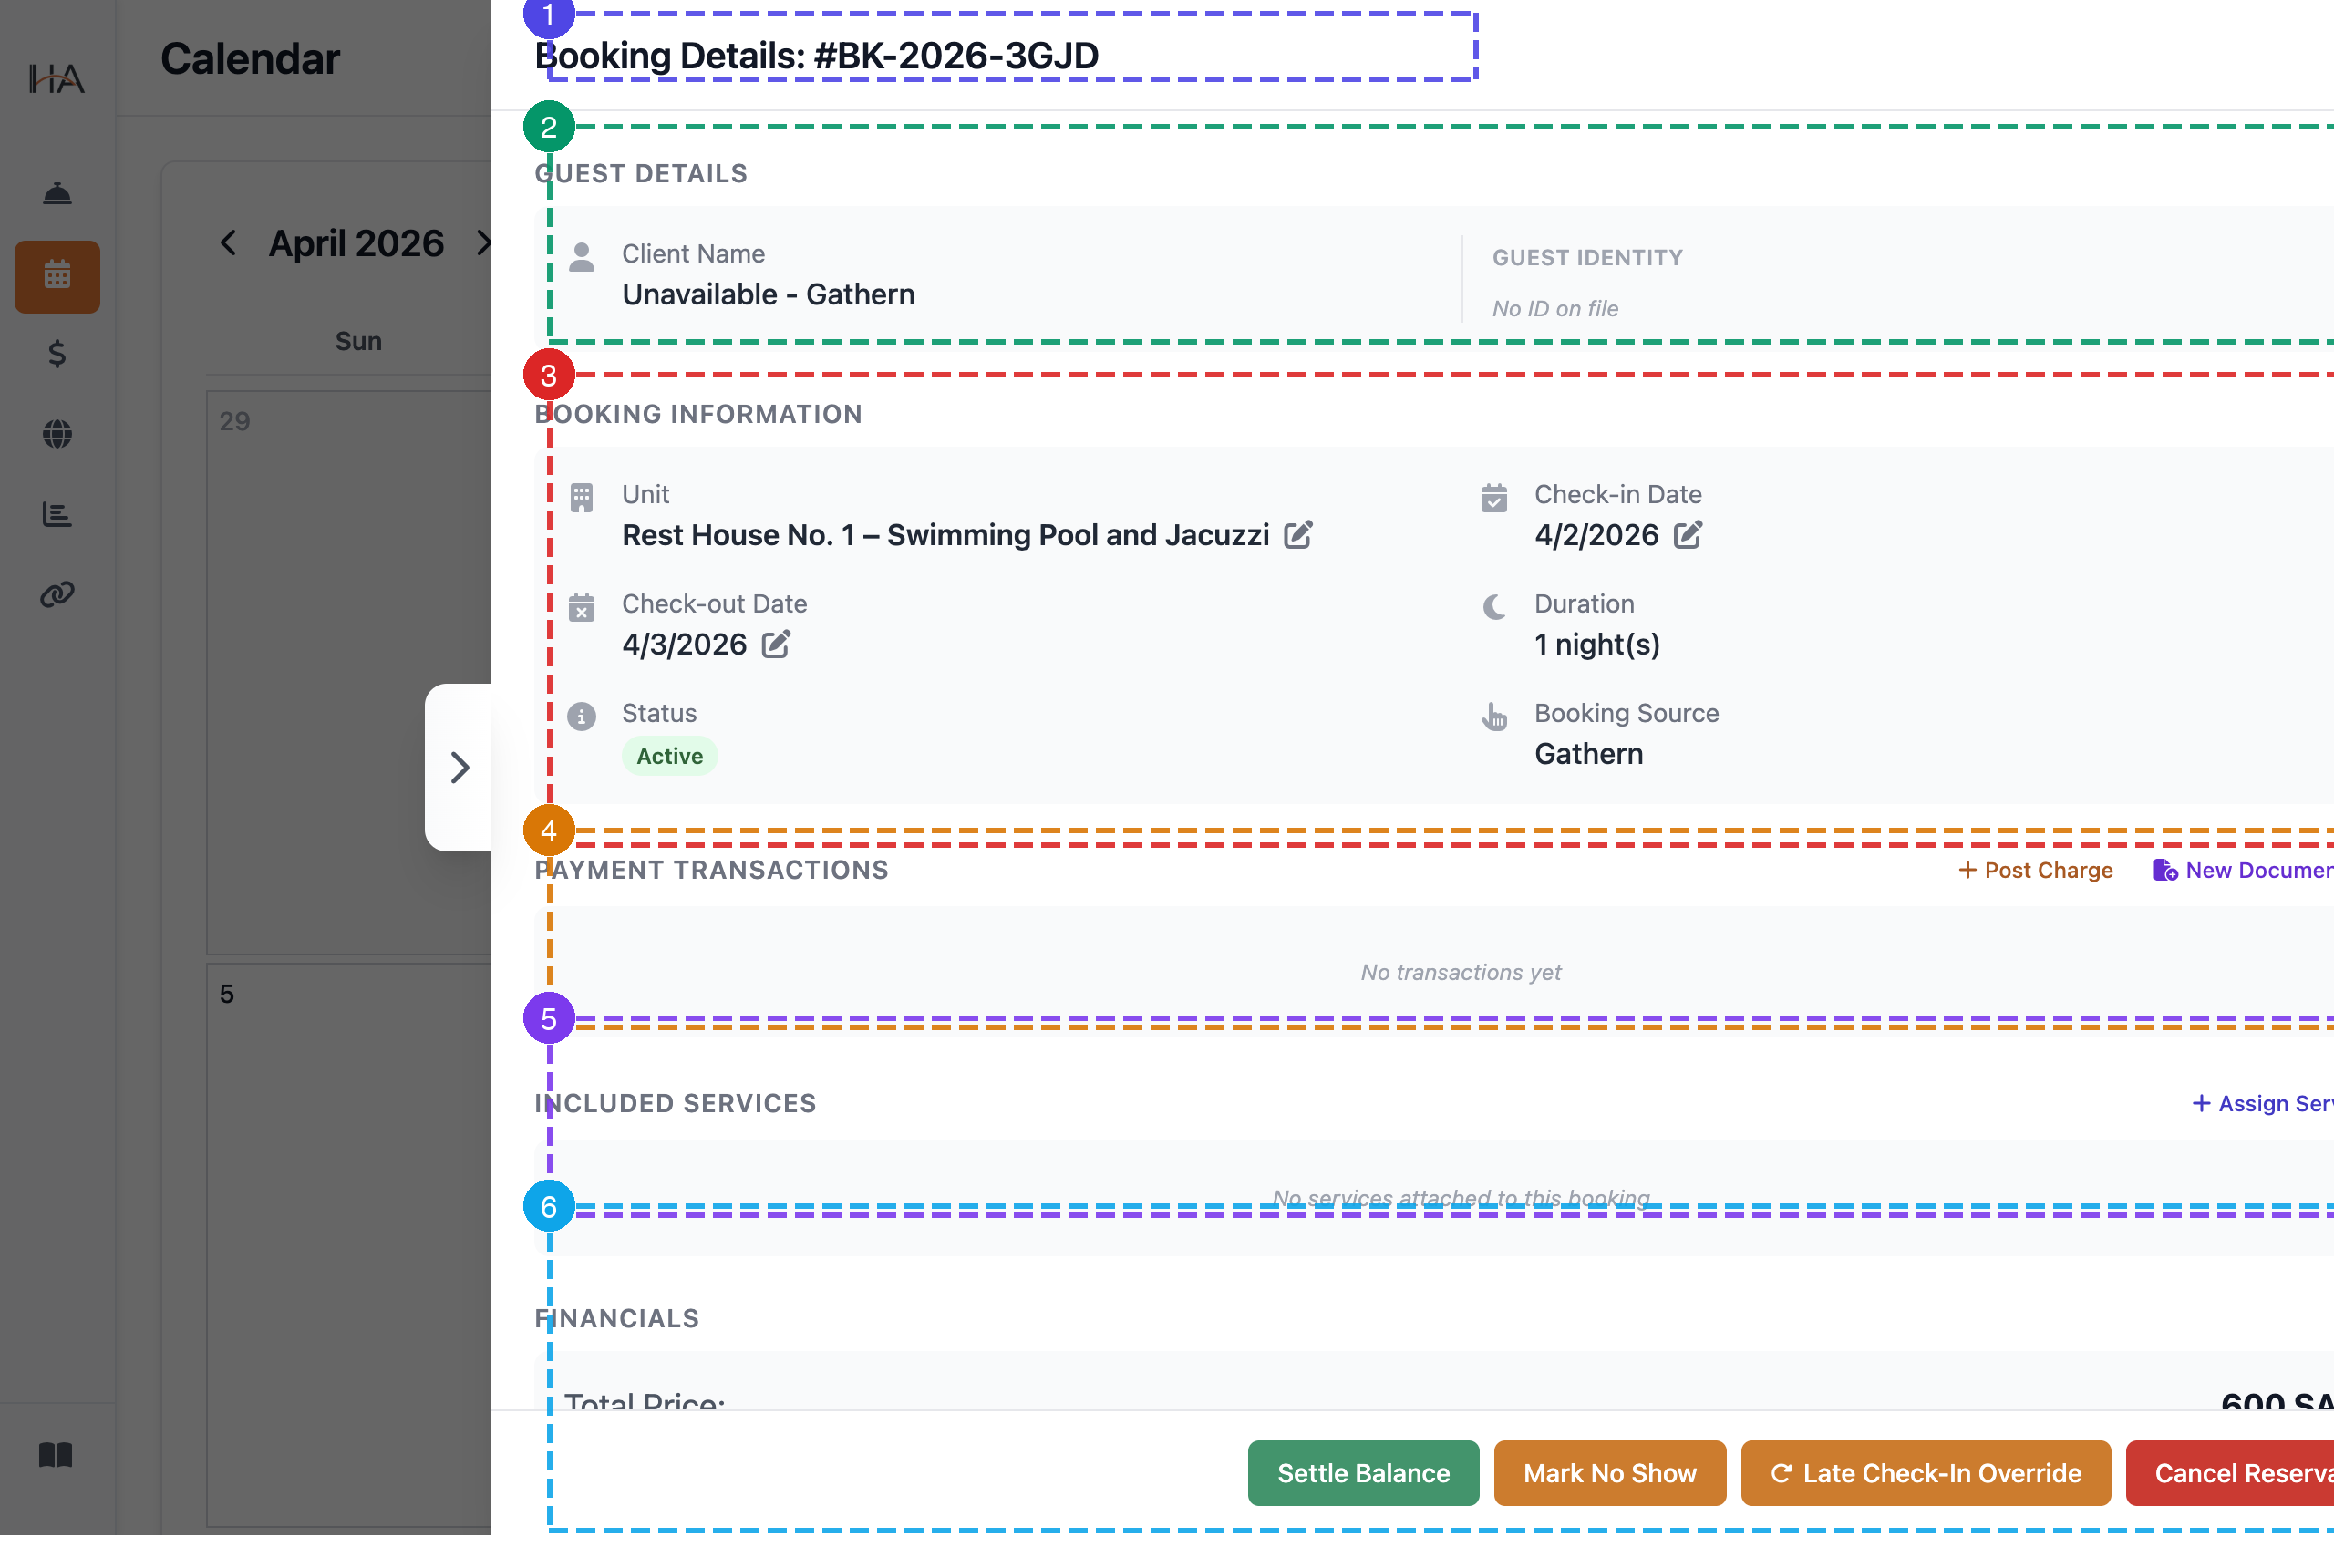
Click any booking block on the calendar to open the Booking Details panel on the right. The panel is divided into 6 labeled sections: ① Booking ID — unique reference shown at the top of the panel ② Guest Details — client name and guest identity button (OTA bookings may show "Unavailable" for privacy) ③ Booking Information — unit, check-in/out dates (each with a ✏ edit icon), duration, booking status, and source ④ Payment Transactions — list of all posted charges plus "+ Post Charge" and "New Document" shortcuts ⑤ Included Services — services attached to the stay plus "+ Assign Service" ⑥ Financials — total price, paid amount, balance due, payment status, and "Apply coupon code" link
Transfer Guest to a Different Unit
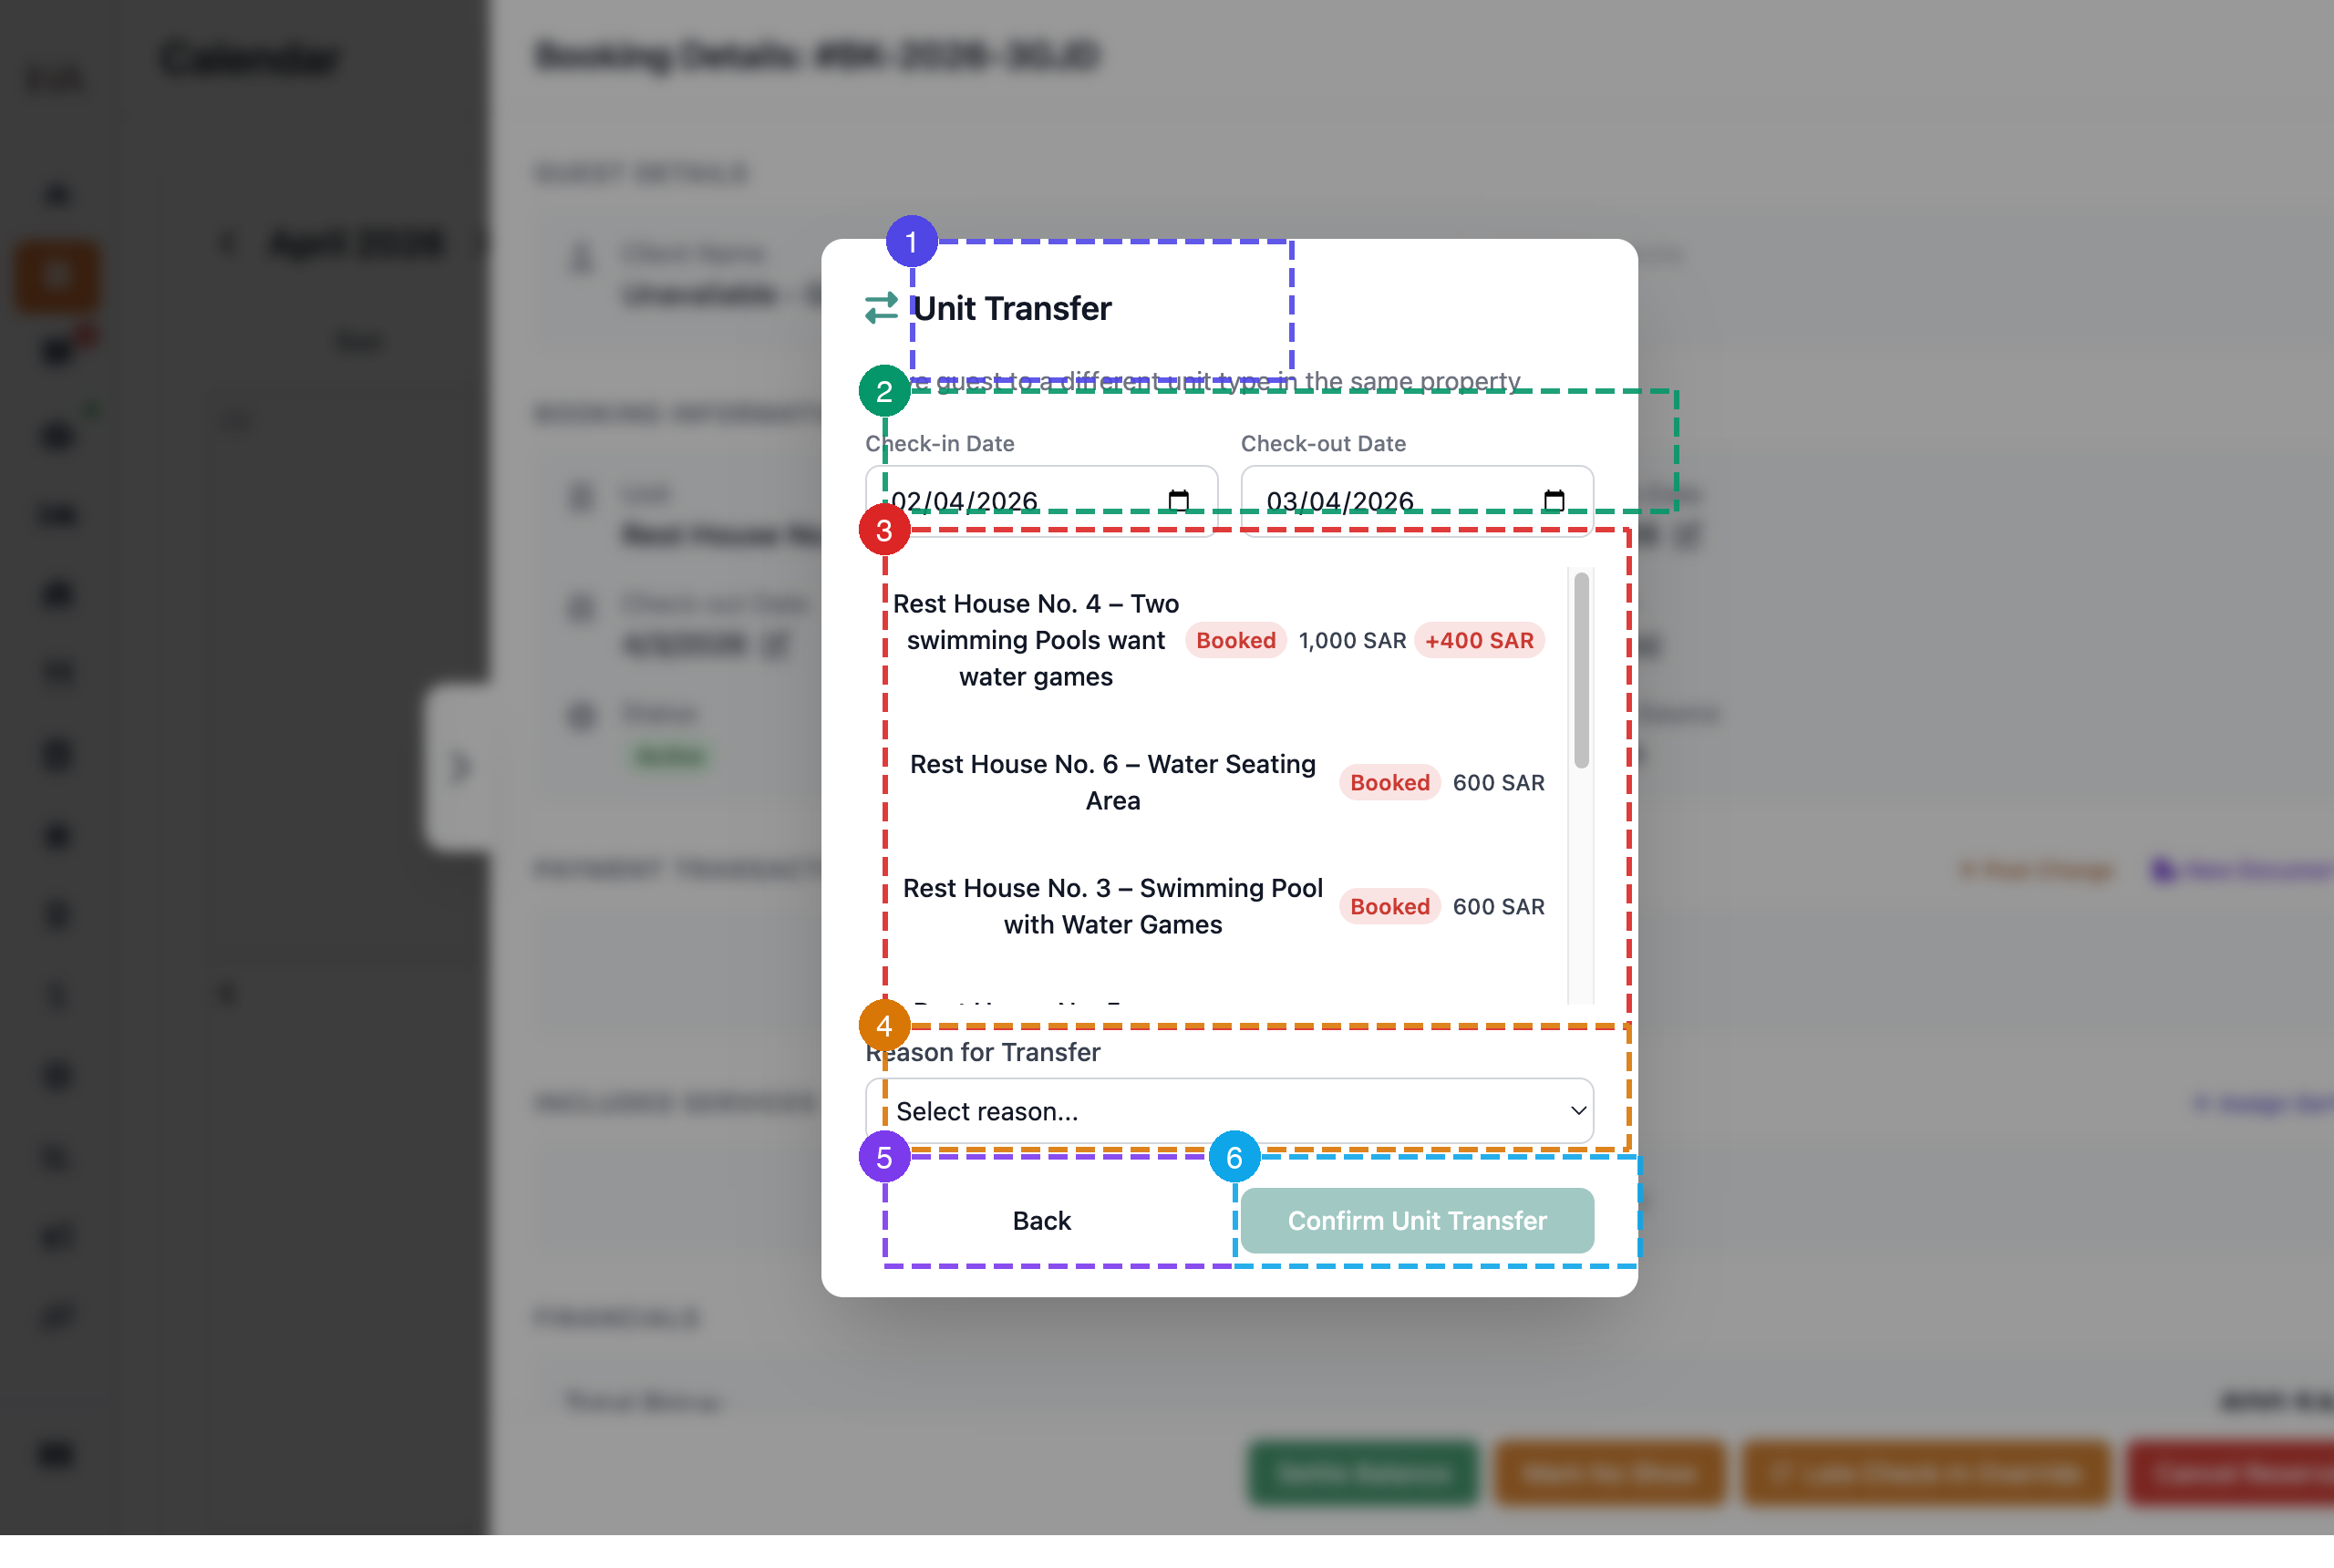
Click the ✏ icon next to the unit name in the Booking Information section to open the Unit Transfer window: ① Title — "Unit Transfer": move the guest to a different unit in the same property ② Date Range — confirms the check-in and check-out dates for the transfer ③ Unit List — all units with Booked/Available status badges and prices; scroll to choose the target unit ④ Reason for Transfer — required: Upgrade, Downgrade, Maintenance Issue, Guest Request, Overbooking Correction, or Other ⑤ Back — return to the panel without transferring ⑥ Confirm Unit Transfer — completes the move (active only after selecting an available unit and a reason)
Modify Booking Dates
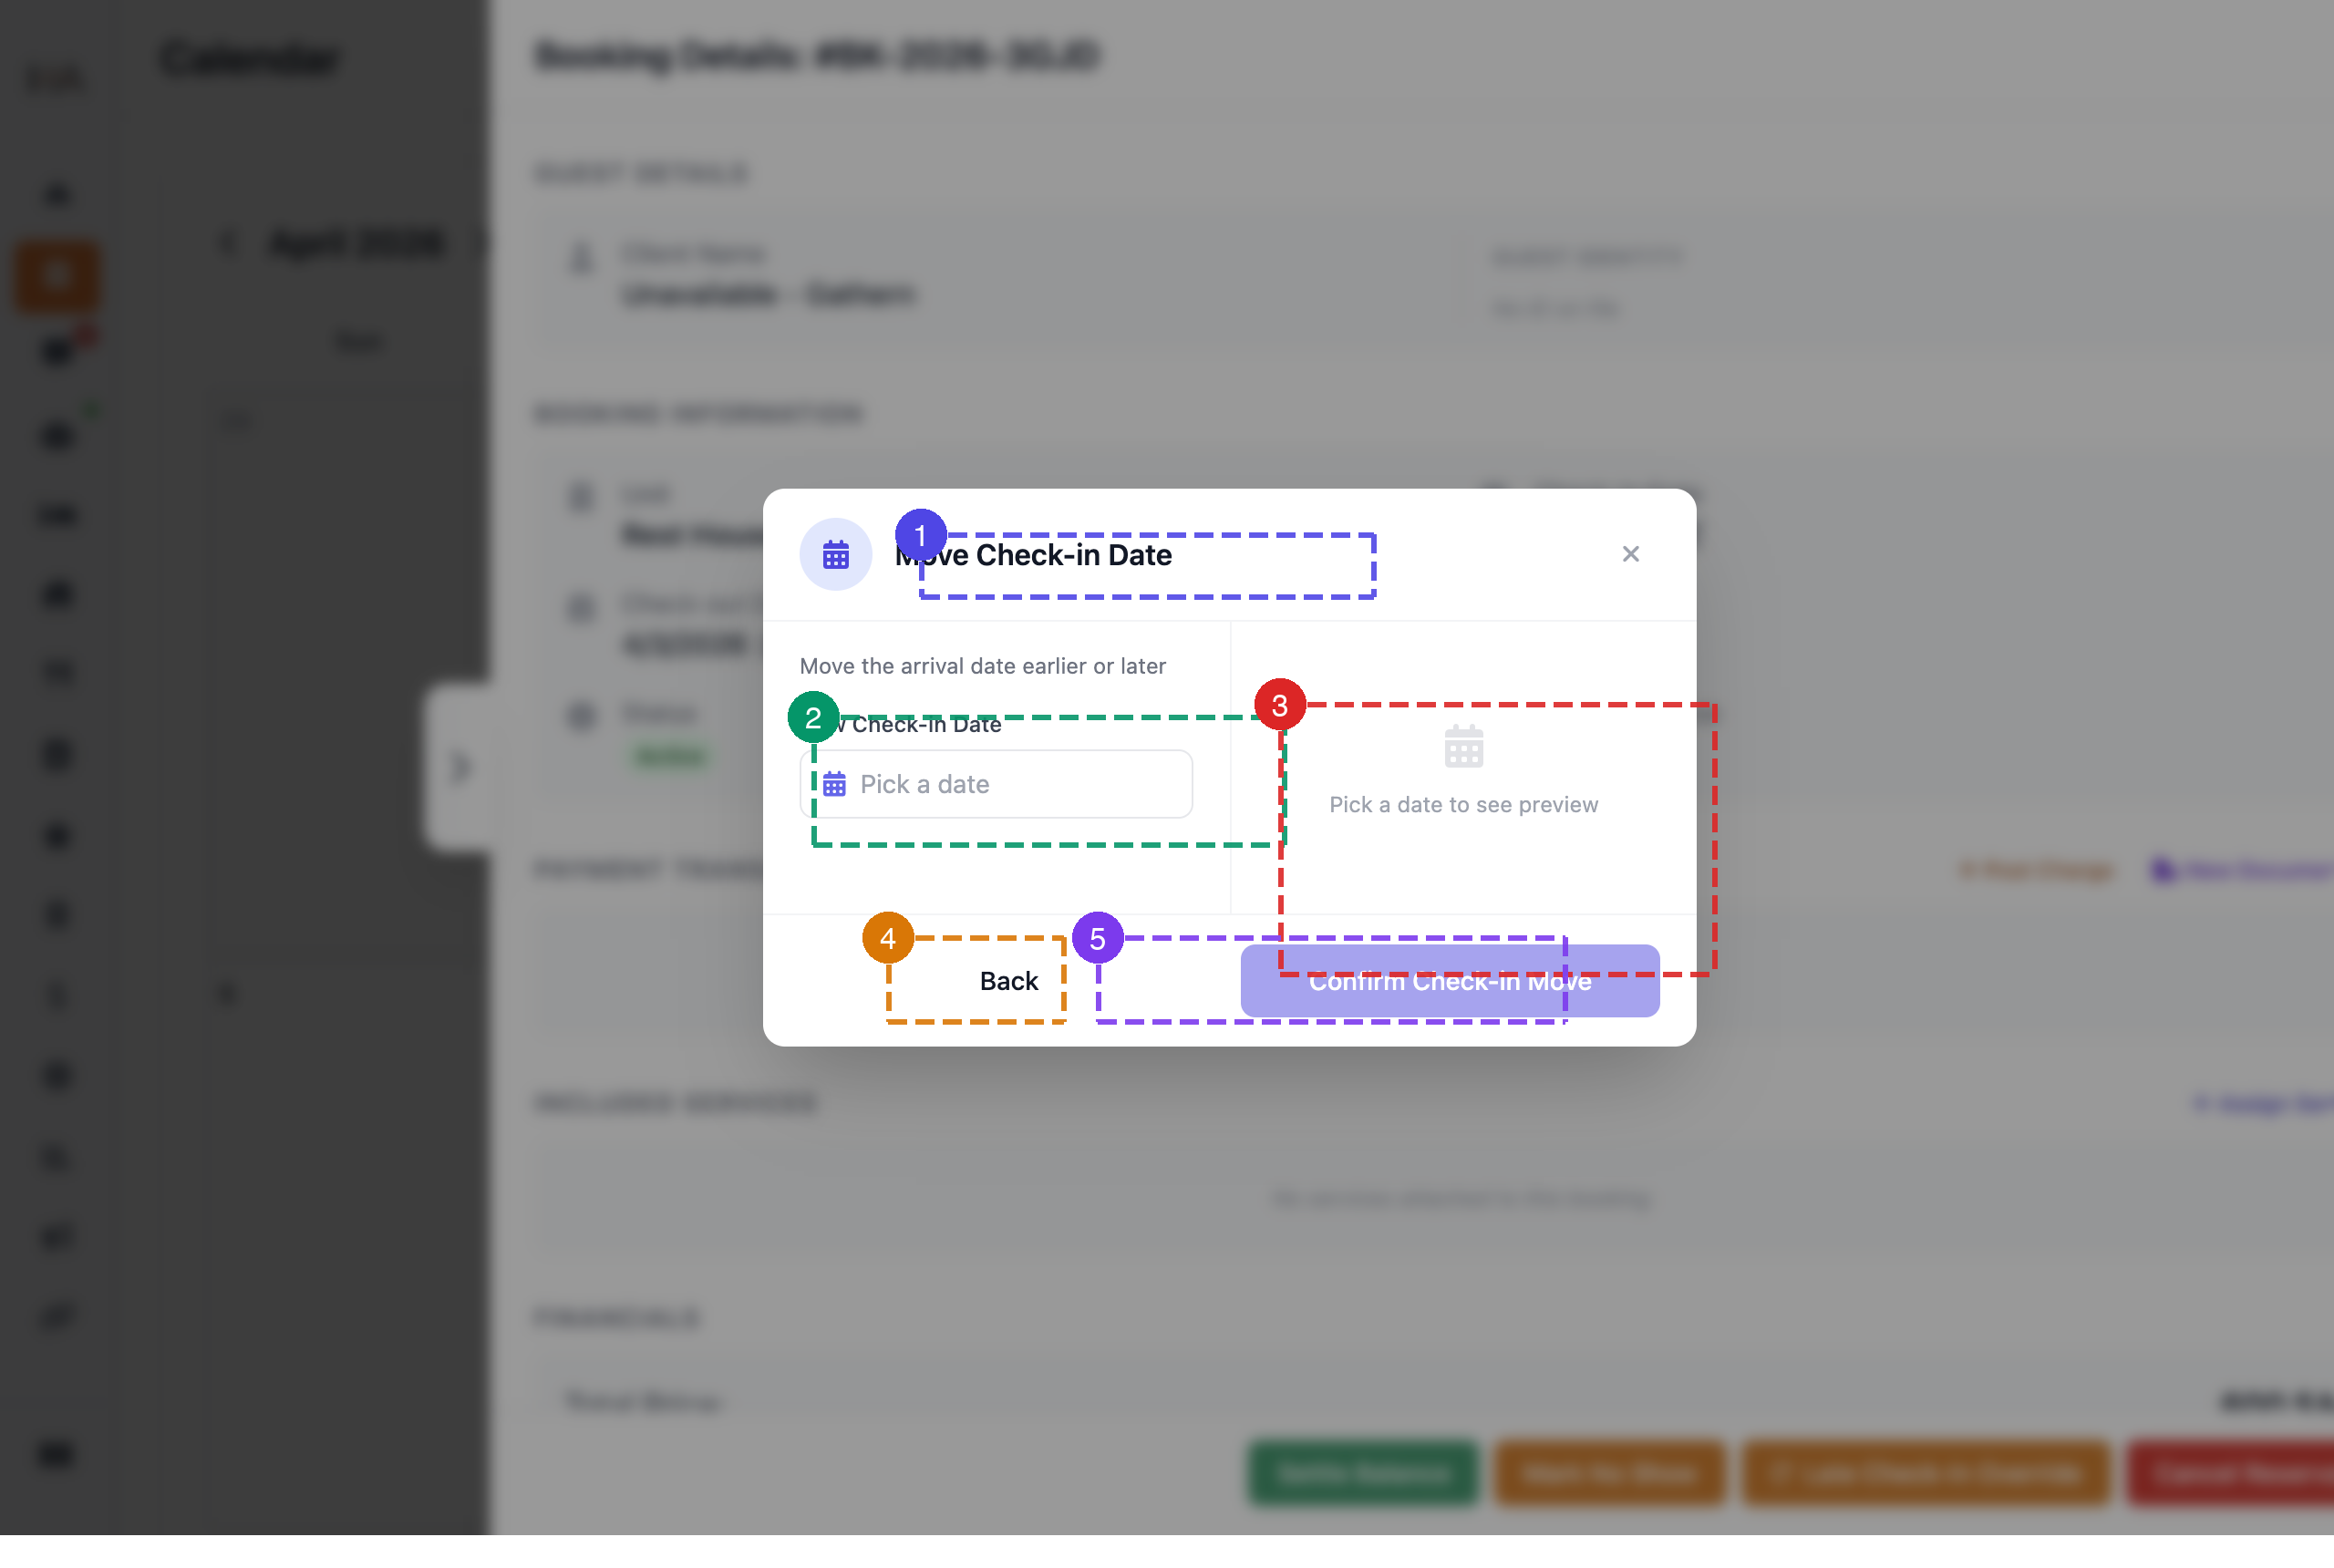
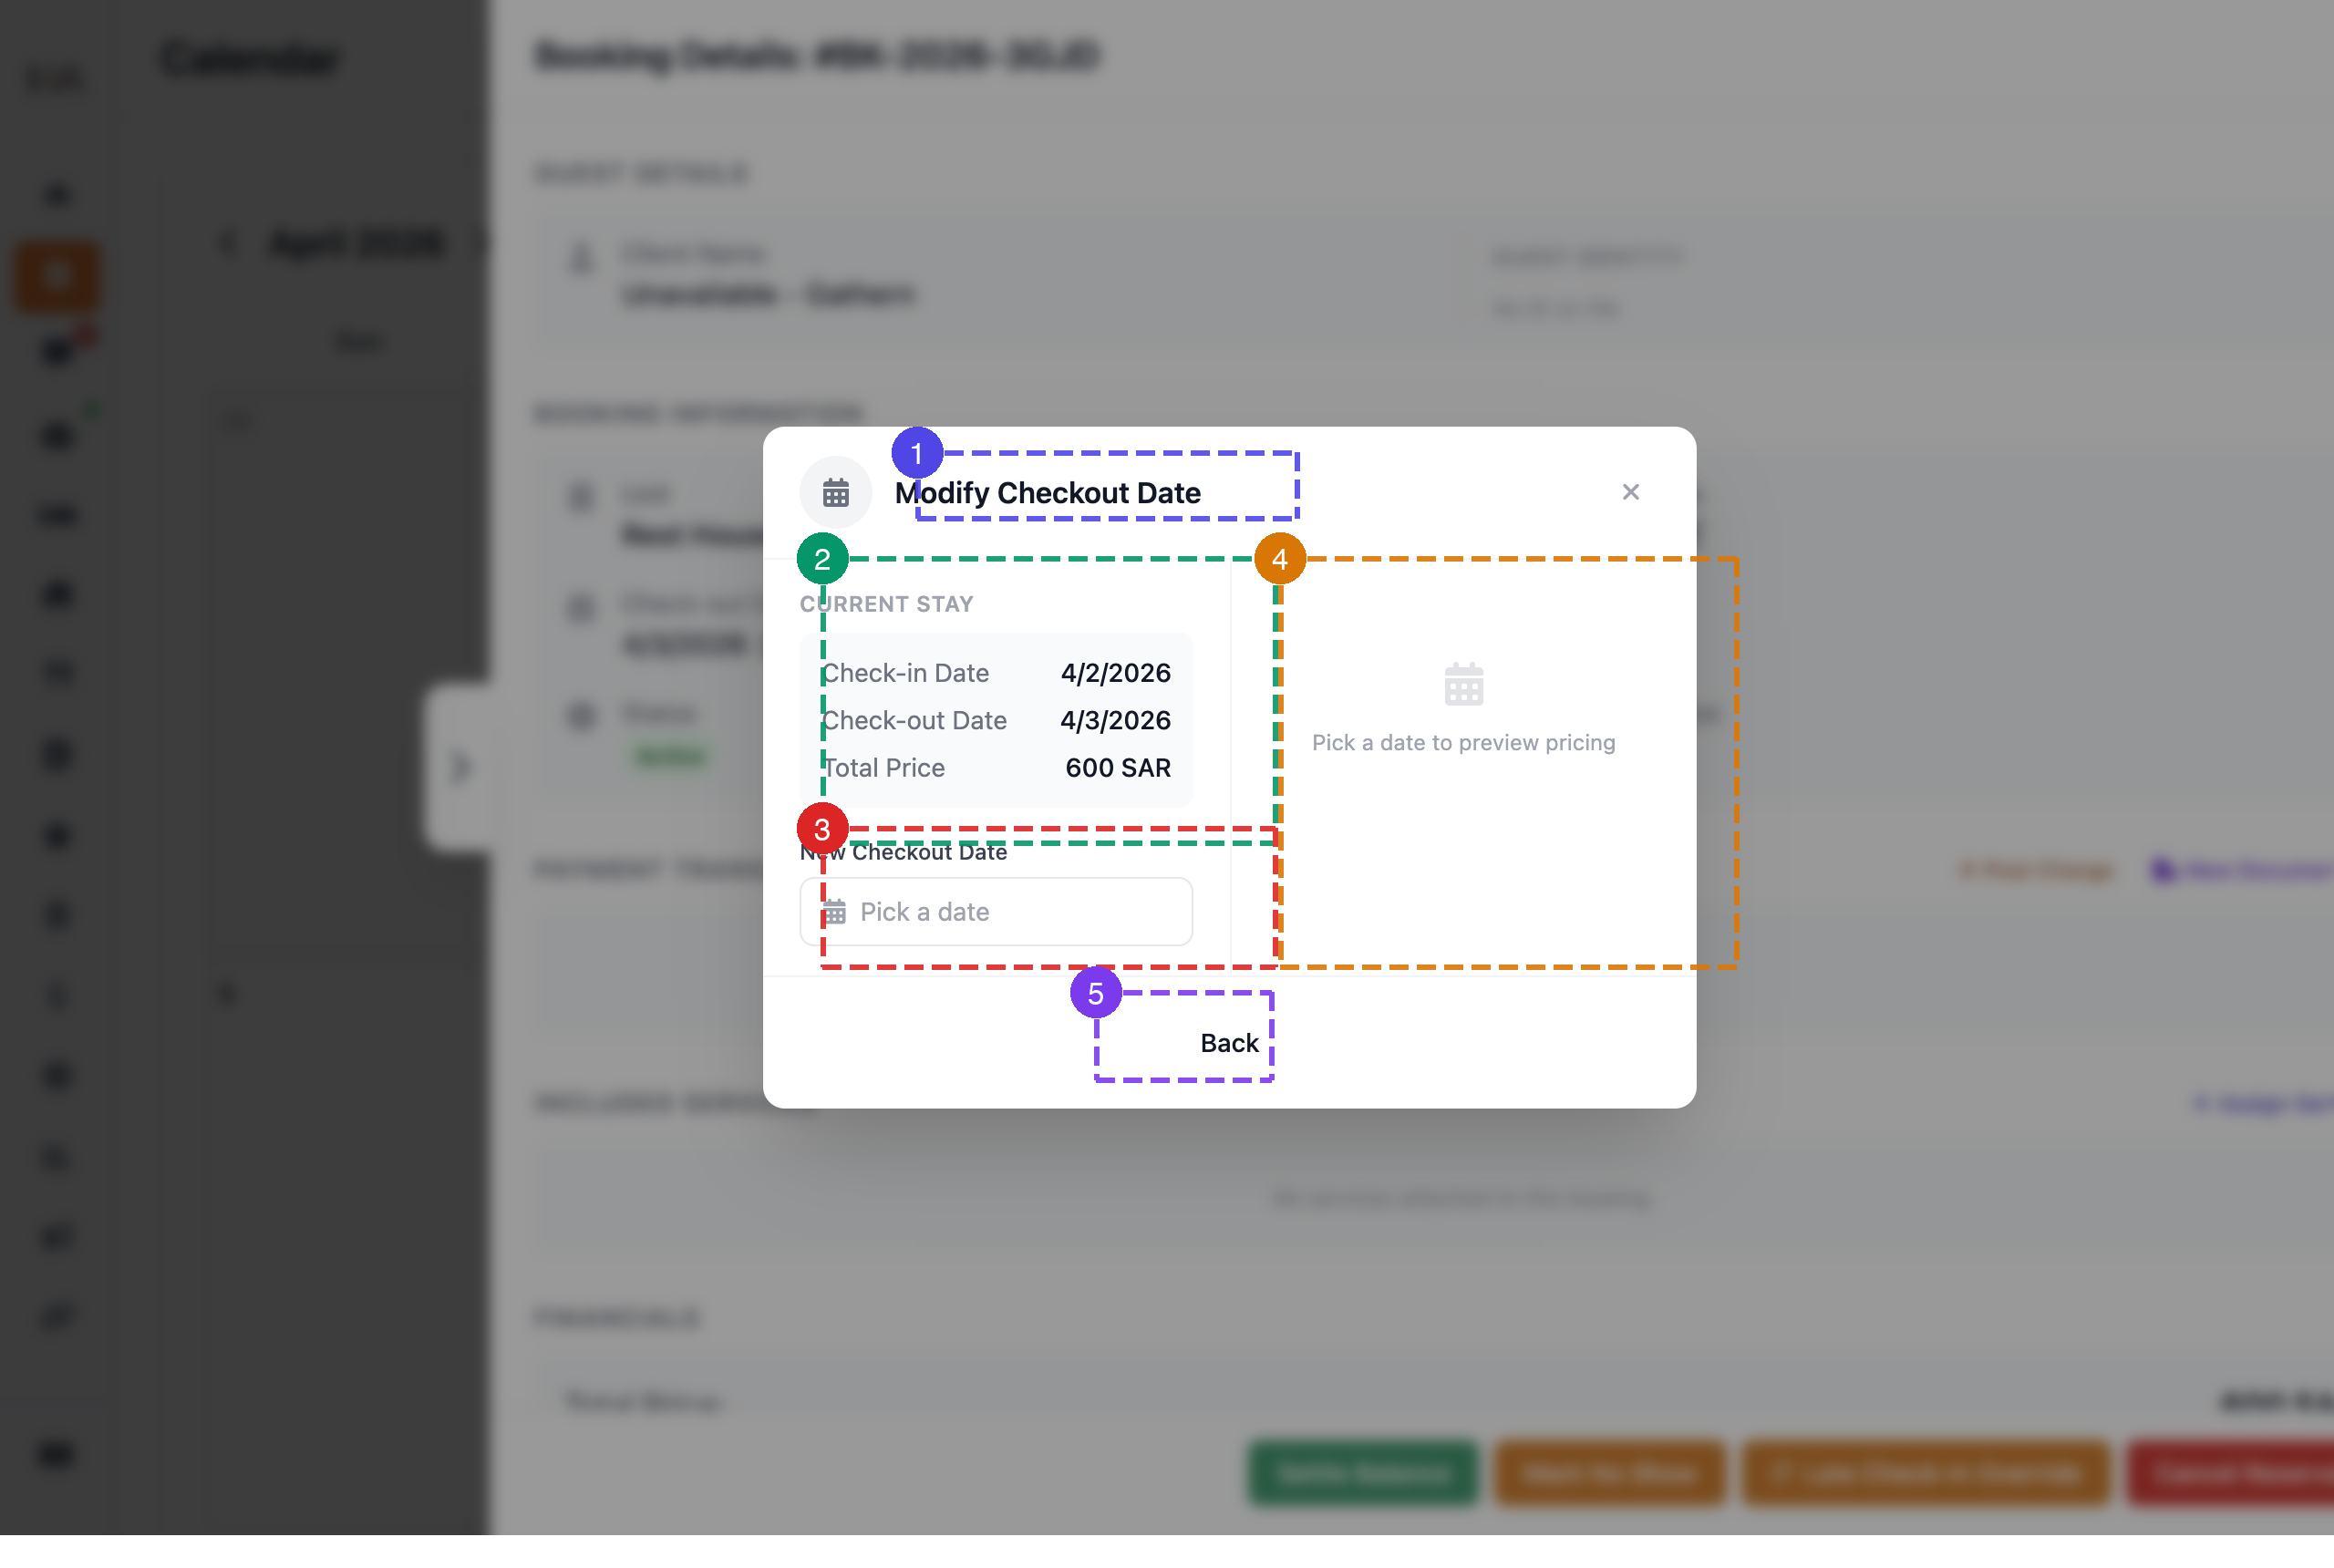
Click the ✏ icon next to Check-in Date or Check-out Date in the Booking Information section to adjust the stay duration.
Move Check-in Date
① Title "Move Check-in Date" — move the arrival date earlier or later ② New Check-in Date — date picker to select the updated arrival date ③ Preview — shows the impact on pricing once a date is selected ④ Back — cancel and return to the booking panel ⑤ Confirm Check-in Move — saves the new arrival date (disabled until a date is chosen)
Modify Check-out Date
① Title "Modify Checkout Date" ② Current Stay — shows current check-in date, check-out date, and total price for reference ③ New Checkout Date — date picker to extend or shorten the stay ④ Preview — shows updated pricing after a new date is selected ⑤ Back — cancel and return to the booking panel
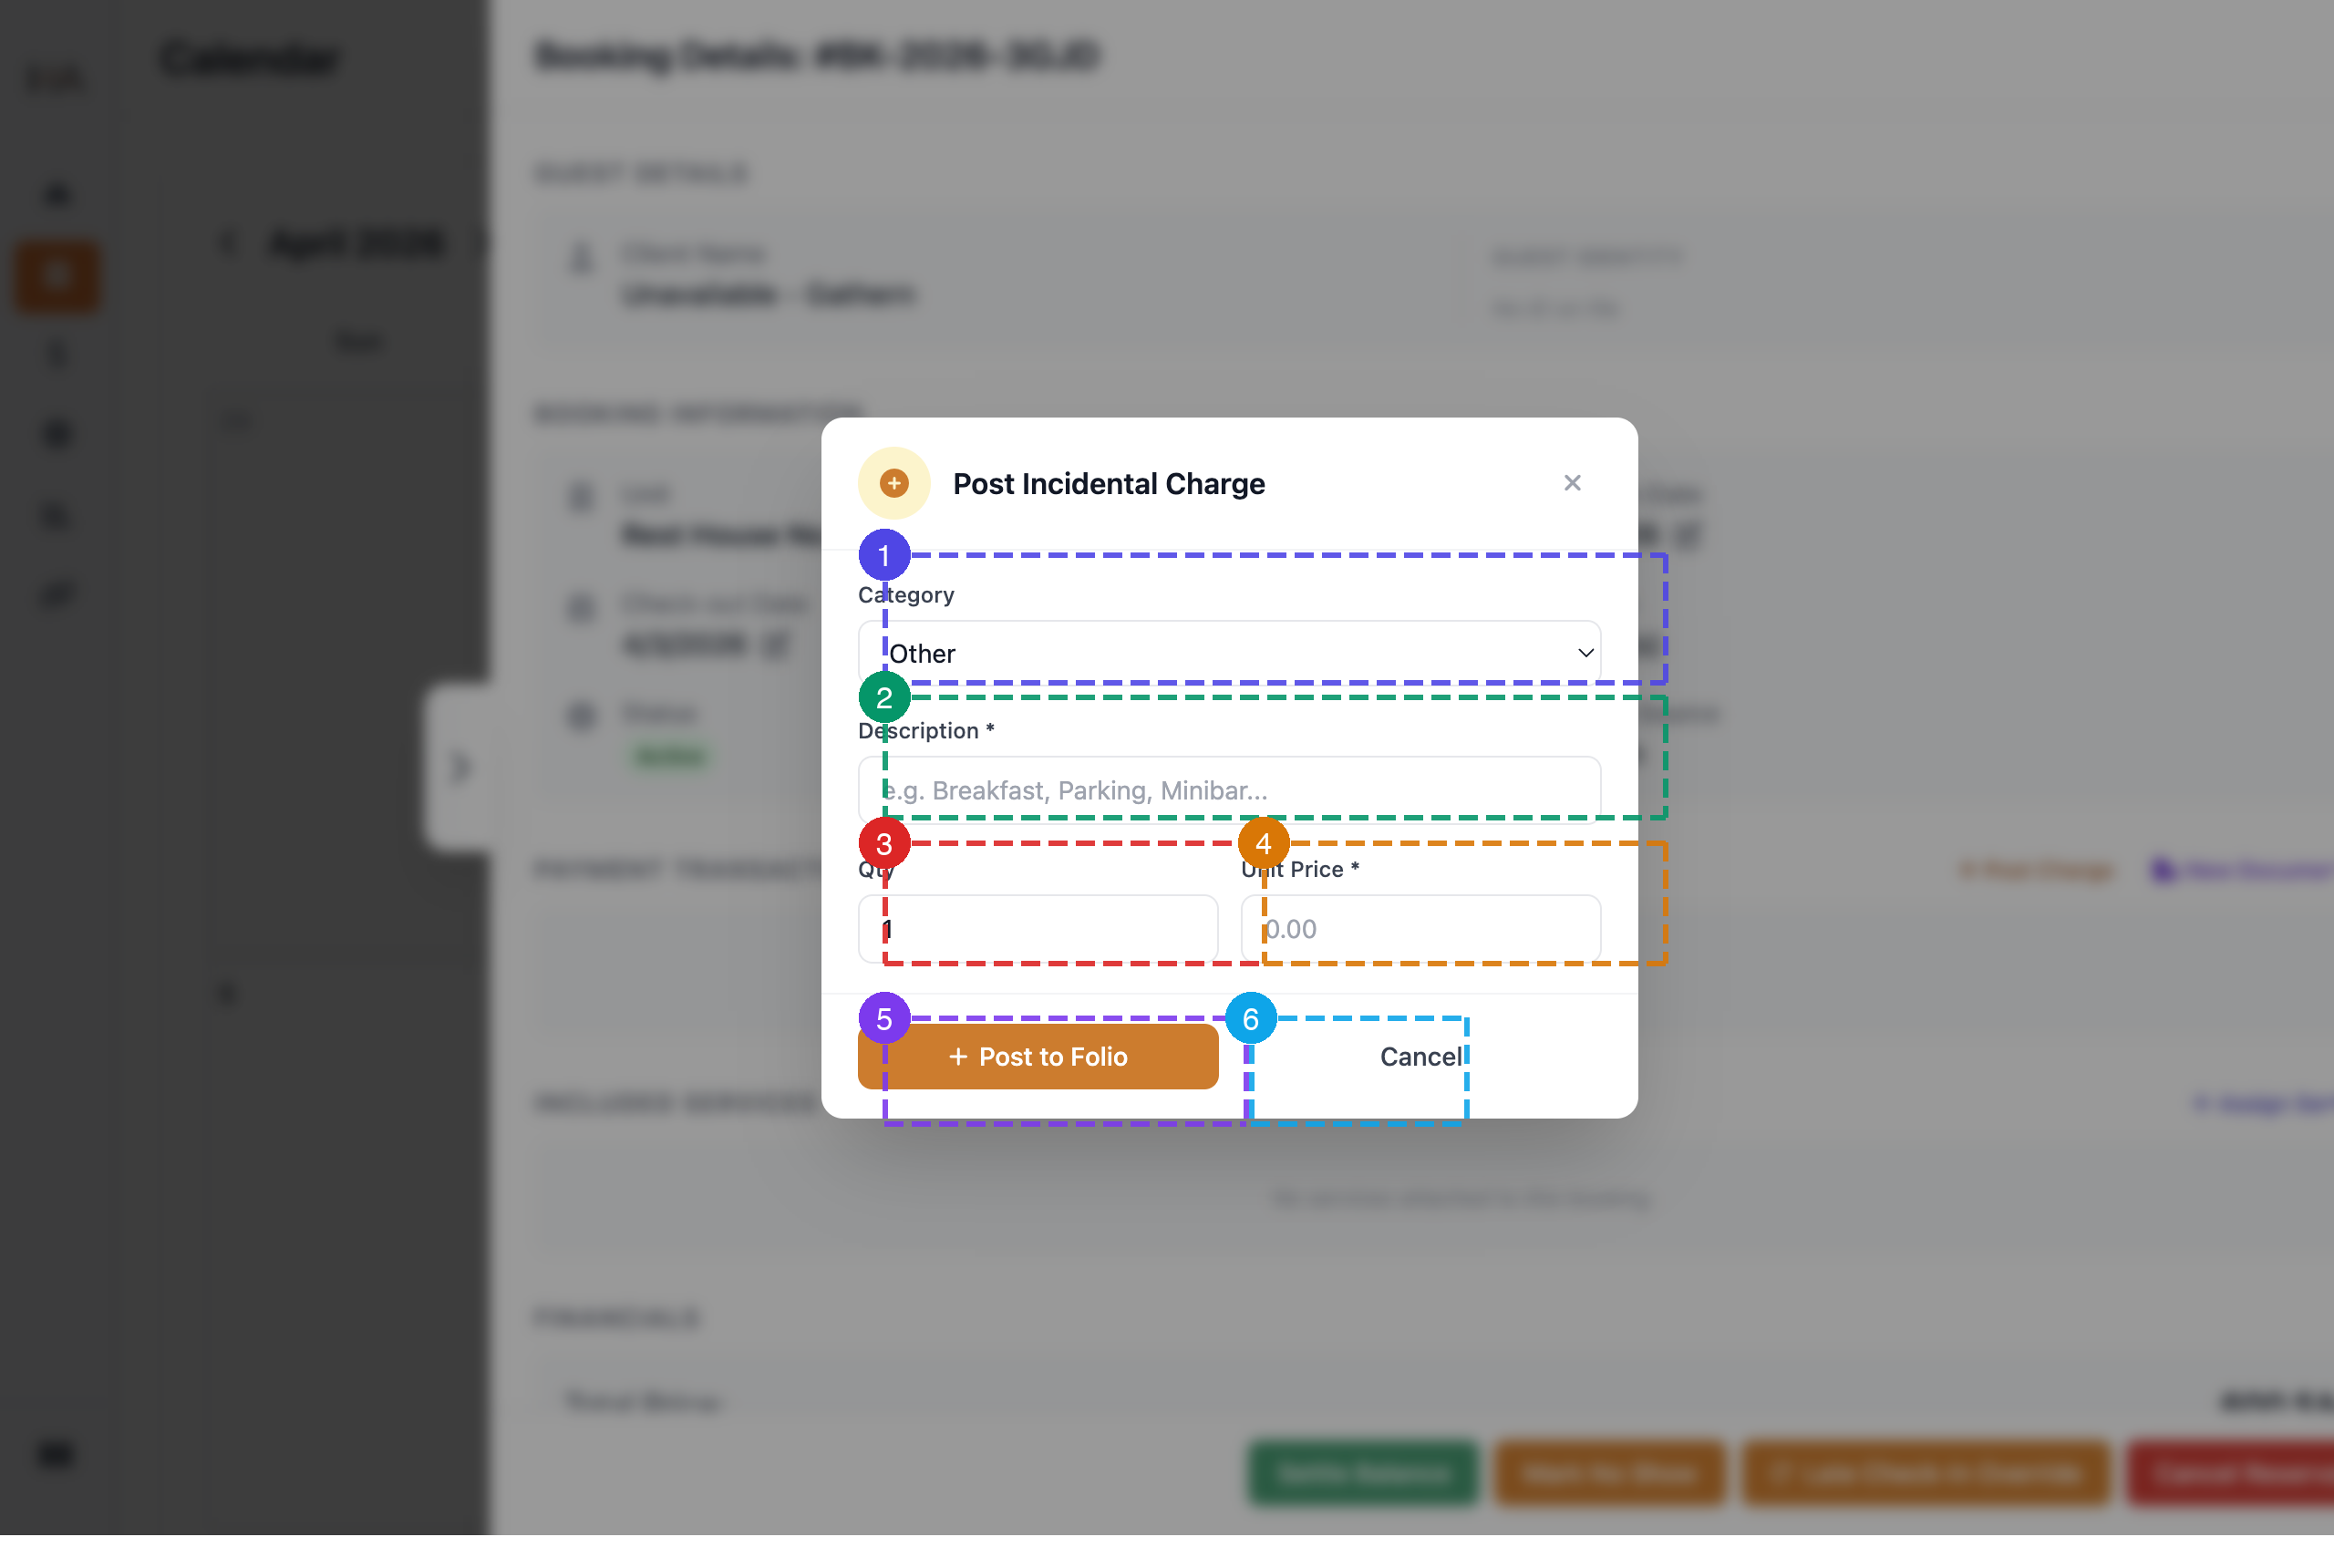
Post an Incidental Charge
In the Payment Transactions section, click "+ Post Charge" to record any extra expense during the stay: ① Category — select the charge type: Food & Beverage, Minibar, Parking, Laundry, Spa & Wellness, Late Check-Out, Early Check-In, Damage & Repair, Activities & Sport, or Other ② Description — enter a description of the charge (required) ③ Qty — number of units (defaults to 1) ④ Unit Price — price per unit in SAR (required) ⑤ + Post to Folio — adds the charge to the booking's transaction record ⑥ Cancel — dismiss without posting
Generate a Document
In the Payment Transactions section, click "New Document" to generate financial documents for the booking.
Select Document Type
① New Document — click to open the document type dropdown ② Issue Invoice — generates a tax invoice for the booking ③ Receipt — generates a payment receipt ④ Quotation — generates a price quotation
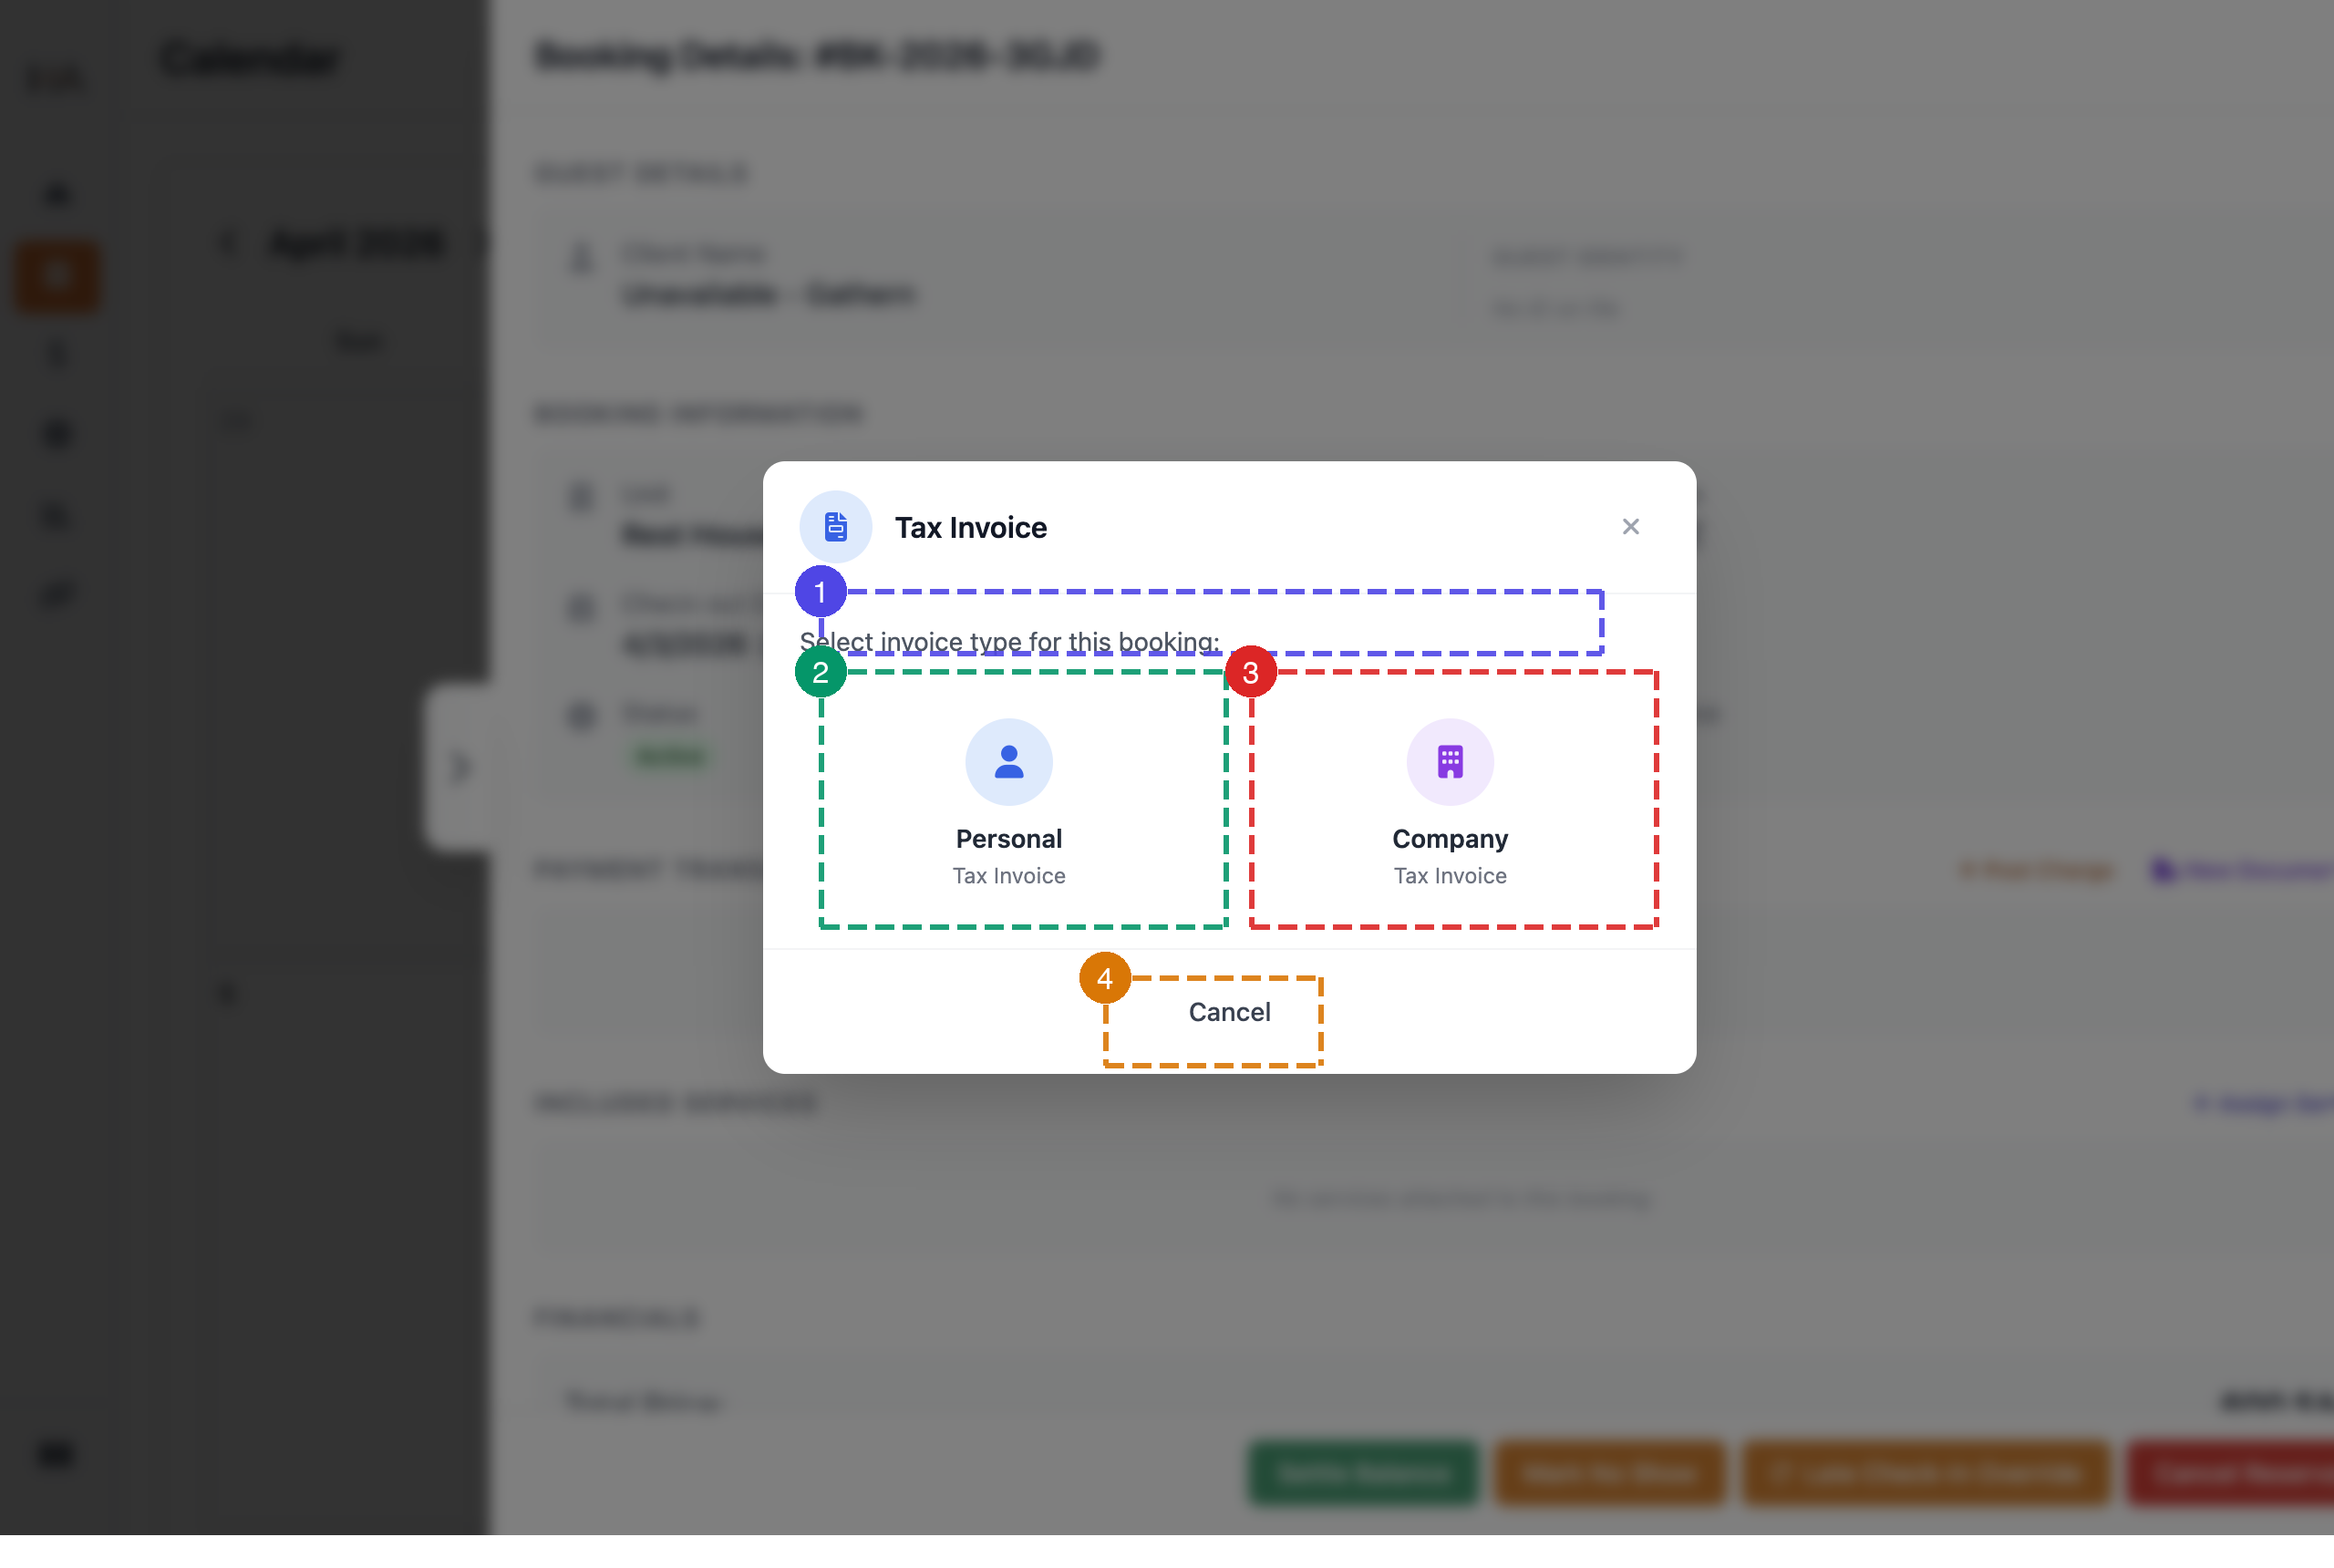
Issue a Tax Invoice
After clicking "Issue Invoice", select the invoice type: ① Prompt — "Select invoice type for this booking:" ② Personal Tax Invoice — for individual guests ③ Company Tax Invoice — for corporate bookings (includes company name and VAT number fields) ④ Cancel — return without generating an invoice
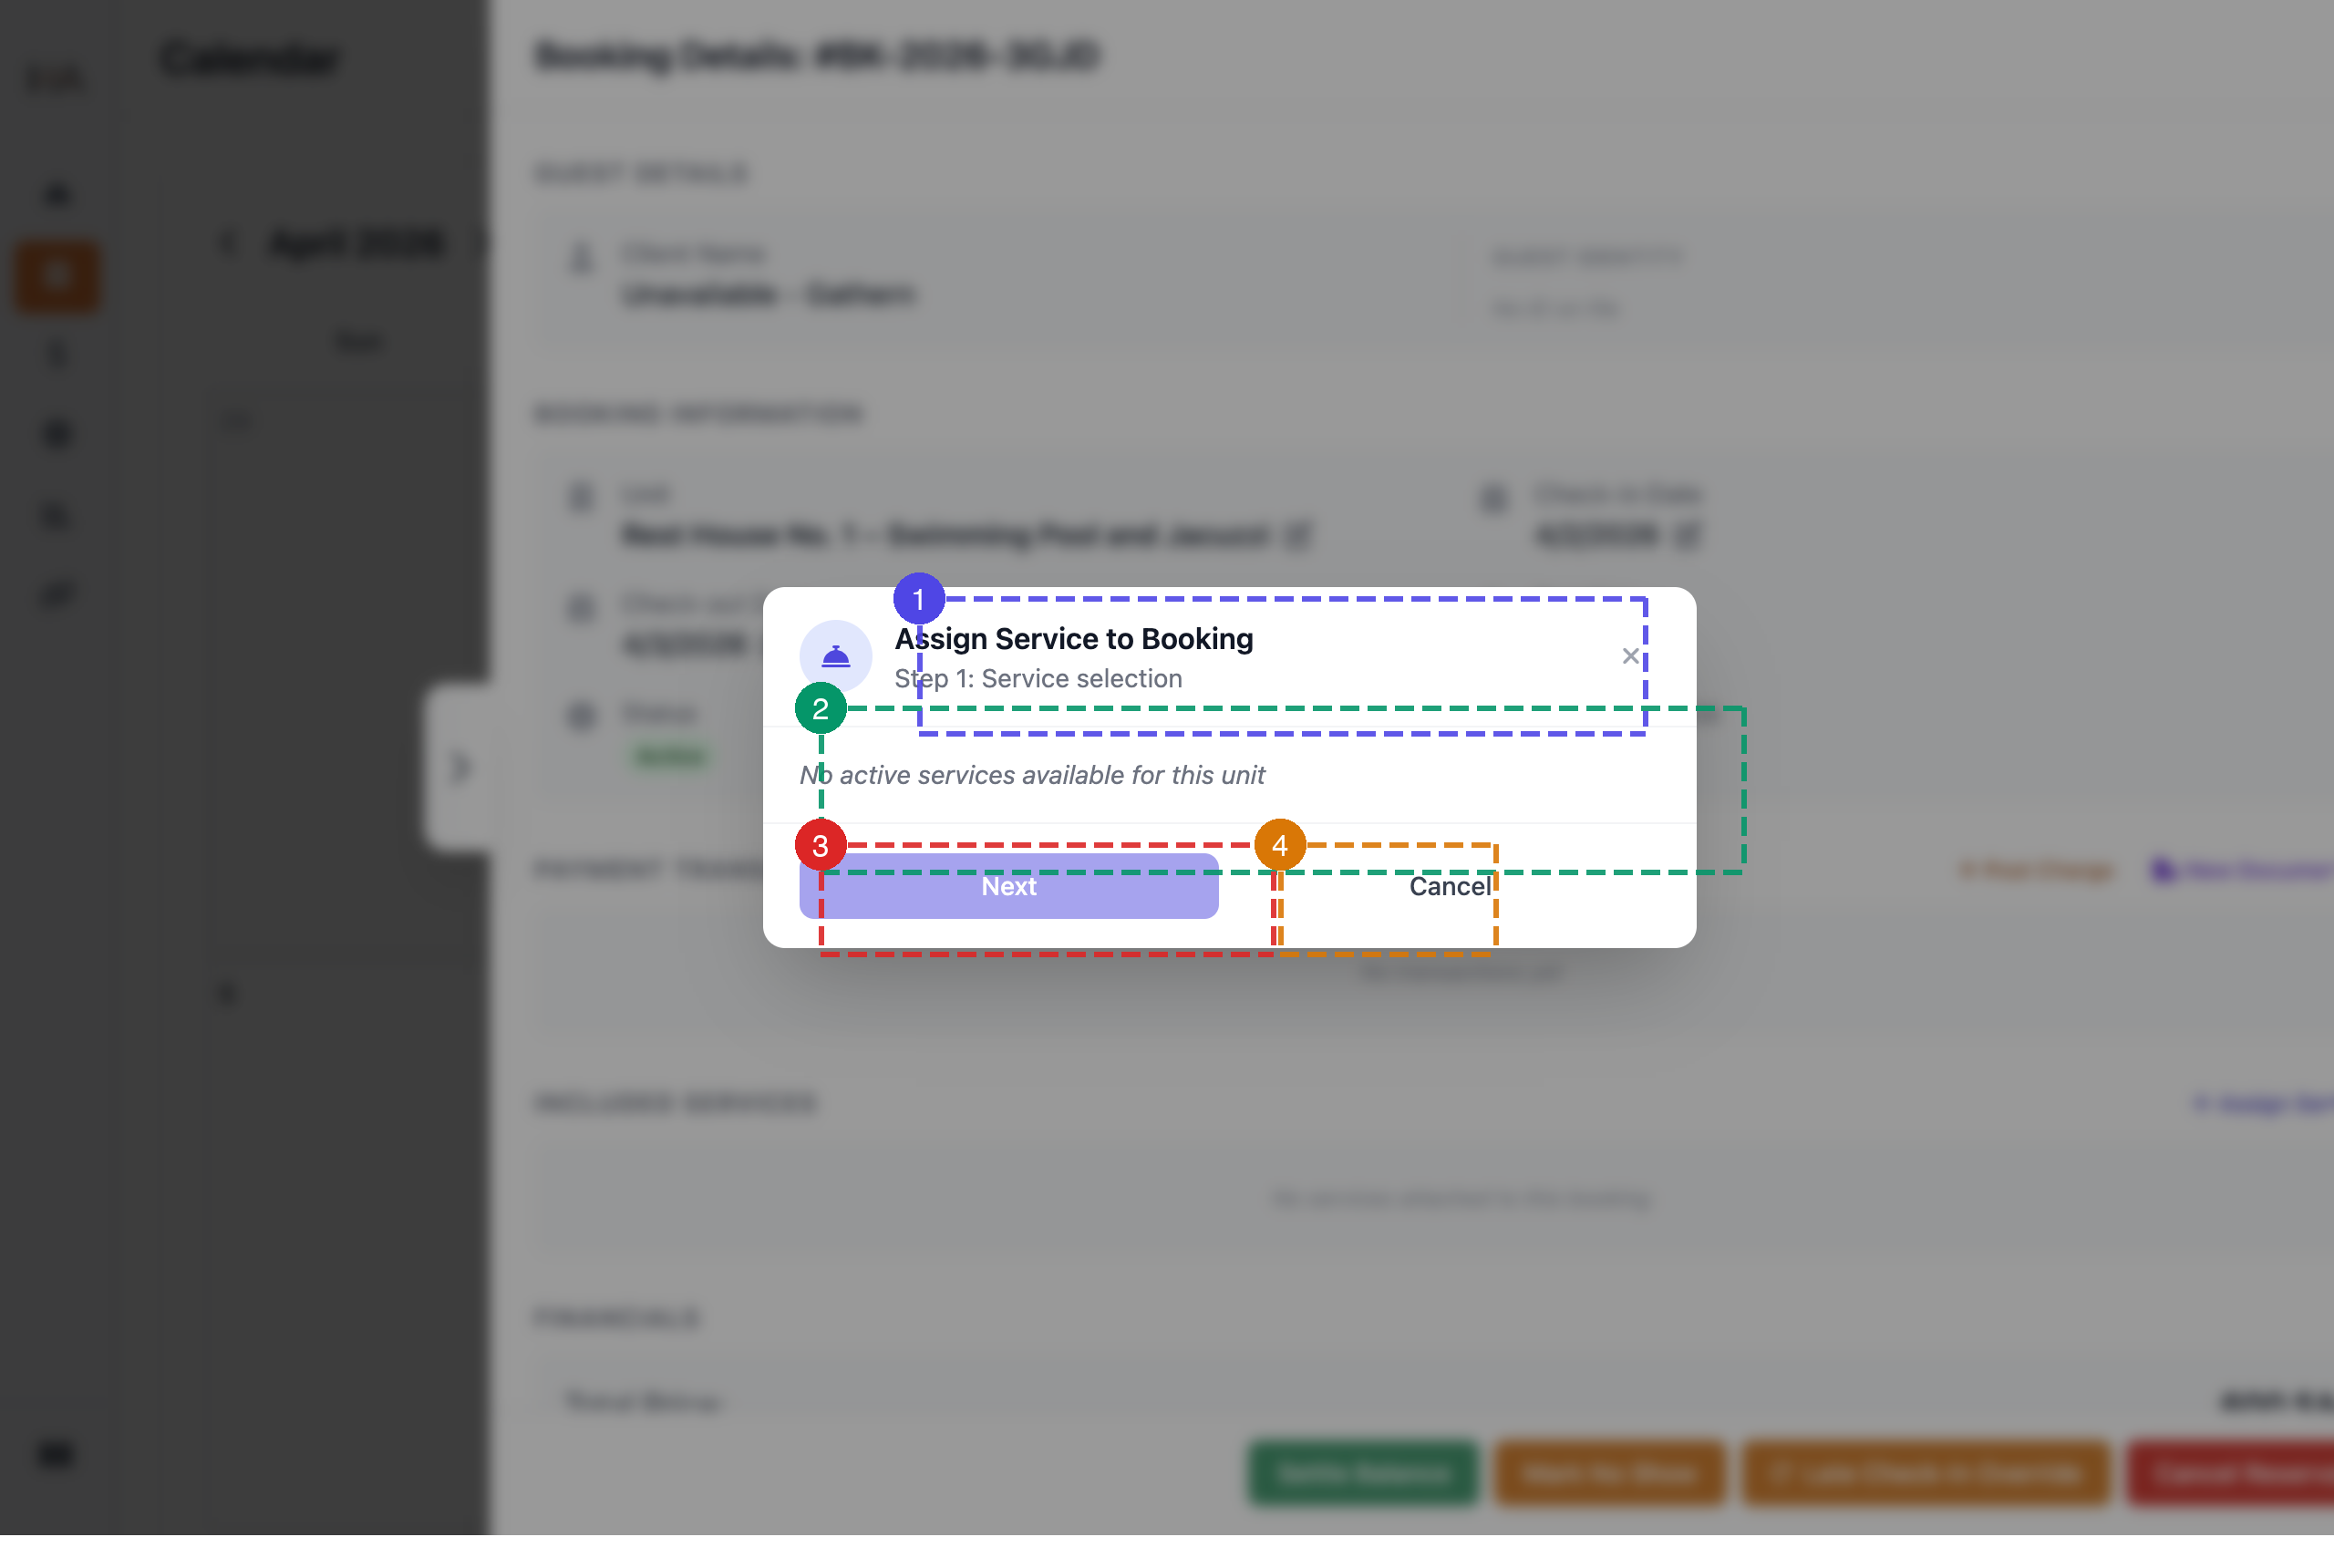
Assign a Service to the Booking
In the Included Services section, click "+ Assign Service" to add a service to the stay. Services must be active in unit settings before they appear here: ① Title "Assign Service to Booking" with "Step 1: Service selection" indicator ② Services List — shows active services available for this unit; displays "No active services available" if none are configured ③ Next — proceeds to service configuration (enabled after selecting a service) ④ Cancel — returns to the booking panel without assigning
View Financials & Apply a Coupon
Scroll down in the booking panel to see a full financial summary of the reservation.
Financials Overview
① Payment Transactions — all posted charges with "+ Post Charge" and "New Document" buttons ② Included Services — services assigned to the booking ③ Financials — Total Price, Paid Amount, Balance Due (highlighted in red when outstanding), Payment Status (Pending/Partial/Paid), and an "Apply coupon code" link
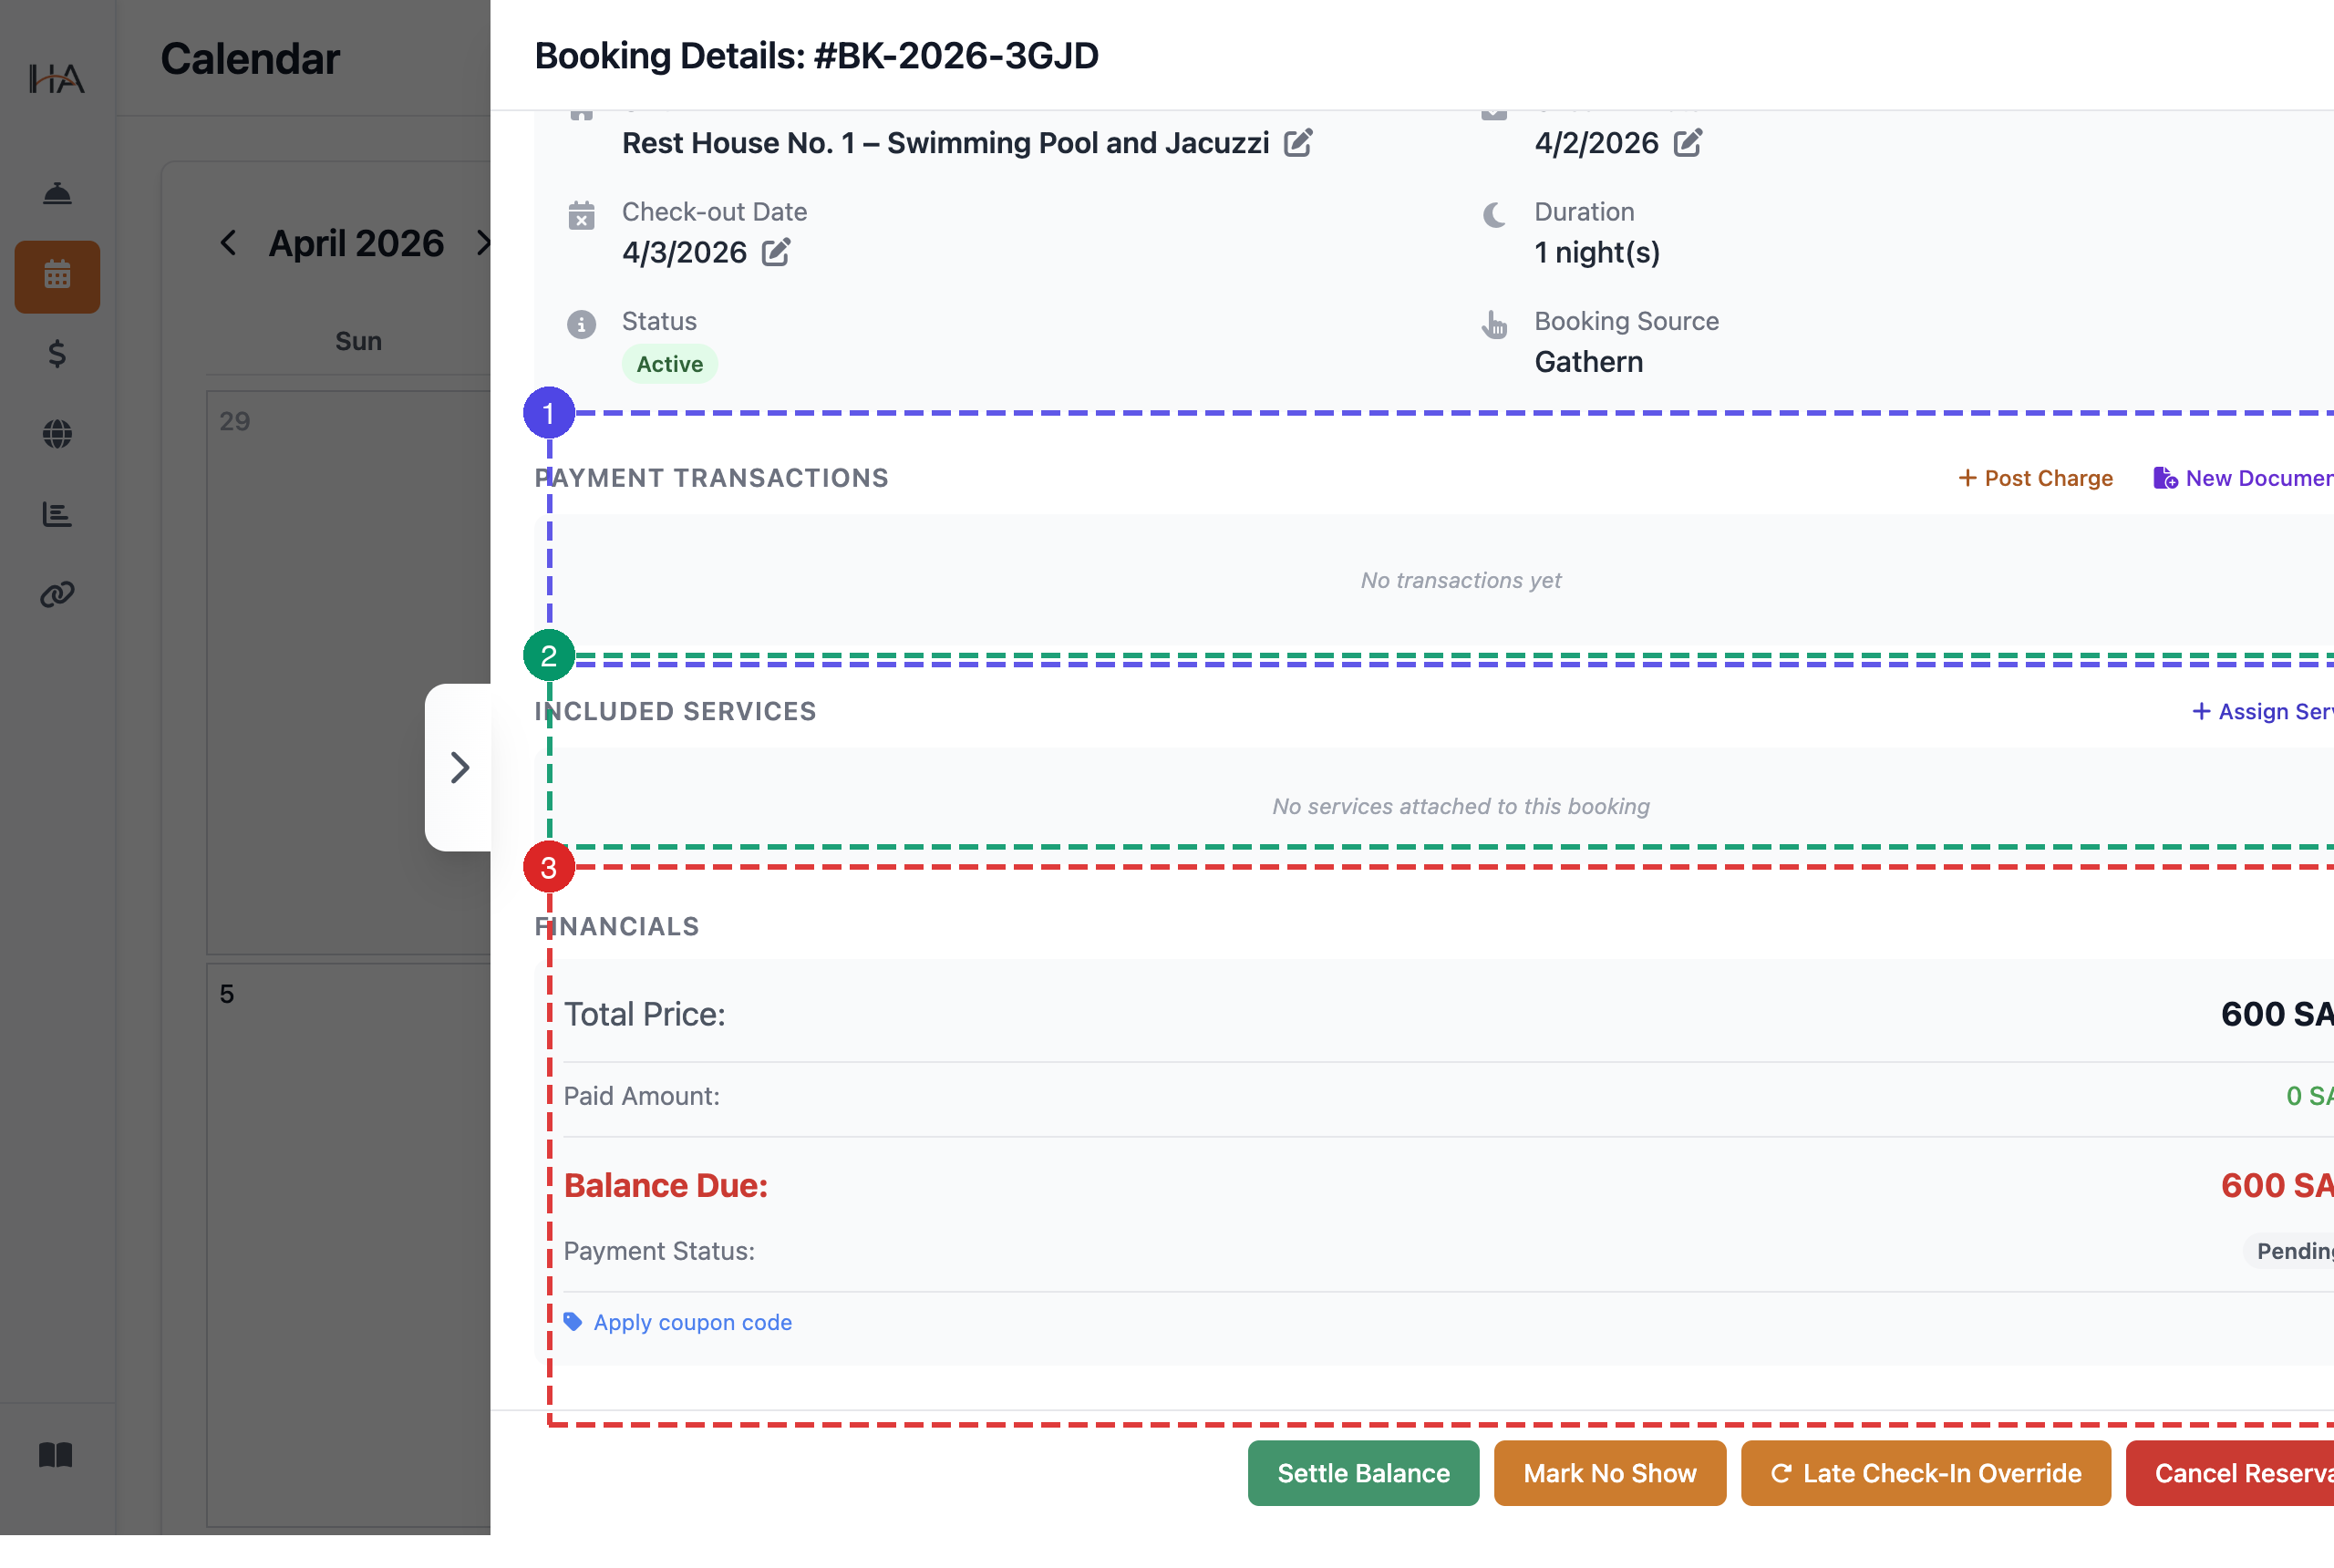
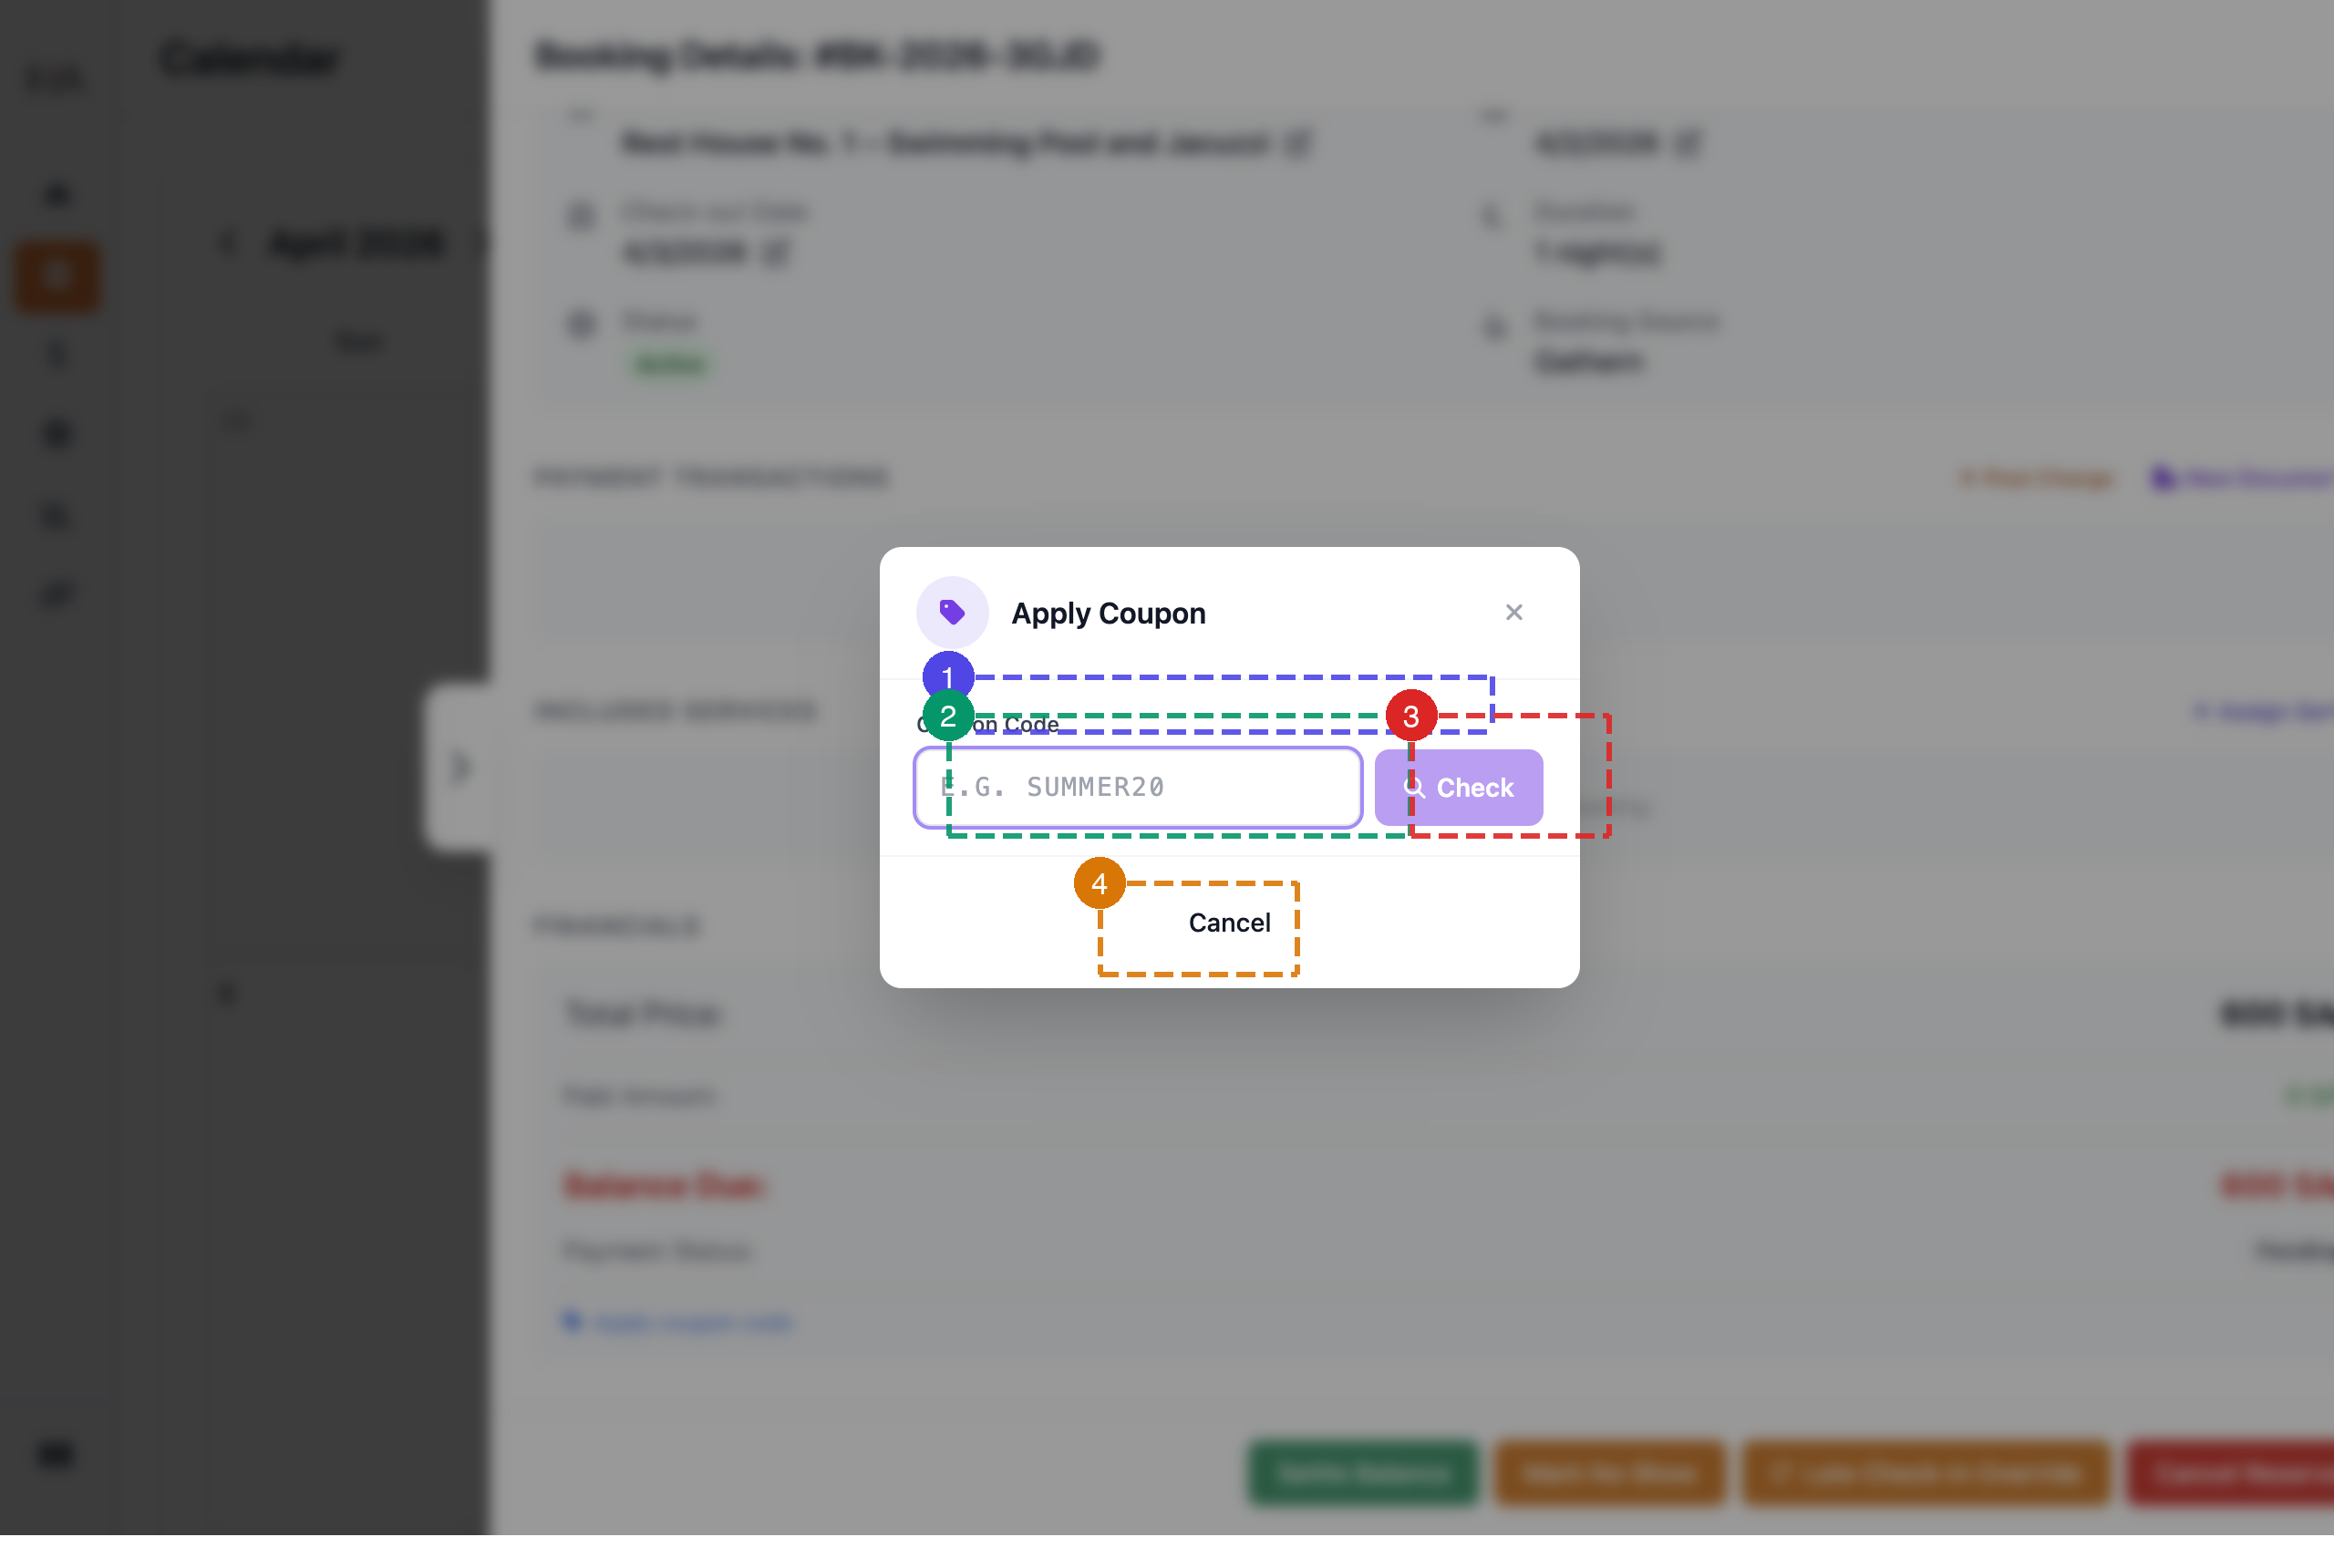
Apply a Coupon Code
Click "Apply coupon code" in the Financials section to open this window: ① Coupon Code — the label for the discount code input ② Input — enter the discount code (e.g. SUMMER20) ③ Check — validates the code and shows the discount amount if valid ④ Cancel — dismiss without applying the coupon
More in Calendar & Bookings
Understanding the Calendar View
Learn how to navigate the calendar, understand booking statuses, filter by units, and interpret the visual indicators.
Create a Manual Booking
Learn how to create a booking from the calendar using the Add Booking panel, including guest info, stay details, pricing edits, payment details, and final submission.
Modify Booking Dates
Learn how to move a booking's check-in or check-out date directly from the Booking Details panel using the inline pencil edit icons.
Cancel or Delete Bookings
Learn how to cancel bookings, process refunds, manage cancellation policies, and handle guest communication.
Set Custom Pricing on Specific Dates
Learn how to create price overrides for specific date ranges — replacing the base price or adding a fixed amount — and apply them to selected units.