Mapping Units to Channel Room Types (Mapping Tab)
Match each of your units to a channel room type and rate plan so prices, availability, and bookings flow to the right place.
Why Mapping Matters
Mapping is the most important step. It tells the system which of your units equals which room type on the channel, and which price list (rate plan) to use. Think of it as a translation table: - Your unit "Deluxe Double 101" → the channel's "Double Room" room type - That room type's price list → its "BAR" (Best Available Rate) rate plan If a unit is not mapped, the system cannot send its prices or availability anywhere, and a booking for it from an OTA cannot be matched automatically. Get mapping right and everything else just works. Open the Mapping tab at the top of the Channel Manager to begin.
Find the Unit You Want to Map
The Mapping tab shows one card per unit in your property. To work efficiently: - Use the search box to filter units by name when you have many. - Click a unit card to expand it and see its mapping options. - Use the collapse/expand all control to open or close every card at once. Each card represents one bookable unit from your dashboard. You will map every unit you want to sell online. Units you do not map will simply not appear on the OTAs, which is fine if you intentionally keep some rooms direct-only.
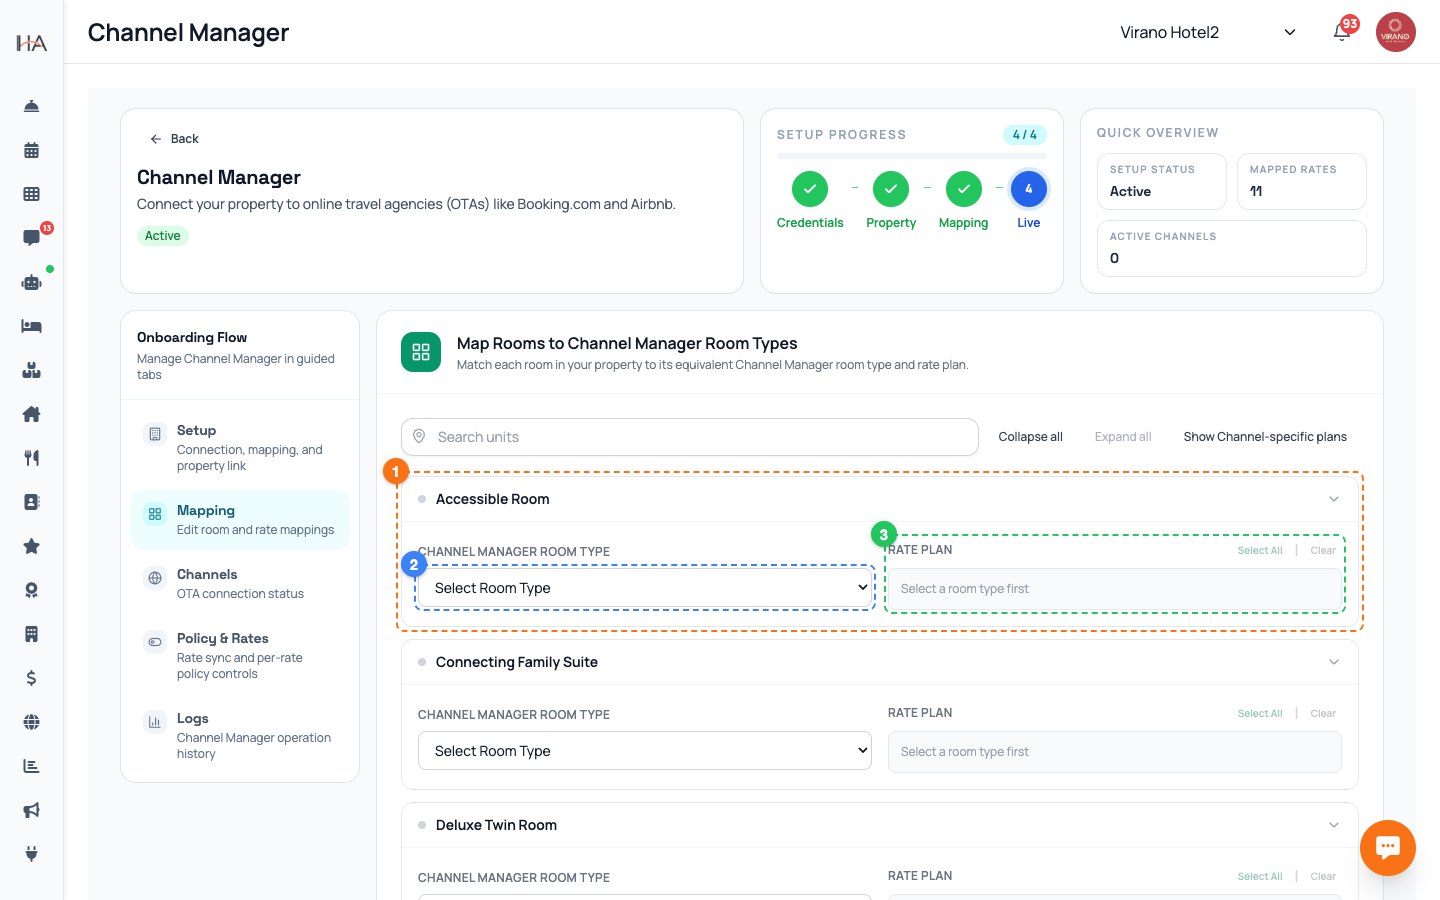
Pick the Channel Room Type
Inside each unit card, the first dropdown is labeled "Channel Manager room type." 1. Open the dropdown (it starts on "-- Select room type --"). 2. Choose the room type on the channel that matches this unit. Match by what guests actually book: a double room maps to a double room type, a two-bedroom apartment maps to a two-bedroom room type. If you have several identical units (for example five identical studios), they usually all map to the same channel room type, since OTAs sell by room type and count, not by individual room number. If a room type is missing from the list, create it in your channel account first, then come back.
Pick the Rate Plan
After choosing a room type, the second dropdown lets you pick the Rate plan for that unit. - It stays locked until you have selected a room type (it will say "Select a room type first"). - Once a room type is chosen, it lists the rate plans that belong to it. - Choose the rate plan you want your dashboard prices to feed, usually your standard or Best Available Rate plan. A rate plan is simply a price list with its own rules, such as a flexible rate or a non-refundable rate. If you see "No rate plans found for this room type," the room type has no price list yet on the channel side; add one there first. You can manage extra rate plans and their policies later in the Policy & Rates tab.
Save Mappings and Go Live
When you have mapped your units, save everything at once: 1. Review each unit card to confirm both the room type and rate plan are set. 2. Click Save Mappings & Activate at the bottom. This saves all your mappings together and, on first setup, switches the integration on so your property goes live with the OTAs. After saving, the system runs an initial sync to push your prices and availability. If that first sync runs into a problem you will see a notice, but your mappings are still saved; you can simply use Sync now on the Setup tab to retry. From now on, any future mapping change just needs Save again.
Editing Mappings Later
You can change mappings any time from the Mapping tab: - To add a new room, create the unit in your dashboard, then come back, expand its card, and set the room type and rate plan. - To fix a mistake, expand the unit, change the dropdowns, and click Save again. - To stop selling a unit online, you can remove its mapping. A few tips: - Always Save after any change so the OTAs get the update. - If a booking lands in the "unmapped" queue (see the Logs article), it usually means a unit was sold on the channel before it was mapped here. Fix the mapping, then handle the booking. - Keep one unit mapped to one room type and rate plan combination to avoid confusion.
More in Channel Manager
Channel Manager: One Two-Way Sync for All Your OTAs
Connect your property to Booking.com, Airbnb, Expedia and more through a single connection that keeps prices, availability, and bookings in sync automatically.
Connecting Your Property (Setup Tab)
Enter your channel manager access key, link your property, and run the first full sync so your dashboard and OTAs are in step.
Activating Channels: Booking.com, Airbnb, Expedia (Channels Tab)
Connect each online travel agency using a secure one-time login so your mapped rooms start selling on Booking.com, Airbnb, Expedia and more.
Policy & Rates: Control What Reaches the OTAs
Fine-tune the prices, availability, and stay restrictions pushed to each OTA, per rate plan, and run quick or bulk updates.
Logs & Troubleshooting (Logs Tab)
Read the operation history, handle bookings that could not be matched automatically, and fix common sync issues.