Activating Channels: Booking.com, Airbnb, Expedia (Channels Tab)
Connect each online travel agency using a secure one-time login so your mapped rooms start selling on Booking.com, Airbnb, Expedia and more.
Open the Channels Tab
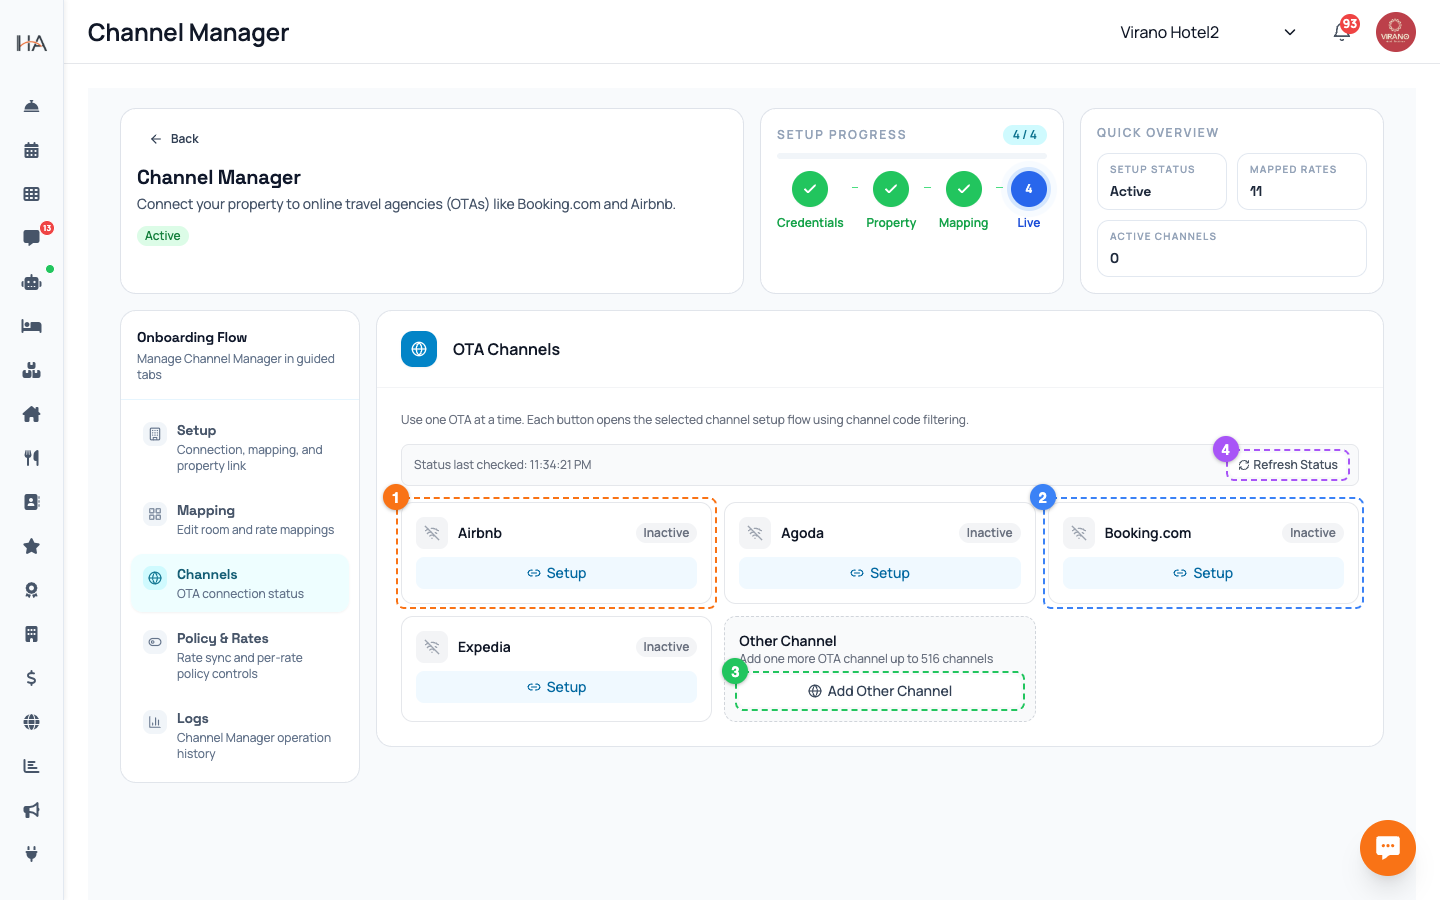
Once your property is connected and your units are mapped, open the Channels tab in the Channel Manager. This is where you turn on the individual OTAs you want to sell on. The tab shows: - Cards for OTAs that are already active for your property, with their status. - A way to add and activate new channels such as Booking.com, Airbnb, and Expedia. Important: activate channels only after mapping is complete. A channel that goes live with no mapped rooms cannot receive your prices or availability. If your Mapping tab is not finished, do that first.
Find the OTA You Want
To add a channel: 1. On the Channels tab, look for the option to browse other channels. 2. A list of all available OTAs opens, with a search box. 3. Type the name (for example Booking.com, Airbnb, or Expedia) to find it quickly. 4. Select the channel you want to activate. You can connect several channels, one at a time. Each OTA has its own activation, so you repeat this for every platform you sell on. Only connect channels where you actually have an active listing or account, since activation links your existing OTA account to the Channel Manager.
Activate Using the One-Time Login
When you choose a channel and click to activate, a secure connection window opens right inside the dashboard: 1. A panel from the channel manager loads, using a safe one-time login token, so you do not have to handle passwords manually. 2. Sign in to your OTA account when prompted (for example your Booking.com extranet or your Airbnb login). 3. Approve the connection and follow any steps the OTA shows. This window is provided by the channel manager and the OTA themselves. Complete every step they ask for. When you finish, the window closes and the channel is linked to your property.
Connect the Room Mapping on the OTA Side
Some OTAs ask you to confirm which of their room types corresponds to your room types during activation. If you see this: - Match each OTA room type to the same room type you already set up in the Mapping tab. - Make sure the names and bed setups line up so guests book the right room. This double mapping (your unit to a channel room type, and the channel room type to the OTA's own listing) is what lets a Booking.com or Airbnb reservation arrive correctly in your dashboard. If you are unsure, the OTA's own help screens guide you, and the listing must already exist on that OTA before it can be matched.
Confirm the Channel Is Active
After activation, return to the Channels tab. The OTA you just connected should now appear as an active channel card with its logo and a connected status. When a channel first goes active, the system automatically pushes a fresh sync to it so it immediately has your correct prices and availability, you do not need to press Sync now for this. To check it worked: - Confirm the channel card shows as connected. - Open the Logs tab and look for an "Activate channel" entry and a channel activation sync entry with a success outcome. - If you sell on more OTAs, repeat the activation for each one.
Managing and Removing Channels
Your channels are not set-and-forget; you can adjust them later: - To stop selling on a channel for a while, you can deactivate it from the Channels tab. Deactivating stops sending updates to that OTA. - To resume, activate it again. - The Logs tab records each "Activate channel" and "Deactivate channel" action with a timestamp, so you always know who changed what and when. Keep in mind that turning a channel off here only affects this connection; your listing may still exist on the OTA. If you want to fully close a listing, do that in the OTA's own dashboard as well. Only owners and managers with channel permission can activate or deactivate channels.
More in Channel Manager
Channel Manager: One Two-Way Sync for All Your OTAs
Connect your property to Booking.com, Airbnb, Expedia and more through a single connection that keeps prices, availability, and bookings in sync automatically.
Connecting Your Property (Setup Tab)
Enter your channel manager access key, link your property, and run the first full sync so your dashboard and OTAs are in step.
Mapping Units to Channel Room Types (Mapping Tab)
Match each of your units to a channel room type and rate plan so prices, availability, and bookings flow to the right place.
Policy & Rates: Control What Reaches the OTAs
Fine-tune the prices, availability, and stay restrictions pushed to each OTA, per rate plan, and run quick or bulk updates.
Logs & Troubleshooting (Logs Tab)
Read the operation history, handle bookings that could not be matched automatically, and fix common sync issues.