Lost & Found
Log items left behind by guests, track each one through its lifecycle, and record when it is returned, donated, or disposed of.
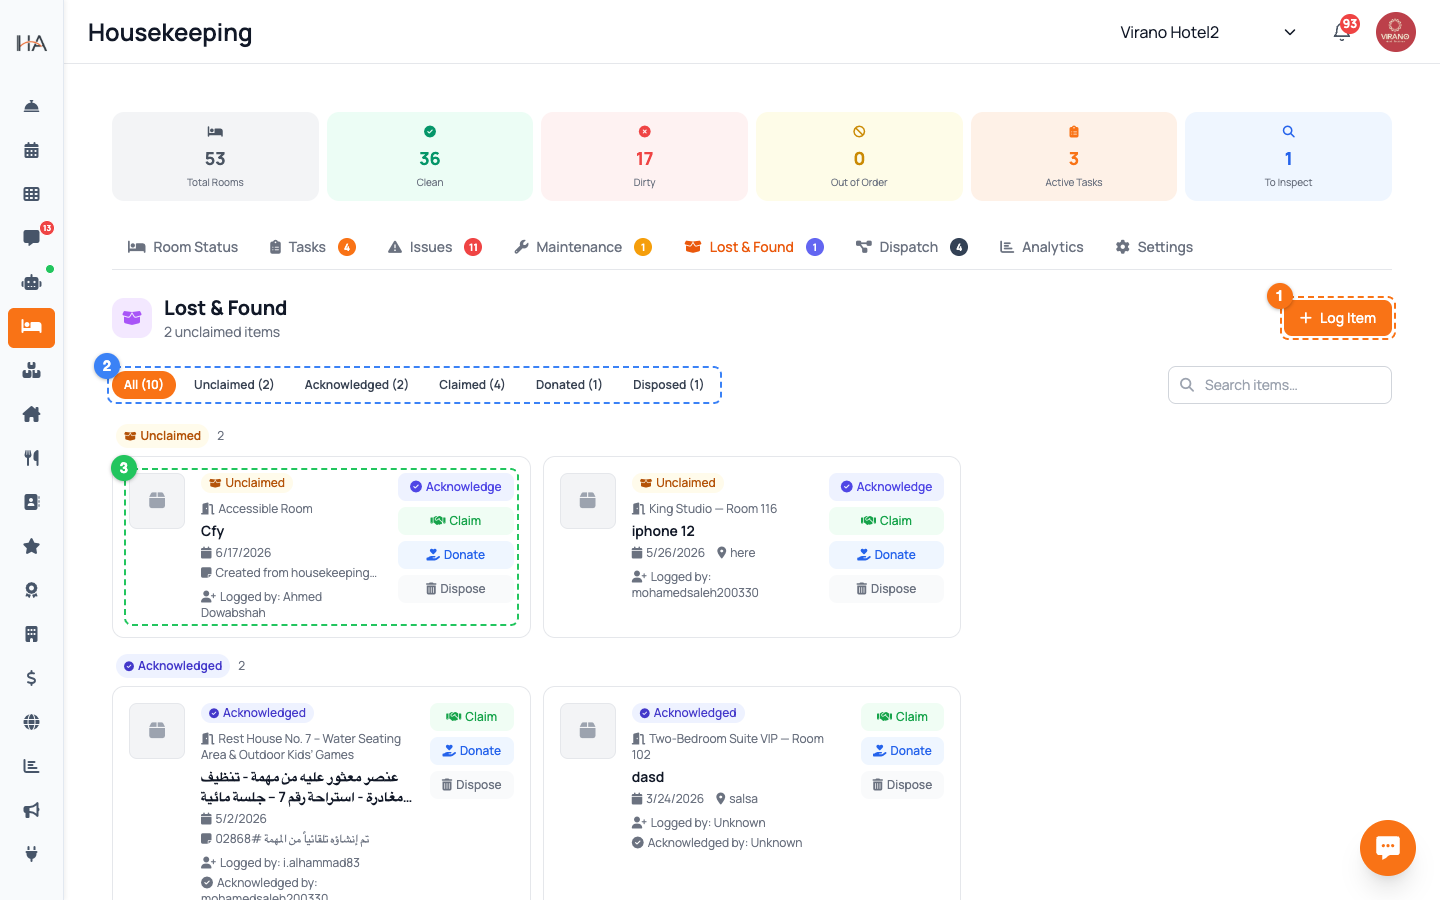
Open the Lost & Found Tab
From the left sidebar open Housekeeping, then click the Lost & Found tab (open-box icon). The header shows how many unclaimed items you currently hold. Items are grouped into sections by status, and a row of filter chips across the top lets you jump to All, Unclaimed, Acknowledged, Claimed, Donated, or Disposed. There is also a search box on the right to find an item by its description, storage location, or the name of whoever claimed it.
Log a Found Item
When a cleaner finds something, click Log Item and fill in the form: 1. Item Description — be specific, e.g. "black iPhone charger" — required 2. Unit / Room — where it was found (leave as Unknown if unsure) 3. Date Found — defaults to now, adjust if needed 4. Storage Location — where you are keeping it, e.g. "Front desk drawer 2" 5. Notes — any extra detail You can also attach a Photo using the camera button, which makes matching the item to its owner much easier later. Click Log Item to save.
Follow the Item Lifecycle
Every item moves through a clear set of statuses shown as colored labels: - Unclaimed: just logged, waiting - Acknowledged: a staff member has reviewed and confirmed it - Claimed: returned to its owner - Donated: given to charity after the holding period - Disposed: thrown away (e.g. perishables or low-value items) Filtering by a status lets you, for example, see everything still Unclaimed so nothing is forgotten in storage.
Acknowledge an Item
An item starts as Unclaimed. To confirm it has been received and shelved properly, open the item and click Acknowledge — its status changes to Acknowledged and your name is recorded as the person who reviewed it. This simple step creates accountability: anyone looking at the list can see the item was checked in by a real staff member, not just dropped into the system. Acknowledging is optional but recommended for valuable items.
Return an Item to Its Guest
When a guest comes back for their belonging, open the item and click Claim. A small window asks for the Claimed By full name — type the name of the person collecting the item, then click Confirm. The status becomes Claimed, and the system stores who collected it, when, and which staff member handled the handover. This gives you a clean record proving the item was returned to a named person, which protects both the guest and your property.
Donate or Dispose of Old Items
Items that go unclaimed past your holding period need closing out. On an Unclaimed or Acknowledged item you have two buttons: - Donate: marks the item Donated — use this when you give it to charity - Dispose: marks the item Disposed — use this for perishables, trash, or items of no value Both actions record your name and the date, so there is always a clear trail of what happened to every item. Follow your property's policy on how long to hold items before donating or disposing.
Keep a Trustworthy Record
Each item card shows its full handling history at a glance: - Logged By: the staff member who first recorded it - Acknowledged By, Processed By: whoever moved it along - Claimed By and the date, when returned Good habits keep this useful: log items the same day they are found, write clear descriptions, add a photo for anything valuable, and always note the storage location so the item can be found instantly when the owner calls. The list updates live, so the whole team sees the same accurate picture.
More in Housekeeping
Understanding Housekeeping
Learn about the comprehensive Housekeeping system that manages room cleaning, inspections, maintenance, and team coordination.
Managing Room Status and Occupancy
Learn how to monitor, update, and manage room status to ensure accurate occupancy information and cleanliness standards.
Cleaning Tasks & Auto-Assignment
Create, assign, prioritize, and track every housekeeping task from one board, and let the system route new cleans to your team automatically.
Inventory, Linen & Supplies
Track your housekeeping stock, linen, and consumable supplies, see what is running low, and record stock movements as items come in and get used.
Maintenance Orders
Log maintenance issues, assign a technician, track work through to completion, approve costs, and block a unit while it is being repaired.
Zones, Shifts & KPIs
Organize cleaning by zone, set up staff shifts so the right people get the right work, and watch housekeeping performance with daily KPIs.