The Reports Hub
Find every report in one place. The Reports section is organized into a quick Summary & Charts view and a Detailed Reports grid grouped by category.
Open the Reports section
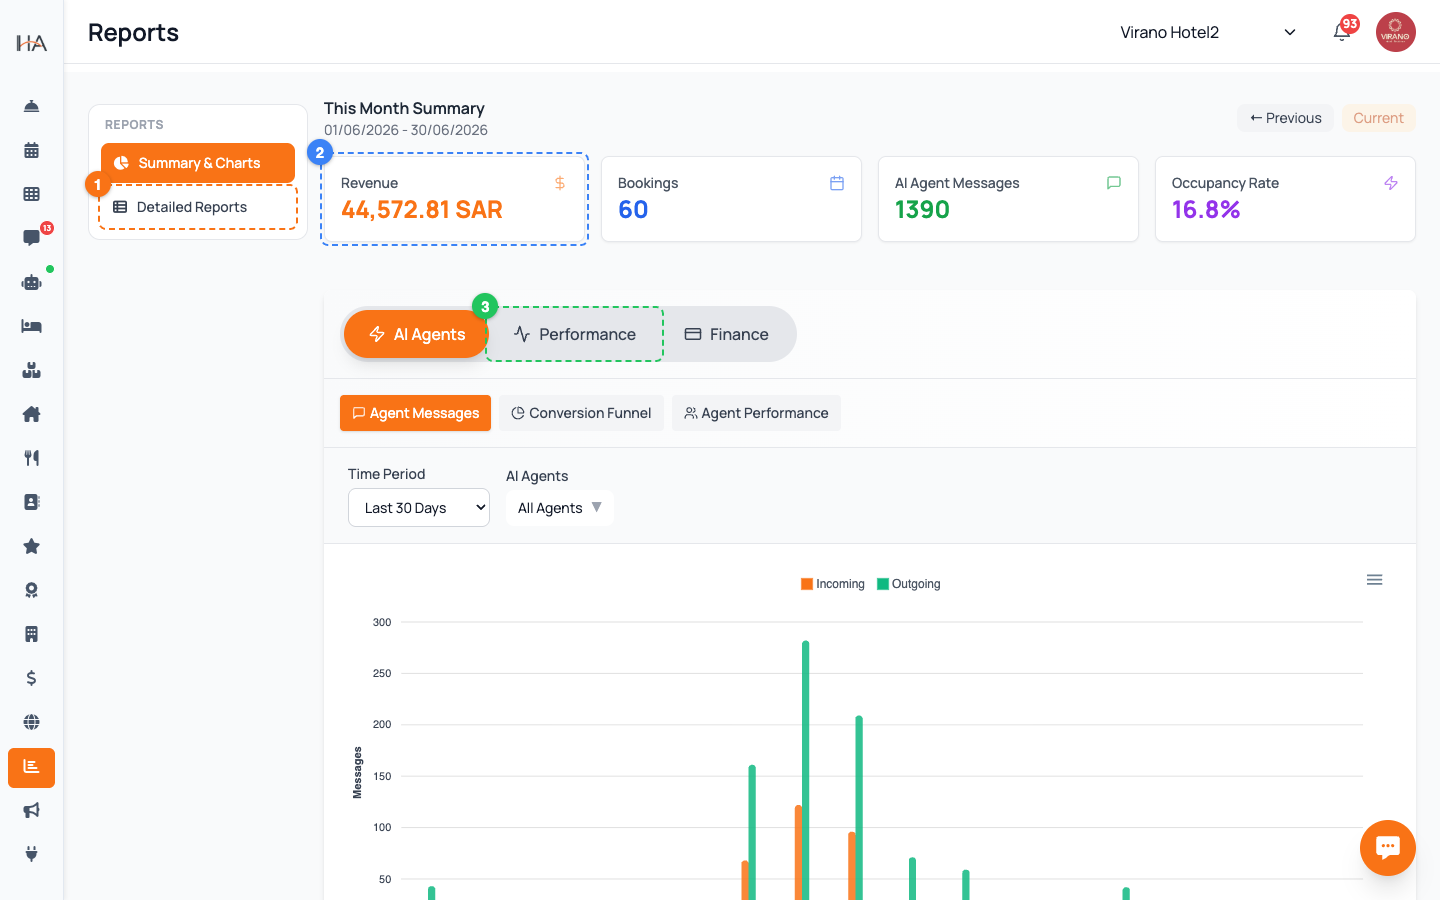
Click Reports in the left sidebar. The page opens with a slim column of view tabs on the left and the report content on the right. There are two views, listed in that left column: 1. Summary & Charts - a visual overview with this month's summary and analytics charts 2. Detailed Reports - the full library of individual reports, grouped by category Click either tab to switch between them. The page remembers which view you were on. Note: if you do not see the Reports section, your role may not include reporting permission - ask the property owner or a manager to grant it.
Start with Summary & Charts
The Summary & Charts view is the best starting point for a quick health check. It shows: - This Month Summary - headline tiles for Revenue, Bookings, and Occupancy Rate, with arrows to step to the previous or current month - Analytics charts - visual trends drawn from your bookings and revenue Use this view when a manager or owner asks "how are we doing this month?" and you want a one-glance answer. For row-by-row detail or an export, switch to the Detailed Reports view.
Browse the Detailed Reports grid
Click Detailed Reports to see the full library. Reports are arranged as cards inside labeled category sections: - Occupancy & Revenue - Arrivals & Departures - Booking Reports - Financial - Guest Reports - Reviews - Operations & Compliance Some accounts also see Inventory Reports. Each card shows the report's name, a one-line description, and a View Report button. Scroll down to move through the categories.
Recognize the report badges
Some report cards carry a small colored badge in the corner that tells you what kind of report it is: - Live - reflects up-to-the-minute data, such as Daily Occupancy - KPI - a key performance indicator report, such as RevPAR / ADR - Daily - meant to be read or closed once a day, such as Day Closing - Auto - generated automatically, such as the Review Summary - Audit - an audit trail for compliance, such as the Housekeeping Compliance Audit Badges are just a hint about how often to check a report and what it is for - they do not change how you open it.
Know what each category covers
A quick map of the main categories: - Occupancy & Revenue: how full you are and how much each room earns (Daily Occupancy, RevPAR / ADR, Room Revenue Summary) - Arrivals & Departures: who is coming and going (Arrivals List, Departures List, In-House Guest List) - Booking Reports: a record of reservations (Booking Summary, Booking Source, Cancellation Report) - Financial: money in and out (Daily Revenue, Payment Methods Breakdown, Refunds, Day Closing) - Guest Reports: who your guests are (Guest History, Guest Demographics) - Reviews: guest ratings and feedback (Review Summary) - Operations & Compliance: operational audit trails (Housekeeping Compliance Audit)
Open a report and note what may be hidden
To open any report, click View Report on its card. The report opens on its own page with charts, tables, and filters (covered in the next articles). Keep two things in mind: - A few reports are only available on higher plans - for example, the Housekeeping Compliance Audit requires the Pro plan. If you do not see it, your current plan does not include it. - Some advanced Inventory Reports stay hidden unless the advanced inventory module is switched on for your account, because they would otherwise be empty. If a report you expect is missing, check your plan and your permissions before assuming something is wrong.
More in Reports
Reading Your Home Dashboard
Your Home screen is the daily command center: it shows live KPI stats, today's arrivals and departures, occupancy, and one-tap quick actions.
Opening & Reading a Report
Learn what you see inside any report - the title bar, the data table, the summary totals, and the buttons to print or export.
Occupancy & Revenue Reports
Track how full your property is and how much money it earns using the Daily Occupancy, RevPAR / ADR, and Room Revenue Summary reports.
Operations & Source Reports
See where your bookings come from and how your operation is running using the Booking Source, Cancellation, Payment, and Housekeeping Compliance reports.
Filtering, Date Ranges & Exporting
Master the filter bar on every report - property, unit, and date range - then print, save as PDF, or export to a spreadsheet.