Team Management — Invite Members, Assign Roles & Permissions
Invite your staff, control exactly what each person can do, and manage roles. Use predefined roles for quick setup or build custom roles for fine-grained control.
Open Team Management
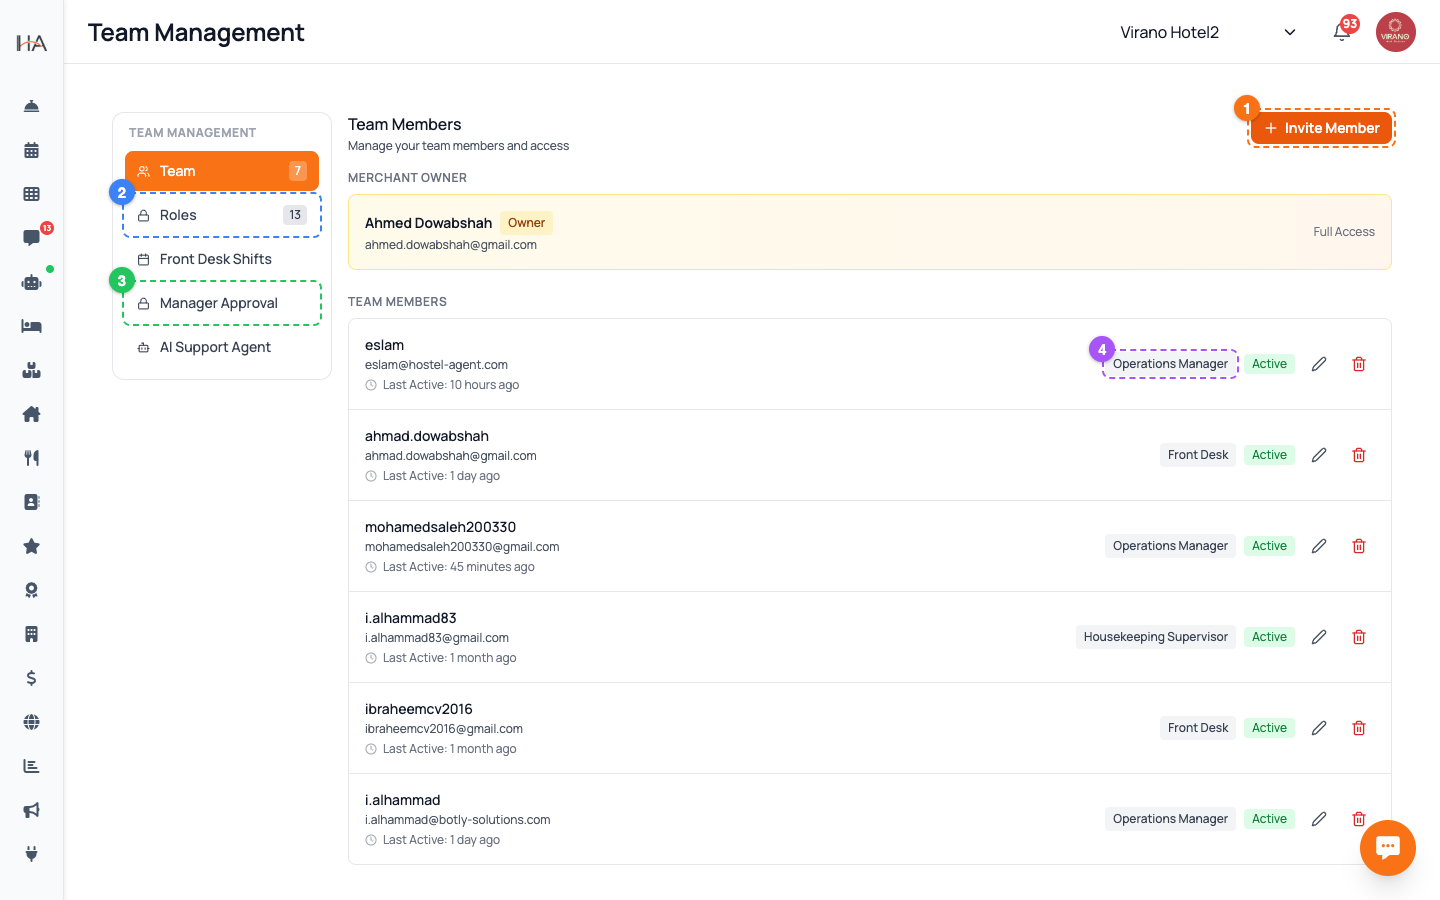
Go to Settings and open Team Management. On the left you will see a sub-menu with several tabs: - Team — your people and their roles - Roles — the roles and what each one can do - Front Desk Shifts — reception shift scheduling - Manager Approval — the PIN gate for sensitive actions - AI Support Agent — settings for the support assistant The page opens on the Team tab by default, showing your account owner at the top and all team members below.
Understand the Account Owner
At the top of the Team tab, in a highlighted card, you will see the Merchant Owner. This is the main account holder. Key facts about the owner: - The owner has full access to everything in the dashboard. - The owner role cannot be removed or downgraded by other members. - Only the owner can create, edit, or delete custom roles. Everyone else you add appears below the owner in the Team Members list, each with a role badge and an Active status indicator.
Invite a Team Member
On the Team tab, click the Invite Member button at the top right. A window opens where you set up the invitation: 1. Enter the person's email address 2. Choose their role (a predefined role like Operations Manager or Housekeeping, or one of your custom roles) 3. Choose which property groups they can access 4. Send the invitation The person receives an email invite to join. Once they accept and set their password, they appear in the Team Members list with an Active status. Note: The Invite Member button is only active if your role includes managing the team.
Edit or Remove a Member
Each row in the Team Members list shows the member's name, email, role badge, and Active status, plus edit and delete actions. - To change someone's role or property access, use the edit action on their row. - To remove someone from your team, use the delete action. They will lose access to the dashboard immediately. Good practice: - Give each person the smallest role that lets them do their job. - Review your team list regularly and remove people who have left. - You cannot remove or downgrade the account owner.
Explore Roles and Their Permissions
Click the Roles tab in the left sub-menu. You will see two kinds of roles: - Predefined roles — built-in roles such as Operations Manager, Housekeeping, and Front Desk. These carry a Predefined badge and are ready to use. - Custom roles — roles you have created yourself for special needs. Click the eye icon next to any role to view exactly which permissions it includes (for example, viewing bookings, editing units, managing payments). This is the best way to understand what a role can and cannot do before you assign it.
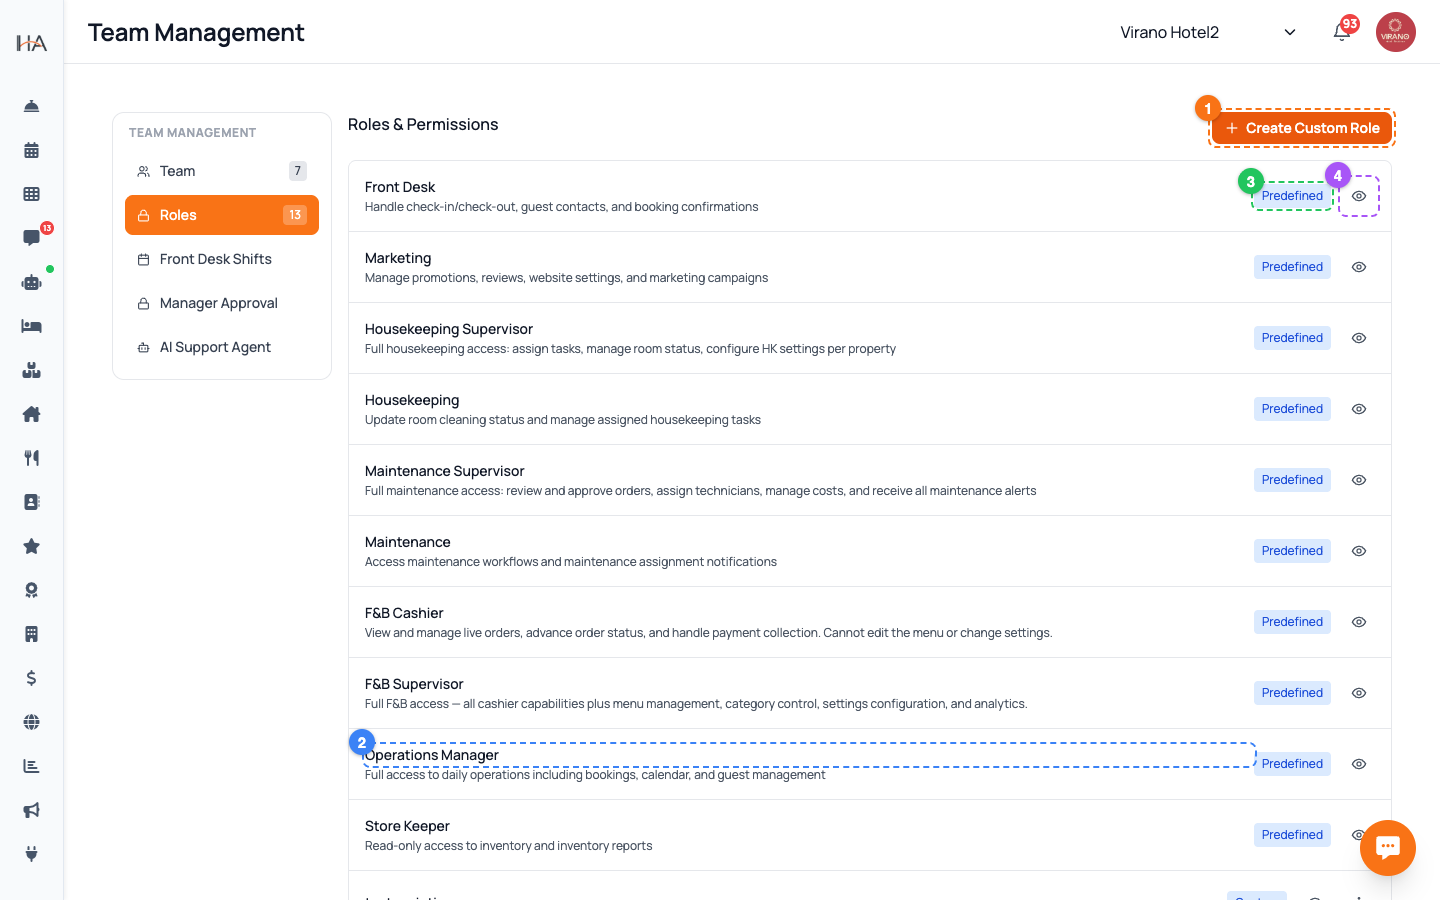
Create a Custom Role
If the predefined roles don't fit your needs, the account owner can create a custom role. On the Roles tab, click Create Custom Role (this button only appears for the owner). In the window that opens: 1. Give the role a clear name (for example, Night Auditor or Restaurant Manager) 2. Optionally start from an existing predefined role as a template 3. Turn individual permissions on or off, page by page 4. Save the role The new role then appears in the Roles list and can be assigned to team members just like any predefined role.
Best Practices for Roles & Access
A few tips to keep your account secure and organized: - Assign roles based on the job, not the person — it makes future changes easier. - Limit who can manage payments, refunds, and team settings to trusted managers. - Use custom roles when a predefined role gives too much or too little access. - Combine roles with the Manager Approval tab to add a PIN check on sensitive front-desk actions. - When someone changes jobs, update their role rather than creating a brand-new login. Remember: role creation, editing, and deletion are owner-only, so keep the owner login well protected.
More in Settings & Team
Property Settings — Groups, Properties & Units
Manage your property groups and the bookable units inside them. This is where you add new properties, edit details, and control which units are available.
Manager Approval PIN Gate — Anti-Theft for Sensitive Front-Desk Actions
Require a manager's PIN before front-desk staff can perform sensitive actions like refunds, cancellations, and discounts. Set it up per property and choose who approves.
Payment Methods — Enable Gateways for Online Bookings
Choose how guests pay on your booking website: card processors (Moyasar, Tap), Buy Now Pay Later (Tabby, Tamara), Apple Pay, bank transfer, or pay on arrival.
Taxes (VAT) & ZATCA E-Invoicing
Set up VAT on your bookings and connect Saudi ZATCA Phase 2 e-invoicing so your invoices are officially compliant.
Account Settings & Security
Update your profile, change your password, and protect your login with two-factor authentication and trusted devices.
Subscription, Plan & Wallet Balance
See your current plan and its features, track unit usage, renew your subscription, and review your transactions and invoices.